Contents
Introduction
Honestly, there’s nothing worse than a relaxing shower ending in a fogged-up mirror and damp walls. Proper bathroom fan installation is the secret to protecting your home from mold and structural damage while keeping your air fresh. Let me explain how you can tackle this project or know when it’s time to call in the experts.

Bathroom fan installation involves selecting the right fan, cutting an opening in your ceiling, connecting ductwork to the outside, and wiring the unit to your electrical system. Here’s a quick overview of what the process looks like:
- Calculate the right fan size – Use CFM (cubic feet per minute) based on your bathroom’s dimensions
- Choose your venting route – Through the roof, a sidewall, or gable end
- Cut the ceiling opening – Between two joists, ideally near the shower
- Secure the fan housing – Attach it to ceiling joists with brackets or screws
- Connect the ductwork – Run insulated flexible duct to an exterior vent cap
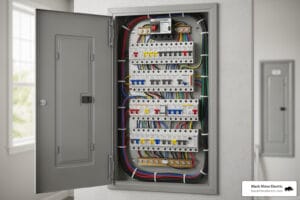
- Wire the fan – Connect to your home’s electrical supply (black to black, white to white, ground to ground)
- Test the fan – Restore power and confirm airflow and damper operation
Here’s the thing – a bathroom without a working exhaust fan is a slow-motion disaster. Moisture from showers builds up on walls, ceilings, and inside your home’s structure. Over time, that leads to peeling paint, warped doors, rotting wood, and mold growth. It’s not just ugly – it’s a real health and safety issue.
The good news? Installing a bathroom exhaust fan is a manageable DIY project for someone with basic electrical and carpentry skills. But it does involve cutting into your ceiling, running ductwork, and handling live wires – so it pays to know exactly what you’re doing before you start.

Know your Bathroom fan installation terms:
When we talk about bathroom fan installation, we aren’t just talking about getting rid of “bathroom smells.” We are talking about the lungs of your bathroom. Every time you take a hot shower, you’re releasing gallons of water vapor into a small, enclosed space. Without a way to escape, that moisture settles on your wallpaper, seeps into your drywall, and drips down your mirrors.
The primary goal of a high-quality exhaust fan is moisture control. By pulling humid air out and venting it safely outside, you prevent the growth of mold and mildew, which can be incredibly costly to remediate once it takes hold in your joists or behind your tile. Beyond structural protection, a fan improves indoor air quality by removing volatile organic compounds (VOCs) from cleaning products and, of course, managing odors.

Planning Your Bathroom fan installation
Before you pick up a saw, you need a plan. Success in bathroom fan installation is 90% preparation. You need to know where your joists are, where the air is going to go, and exactly how much “muscle” your fan needs to have.
Why Ventilation is Non-Negotiable
You know what? Many homeowners in Ogden and Roy think an open window is enough. Honestly, it’s not—especially during our chilly Utah winters when you definitely don’t want to leave a window cracked. Proper ventilation is a requirement for modern building codes for a reason.
According to guidelines from the Home Ventilating Institute (HVI), consistent airflow is the only way to prevent “sick building syndrome” and protect your home’s resale value. Without it, you’ll notice peeling paint, rusted light fixtures, and doors that suddenly don’t fit in their frames because the wood has swelled from the humidity.
Sizing Your Fan: CFM and Sone Ratings for Bathroom fan installation
Choosing a fan isn’t just about the prettiest grille; it’s about the math. Fans are rated by CFM (Cubic Feet per Minute), which measures how much air they move, and Sones, which measures how loud they are.
- CFM Calculation: For bathrooms 100 square feet or smaller, the rule of thumb is 1 CFM per square foot. If your bathroom is 8′ x 10′, you need at least an 80 CFM fan. For luxury bathrooms with jetted tubs, you should add an extra 100 CFM just for that fixture.
- Sone Ratings: A rating of 1.0 sone is about as quiet as a modern refrigerator. Older fans often roar at 4.0 to 6.0 sones. If you want a peaceful, spa-like experience, look for a fan rated at 1.5 sones or lower.
To make it easy, you can use a Find the Right Fan tool to input your specific room dimensions.
| Bathroom Size | Recommended CFM | Sound Level (Sones) |
|---|---|---|
| Small (50 sq ft) | 50 CFM | 0.5 – 1.5 (Quiet) |
| Medium (80-100 sq ft) | 90 – 110 CFM | 1.0 – 2.0 (Standard) |
| Large (100+ sq ft) | 150+ CFM | 1.5 – 2.5 (High Power) |
Essential Tools and Materials
To get the job done right, you’ll need more than just a screwdriver. Here’s what we recommend having on your workbench:
- Jigsaw or Drywall Saw: For cutting the ceiling hole.
- Voltage Tester: To ensure the power is truly off before you touch any wires.
- Foil Duct Tape: Never use cloth duct tape; it degrades in heat and moisture. Use UL-listed HVAC foil tape.
- Flexible Insulated Ducting: 4-inch diameter is the modern standard.
- Wire Connectors: For secure electrical joins.
- Safety Gear: Goggles and a respirator (attic dust is no joke).
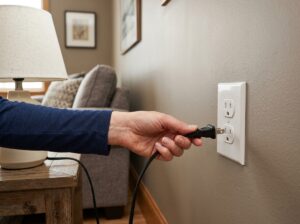
If the electrical side of this list looks intimidating, you can learn more about our residential electrician services to see how we handle the heavy lifting.
Executing the Install and Avoiding Pitfalls
Now we get to the “how-to” part. Whether you are doing a fresh bathroom fan installation or replacing an old, rattling unit, the steps remain similar, but the stakes for your home’s safety are high.
Bathroom fan installation: The Step-by-Step Process
- Shut Off the Power: Go to your breaker panel and flip the switch. Use your voltage tester at the existing light or fan to confirm there is zero current.
- Mark and Cut: If this is a new install, drill a reference hole from below, then go into the attic to ensure you aren’t hitting a joist or a pipe. Trace the fan housing on the ceiling and cut carefully with your drywall saw.
- Mount the Housing: Most fans come with extendable bracket arms that screw directly into the ceiling joists. Ensure the housing is flush with the drywall.
- Wiring: This is where precision matters. You’ll typically connect the house’s black (hot) wire to the fan’s black wire, white (neutral) to white, and the bare copper or green wire to the ground screw. If you’re unsure, check out our electrical services page for guidance.
- Ducting: Attach your ductwork to the fan’s discharge port using a clamp and foil tape.
- Final Flourish: Snap the grille into place, restore power, and listen for that sweet, quiet hum.
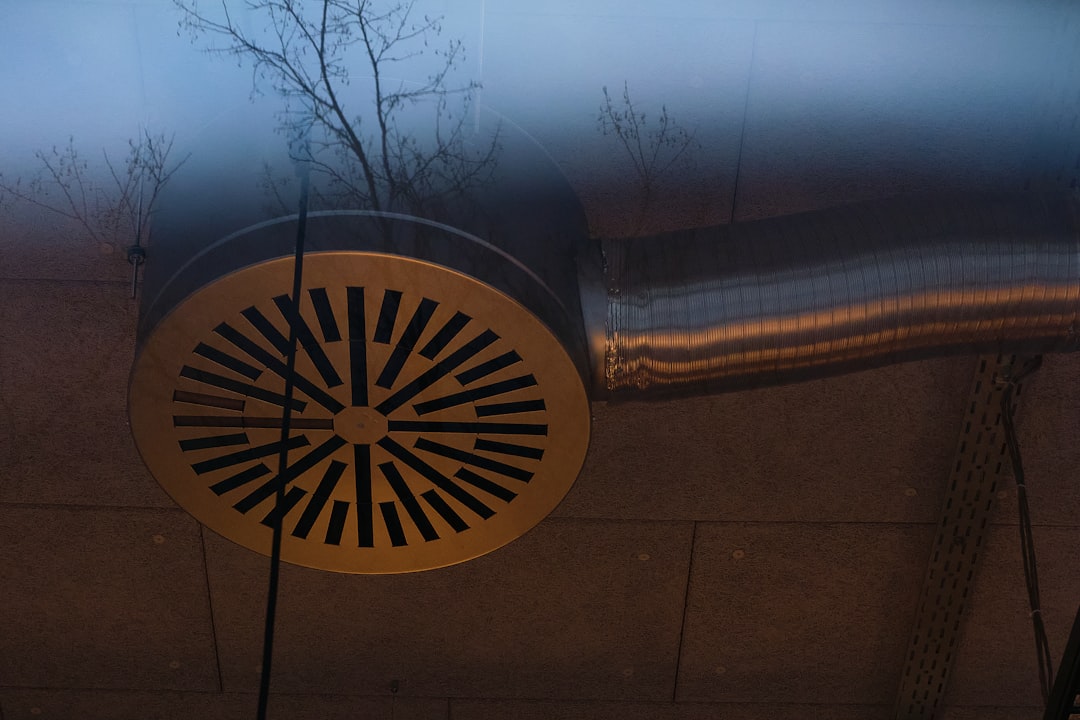
Proper Venting and Ductwork Best Practices
Here is the biggest mistake we see in Weber County: venting the fan directly into the attic. Never do this.
Venting into the attic just moves the moisture problem from your bathroom to your roof structure. It causes wood rot and mold in your insulation. According to research on moisture damage, you must vent to the absolute exterior of the house.
- The Route: Use the shortest, straightest path possible. Every bend in the duct reduces the fan’s efficiency.
- Termination: Use a dedicated roof cap or a sidewall vent with a flap that prevents birds and cold air from coming back in.
- Insulation: In our Utah climate, use insulated ducting in the attic. This prevents the warm air inside the duct from condensing into water when it hits the cold attic air.
When to Hire a Professional Electrician
Let’s be honest—sometimes a “simple” bathroom fan installation turns into a nightmare. Maybe you discovered aluminum wiring, or perhaps your bathroom is on the first floor of a two-story home with no easy access to the outside.
At Black Rhino Electric, we specialize in these complex scenarios. Whether you’re in North Ogden, West Haven, or Pleasant View, our team ensures your installation is 100% code-compliant. Cutting a hole in your roof is a high-stakes move; if it isn’t sealed correctly, you’re looking at water leaks. If the wiring isn’t grounded, you’re looking at a fire hazard.
We bring the expertise of licensed and insured contractors to every job, providing transparent pricing and 24/7 availability for those urgent Weber County needs. You can easily Request a Quote to see how affordable professional peace of mind can be.
Honestly, while a DIY approach can be rewarding, ensuring your home is safe and up to code is what really matters. If you find yourself overwhelmed by the wiring or the thought of cutting through your roof, don’t sweat it. You can reach the experts at Black Rhino Electric by calling 801-810-4292 or simply Request a Free Quote to get your project started today.