Circuit breaker panel installation is one of the most important electrical projects in any home because it affects safety, capacity, and long-term reliability. If you are dealing with flickering lights, frequent breaker trips, or an older panel in Ogden or Weber County, here is what homeowners should know before planning an upgrade.
Contents
What You Need to Know About Circuit Breaker Panel Installation (Quick Answer)
Get the work done correctly, and your home runs safely for decades. Get it wrong, and you could be looking at fire hazards, failed inspections, unsafe wiring, or costly repairs.

Here’s a fast overview for homeowners researching this topic:
| Topic | Quick Answer |
|---|---|
| What it is | Installing or replacing the main box that distributes power throughout your home |
| When you need it | Frequent trips, flickering lights, burning smells, panels 25+ years old, or adding high-load appliances |
| Typical cost | $1,500 – $5,000 for most residential upgrades |
| Time to complete | 4 – 10 hours depending on complexity |
| DIY or pro? | Always hire a licensed electrician – permits and utility coordination are required |
| Standard size | 200-amp service for most modern homes |
| Key code requirement | NEC compliance + local permit + inspection before energizing |
Your electrical panel is the central hub for every light, outlet, and appliance in your home. It takes power from the utility company and splits it into individual circuits – each protected by a breaker that trips automatically if something goes wrong.
Here’s the thing: most homeowners never think about their panel until something fails. A breaker that won’t reset. Lights that flicker when the dryer runs. A burning smell near the box. These are warning signs that your panel may be undersized, aging out, or simply unsafe.
Electrical failures cause roughly 26% of industrial facility fires each year – and the risk at home is just as real. Older panels from the 1950s through 1970s, like fuse boxes and early breaker panels, were never designed to handle today’s electrical loads: EV chargers, heat pumps, smart home systems, and high-draw appliances all push older systems past their limits.
This guide walks you through everything – from understanding your panel and knowing when to replace it, to the step-by-step installation process, costs, permits, and how to future-proof your home’s electrical system.

Similar topics to circuit breaker panel installation:
Circuit Breaker Panel Installation Basics: Safety, Sizing, Permits, and Costs
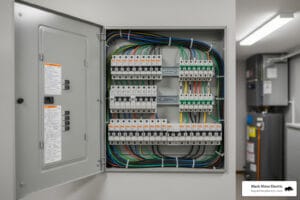
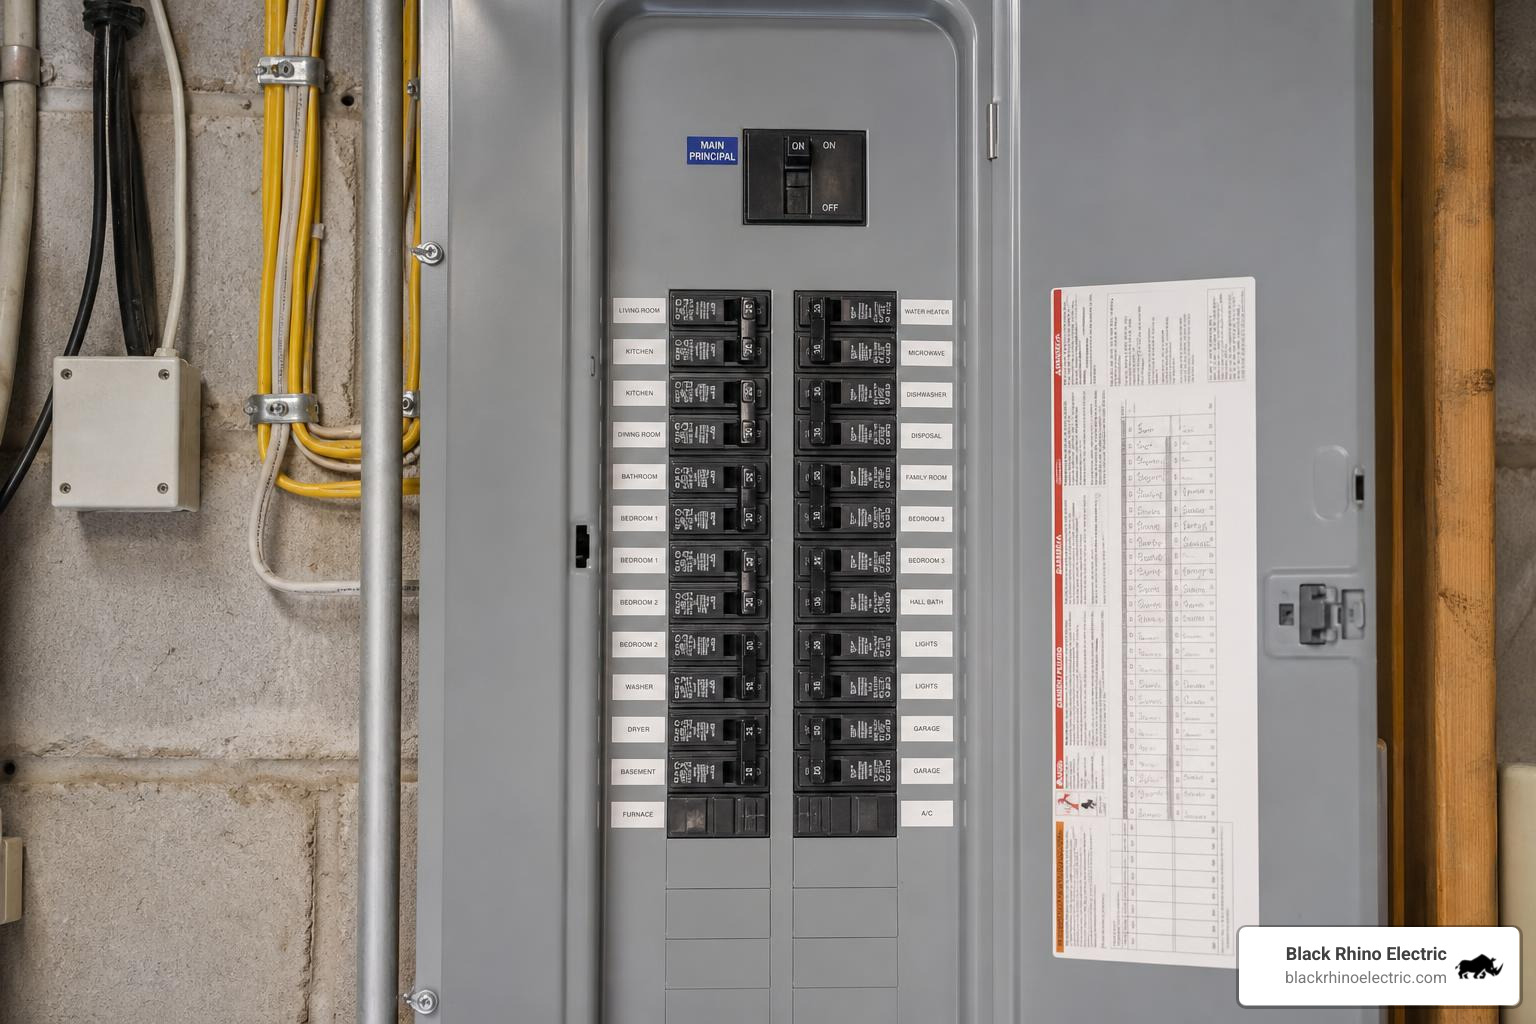
A circuit breaker panel is also called an electrical panel, breaker box, service panel, service equipment, or load center. Different names, same important job: it receives incoming power and distributes it safely through branch circuits.
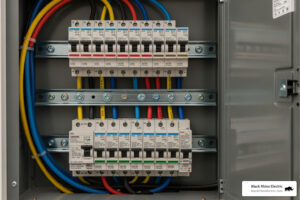
Inside a modern panel, you will typically find:
- Main breaker or main lugs
- Hot bus bars
- Neutral bar
- Ground bar
- Branch circuit breakers
- AFCI breakers for arc-fault protection
- GFCI breakers for shock protection in required areas
- Surge protection, when installed
- Panel directory and circuit labels
Most electrical panels last about 20 to 40 years when properly installed and maintained. But age is not the only issue. A 30-year-old panel that was sized for a simpler home may struggle with today’s loads: EV chargers, hot tubs, larger HVAC systems, finished basements, workshops, smart appliances, and home offices.
For a deeper planning resource, see our electrical panel installation checklist and our essential guide to electrical panel installation.
What an Electrical Panel Does and Why It Matters for Home Safety
Think of your electrical panel as the traffic controller for your home’s power. It sends electricity to lighting, outlets, appliances, HVAC equipment, kitchen circuits, laundry circuits, and dedicated high-load equipment.
When something goes wrong, the breaker should trip. That trip is not an annoyance – it is a safety feature.
Breakers protect against:
- Overloads, when a circuit draws more current than it can safely handle
- Short circuits, when current takes an unintended path
- Ground faults, which can create shock hazards
- Arc faults, which can create fire hazards from damaged wiring or loose connections

Honestly, a breaker that trips repeatedly is trying to tell you something. Resetting it again and again without fixing the cause is like putting tape over your check-engine light. It might feel convenient for a minute, but it does not solve the problem.
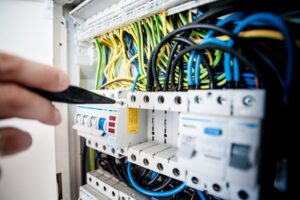
This matters because many electrical accidents happen during installation and maintenance activities. That is why professional testing, correct torque, proper breaker selection, and code-compliant wiring are not “nice extras.” They are core safety steps.
Main Breaker Panel vs Subpanel vs Fuse Box: Key Differences Homeowners Should Know
Not every electrical box in a home does the same thing. Here is the simple breakdown.
| Type | What It Does | Key Safety Detail | Common Use |
|---|---|---|---|
| Main breaker panel | Main distribution point for the home | Neutral and ground are bonded only at service equipment | Whole-home power distribution |
| Subpanel | Adds circuit capacity from a feeder circuit | Neutrals and grounds must stay isolated | Garage, basement, addition, workshop |
| Fuse box | Older overcurrent protection using replaceable fuses | Can be unsafe if oversized fuses are installed | Older homes, often due for replacement |
A main breaker panel includes the service disconnect, meaning it can shut off power to the home’s circuits. However, here is the critical warning: turning off the main breaker does not always de-energize the utility-side service conductors. That is one major reason panel replacement requires utility coordination.
A subpanel is fed from the main panel. It is useful for detached garages, basement finishes, workshops, and additions. In a subpanel, neutral and ground must remain separate. Bonding them incorrectly can energize metal parts and create shock hazards.
Fuse boxes are older systems, often found in homes with 60-amp or 100-amp service. They can work, but they are often undersized for modern loads and may create risk if someone installs a fuse rated higher than the wire can safely handle.
For more detail, read our guide to choosing an electrical panel box for home or learn when main breaker panel replacement makes sense.
When Circuit Breaker Panel Installation or Upgrade Makes Sense
So, when should you consider a new panel? You know what? Your home usually gives clues.
Common warning signs include:
- Breakers trip often under normal use
- Lights flicker or dim when appliances start
- Buzzing, popping, or crackling sounds near the panel
- Burning smells
- Scorch marks or discoloration
- Hot breakers or warm panel cover
- Rust, corrosion, or moisture inside the panel
- Melted insulation or damaged wiring
- No open breaker spaces
- Double-tapped breakers where not listed for it
- Insurance or home sale repair requirements
- Old fuse box or outdated breaker equipment
- 1950s-1970s wiring concerns, including aluminum wiring or old branch circuits
Upgrades also make sense when you add major electrical loads, such as:
- Level 2 EV charger
- Hot tub
- Heat pump
- Home addition
- Detached garage or workshop
- Solar equipment
- Battery storage
- Generator connection
- Large kitchen or laundry remodel
For many Weber County, Ogden, Roy, North Ogden, South Ogden, West Haven, Pleasant View, Hooper, Riverdale, Layton, Kaysville, Syracuse, Clearfield, Farmington, Bountiful, and surrounding Utah homes, a 200-amp upgrade is the practical modern standard. Need help deciding? Start with signs you need a residential electrical panel repair, our 200 amp upgrade guide, and our breakdown of the cost to upgrade electrical panel.
Circuit Breaker Panel Installation Steps: Wiring, Testing, Future-Proofing, and When to Call a Pro
A safe panel installation is not just “swap box, tighten wires, done.” Let me explain. A proper installation involves load calculations, permit applications, utility disconnect coordination, code-compliant grounding, correct conductor sizing, breaker compatibility, torque specifications, inspection, labeling, and testing.
That is why we recommend using a licensed electrician for panel work. At Black Rhino Electric, we handle panel replacements, EV charger installations, hot tub wiring, and whole home or business wiring throughout Ogden and Weber County communities.
For service options, visit our residential electrician page or our breakers and panels electrician page.
Circuit Breaker Panel Installation Safety Checklist: PPE, Lockout, and Code Compliance
Before anyone touches a panel, safety comes first. No shortcuts. No guessing. No “I saw a video once” confidence.
Required tools and PPE typically include:
- Safety glasses
- Insulated gloves rated for the work
- Insulated hand tools
- Voltage tester
- Multimeter for zero-energy verification
- Torque screwdriver or torque wrench
- Lockout/tagout device
- Proper footwear
- Flashlight or work light
- Circuit directory materials
- Approved breakers listed for the panel
- Cable clamps, connectors, conduit, and fittings as required
Important safety and code steps include:
- Coordinate utility-side disconnect when replacing service equipment
- Use lockout/tagout so power is not restored unexpectedly
- Verify zero voltage with a multimeter, not just a non-contact tester
- Keep the work area dry
- Maintain required working clearance
- Follow NEC 110.26 workspace rules: generally 30 inches wide, 36 inches deep, and 6.5 feet high
- Perform NEC Article 220 load calculations
- Label circuits clearly as required by NEC 408.4
- Pull local permits and schedule inspection before final approval
For general breaker-installation concepts, this overview on how to install a circuit breaker can help homeowners understand the process. But understanding is not the same as being qualified to replace a service panel.
Circuit Breaker Panel Installation Process: From Shutoff to Final Inspection
Here is the professional process in plain English. This is not a DIY instruction to attempt live service work – it is what a proper job generally involves.
Assess the existing system
We inspect the panel, service size, meter area, grounding system, branch circuits, available capacity, and signs of heat, corrosion, or unsafe modifications.Perform load calculation
The panel size is based on actual and expected demand, not guesswork. Modern homes often need 200 amps, while larger homes or special loads may need more planning.Pull permits and coordinate utility disconnect
Panel replacement usually requires a permit and inspection. Utility coordination is needed because service conductors can remain energized even when the main breaker is off.Map and label existing circuits
Every circuit is identified before disconnecting. This prevents mystery breakers later. Nobody wants a panel label that says “maybe kitchen?” for the next 20 years.De-energize and verify
Power is shut off, locked out, and verified with proper test equipment.Remove the old panel safely
The dead front cover, breakers, branch conductors, grounding conductors, neutrals, feeders, and enclosure are removed in an organized sequence.Mount the new enclosure
The new panel is installed plumb, level, secure, accessible, and code-compliant.Install conduit, clamps, and fittings
Knockouts are opened only where needed, and conductors are protected with approved connectors.Terminate service conductors
Main conductors are landed on the main breaker or lugs and torqued to manufacturer specifications.Connect neutrals, grounds, and bonding
In a main panel, neutral and ground bonding is handled at the service equipment. In a subpanel, neutrals and grounds stay isolated.Install branch breakers
Breakers must match the panel manufacturer’s listing. Wire size must match breaker size, such as 15 amps for #14 copper and 20 amps for #12 copper in typical residential branch circuits.Add AFCI, GFCI, and surge protection where required
Current code often requires AFCI protection in living areas and GFCI protection in wet or shock-risk areas.Reinstall cover and prepare for inspection
The dead front cover is secured, unused openings are closed, and the directory is completed.Inspection and utility reconnect
After approval, service is restored and the system is tested.

Want to understand the process more deeply? See our step-by-step electrical panel installation guide, how to upgrade electrical panel, changing a breaker safely, and adding a new circuit breaker.
Post-Installation Testing, Maintenance, Costs, Future-Ready Upgrades, and When to Hire a Pro
After installation, the job is not finished until the panel is tested, labeled, documented, and approved.
Post-installation checks should include:
- Visual inspection for damaged insulation or loose conductors
- Voltage testing
- Polarity testing
- Breaker operation checks
- GFCI and AFCI testing
- Load testing where appropriate
- Thermal scanning when needed to detect hot spots
- Verification of grounding and bonding
- Permanent circuit labeling
- Updated panel directory
- Permit and inspection documentation

Common mistakes to avoid include:
- Installing the wrong breaker brand or type
- Oversizing breakers for the wire
- Overfilling the panel
- Leaving loose terminations
- Mixing neutrals and grounds incorrectly in subpanels
- Skipping permits
- Failing to label circuits
- Ignoring corrosion or water damage
- Adding EV chargers or hot tubs without a load calculation
Costs vary by scope. Most residential panel upgrades fall around $1,500 to $5,000, while smaller breaker work may cost less and complex service upgrades can cost much more. Broadly, professional circuit breaker and panel work can range from about $250 to $18,000 depending on size, service changes, trenching, meter work, smart equipment, and code corrections. Many panel replacements take 4 to 10 hours, but complicated projects can take longer.
To future-proof your panel, consider:
- 200-amp service planning
- Extra breaker spaces
- Whole-home surge protection
- EV charger capacity
- Solar-ready or battery-ready equipment
- Generator interlock or transfer equipment
- Smart monitoring
- Dedicated circuits for hot tubs, workshops, and appliances
For ongoing care, keep the panel clean, dry, accessible, and professionally inspected as needed. Learn more in our guide to electrical panel maintenance, our article on new breaker panel cost, and our guide to adding breakers to the main panel.
If you are in Ogden, Roy, North Ogden, West Haven, South Ogden, Pleasant View, Hooper, Riverdale, Washington Terrace, Layton, Bountiful, Kaysville, Syracuse, Clearfield, Farmington, Clinton, North Salt Lake, Centerville, Woods Cross, or nearby, Black Rhino Electric can help you plan a safe, code-compliant panel upgrade. To get started, call 801-810-4292 or Request a Free Quote today.