Contents
- 1 Why changing a gfci circuit breaker is Essential for Home Safety
- 2 Step-by-Step Guide to Swapping Your Breaker
- 2.1 1. Shut Down the Power
- 2.2 2. Verify and Remove the Cover
- 2.3 3. Identify the Faulty GFCI Breaker
- 2.4 4. Disconnect the Wires
- 2.5 Removing the Old Unit and Wiring the New One
- 2.6 Testing and Troubleshooting Your New Installation
- 2.7 When to Call a Professional Electrician
- 2.8 Final Steps for changing a gfci circuit breaker
Why changing a gfci circuit breaker is Essential for Home Safety
Dealing with a tripped circuit that won’t stay on can be incredibly frustrating, especially when it involves your home’s safety devices. Honestly, changing a GFCI circuit breaker is a task many homeowners can handle with the right guidance, ensuring your family stays protected from electrical shocks. Let me explain how you can swap that faulty unit out safely and efficiently.

Here’s a quick overview of how to change a GFCI circuit breaker:
- Turn off the main breaker and verify power is off with a non-contact voltage tester.
- Remove the panel cover using an insulated screwdriver.
- Disconnect the old GFCI breaker—unscrew the black (hot) wire and white neutral pigtail.
- Connect the new breaker—attach the white pigtail to the neutral bus bar and the hot wire to the load terminal.
- Snap the new breaker onto the bus bar and replace the panel cover.
- Restore power and test by pressing the TEST then RESET button on the breaker face.
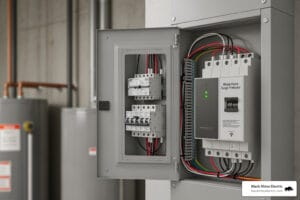
You know what? Most of us don’t think about our electrical panel until the lights go out. But that metal box is the heart of your home’s safety system. A GFCI (Ground Fault Circuit Interrupter) breaker is like a vigilant lifeguard for your electrical system. It’s designed to detect ground faults—where electricity escapes its intended path—and shut down power in a fraction of a second.
According to safety statistics, these devices can detect leaks as small as 4-5 milliamps. To put that in perspective, that’s a tiny fraction of the current needed to light a standard bulb, yet it’s enough to cause a fatal heart rhythm if it passes through a human body. By changing a gfci circuit breaker when it fails, you are directly preventing potential electrocution in high-risk areas.
The National Electrical Code (NEC) is very specific about where these are needed. Basically, if there is water nearby, you need GFCI protection. This includes kitchens, bathrooms, garages, laundry rooms, and any outdoor outlets. In our neck of the woods—from Ogden to Layton—we see a lot of older homes that need these upgrades to meet modern safety standards.
If you’ve noticed an outlet acting up, you might first want to check out How to Reset a GFCI Outlet: 4 Troubleshooting Methods. However, if the issue is at the panel itself, you’re looking at a breaker replacement. We often help neighbors with GFCI Power Outlets and breaker swaps to ensure every “wet” zone in the house is fully protected.

Signs Your Current Breaker is Failing
Here’s the thing: GFCI breakers don’t last forever. While they are built tough, they generally have a lifespan of about 10 to 15 years. If your home in Roy or North Ogden is older than that, it might be time for an inspection.
How do you know it’s time for changing a gfci circuit breaker? Look for these red flags:
- Nuisance Tripping: If the breaker trips frequently even when nothing is plugged in, the internal circuitry might be degrading.
- Test Button Failure: This is the big one. If you press the “Test” button and the breaker doesn’t trip, it is no longer providing protection. It’s essentially a standard breaker now, leaving you vulnerable to shocks.
- Physical Damage: Any signs of scorching, melting, or a burning smell near the breaker is an emergency. Shut off the power immediately.
- Refusal to Reset: If you flip the switch to “On” and it immediately snaps back to the middle or “Off” position (and you’ve ruled out a ground fault in your appliances), the breaker’s internal mechanism is likely shot.
Essential Tools for changing a gfci circuit breaker
Before we dive into the “how-to,” let’s get your gear ready. Working inside an electrical panel requires respect for the power behind those wires. Honestly, the right tools make the difference between a successful DIY project and a dangerous mistake.

You will need:
- Non-Contact Voltage Tester: This is your most important safety tool. It tells you if a wire is “hot” without you having to touch it.
- Insulated Screwdrivers: Specifically a flathead and a Phillips head. Insulated handles prevent accidental contact with live parts.
- Flashlight: Since you’ll be turning off the main power, it’s going to get dark in that utility room!
- Wire Strippers/Pliers: In case you need to trim or reshape a wire end.
- The New GFCI Breaker: Ensure it matches the brand and amperage (usually 15 or 20 amps) of your existing panel.
For a full breakdown of what to look for in your panel, check out The Ultimate Electrical Panel Installation Checklist. It’s a great resource for Ogden homeowners who want to understand their home’s “brain” a bit better.
Step-by-Step Guide to Swapping Your Breaker
Ready to get to work? Let’s walk through the process of changing a gfci circuit breaker step-by-step. Safety isn’t just a suggestion here; it’s the whole point.
1. Shut Down the Power
Go to your main service panel. Locate the Main Breaker (usually a large switch at the top or bottom). Flip it to the “Off” position. This should kill power to the entire house.
2. Verify and Remove the Cover
Use your voltage tester on a nearby outlet or light switch to confirm the power is truly off. Then, carefully unscrew the panel cover. Pro Tip: Hold the cover firmly as you remove the last screw so it doesn’t fall and damage the breakers or your toes!
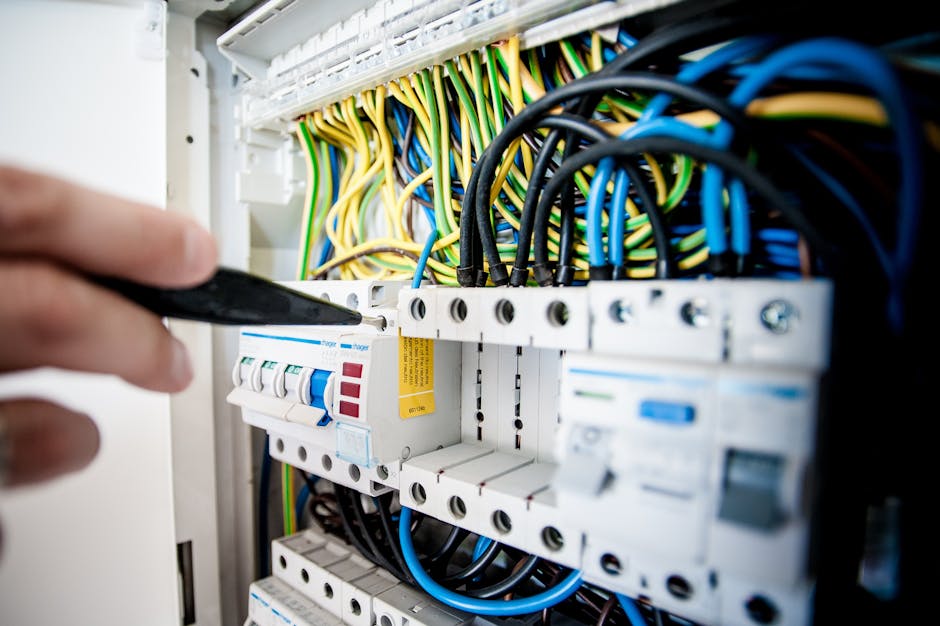
3. Identify the Faulty GFCI Breaker
A GFCI breaker is easy to spot because it has a “Test” button and a white “pigtail” wire coiled up like a spring.
4. Disconnect the Wires
You’ll see two wires connected to the breaker: a black (hot) wire and a white (neutral) wire. Unscrew the terminals and pull the wires away. Finally, find where that white curly pigtail connects to the neutral bus bar and unscrew it there too.
For more technical details on different breaker types, How to Install a GFCI or AFCI/GFCI Circuit Breaker offers a deep dive into the nuances. If this feels like a bit much, our Breakers & Panels Electrician team is always available to step in.
Removing the Old Unit and Wiring the New One
Once the wires are free, you can remove the old breaker. Most breakers “rock” out. Pull the side facing the center of the panel toward you, and it should unclip from the bus bar.
Now, let’s install the new one. This is where most people get confused, so let’s look at the connections carefully.
| Connection Type | Where it Goes | Purpose |
|---|---|---|
| White Pigtail (Curly) | Neutral Bus Bar | Completes the circuit for the GFCI’s internal sensor. |
| Load Neutral (White) | Breaker Terminal (labeled “Load Neutral”) | Returns current from the circuit to the breaker for monitoring. |
| Load Hot (Black) | Breaker Terminal (labeled “Load Hot”) | Sends 120V power out to the circuit. |
Important Note: Unlike a standard breaker where the white wire goes straight to the bus bar, with a GFCI breaker, the circuit’s white wire must connect to the breaker itself. This allows the breaker to compare the electricity going out with the electricity coming back. If they don’t match, it trips!
Testing and Troubleshooting Your New Installation
Once you’ve snapped the new breaker onto the bus bar and tightened all the screws, it’s time for the moment of truth.
- Replace the panel cover.
- Flip the Main Breaker back to “On.”
- Flip your new GFCI breaker to “On.”
You know what? If it trips immediately, don’t panic. This usually means there is an actual ground fault somewhere on the line. Unplug everything on that circuit (toasters, hair dryers, outdoor lights) and try again. If it stays on, plug things back in one by one until you find the culprit.
We recommend monthly tests. Just walk up to the panel once a month and hit that “Test” button. If it clicks off, it’s working. Flip it back to reset it. It takes five seconds but provides peace of mind for your family in West Haven or South Ogden.
When to Call a Professional Electrician
We love the DIY spirit, but electricity doesn’t give second chances. There are specific times when changing a gfci circuit breaker should be left to the pros at Black Rhino Electric.
- Arc Flash Risk: If you see sparks or hear “sizzling” inside the panel, stay back.
- Aluminum Wiring: Many homes built in the 60s and 70s have aluminum wiring. This requires special connectors and “anti-oxidant” paste. If you see silver-colored wires instead of copper, call us.
- Burning Smells: If your panel smells like an electrical fire, it’s a major hazard.
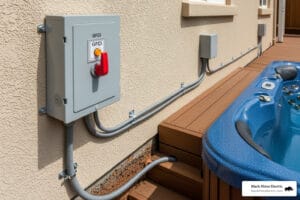
- Double-Pole Breakers: If you’re dealing with a 240V GFCI breaker (like for a hot tub), the wiring is significantly more complex.
If you’re unsure about your panel’s health, check out our guide on How to Upgrade Electrical Panel to see if a simple breaker swap is enough or if you need a full system refresh.
Final Steps for changing a gfci circuit breaker
After a successful installation, make sure you label the breaker clearly on the panel door. “Kitchen Outlets” or “Bathroom GFCI” helps you—and future homeowners—identify the circuit quickly.
At Black Rhino Electric, we take pride in serving our community. Whether you’re a homeowner in Ogden preparing for an EV charger, a family in North Ogden wiring up a backyard hot tub, or a business manager in Roy needing urgent panel replacements, our expert team is here to help. We are fully licensed, insured, and deeply familiar with the local codes in Weber and Davis Counties.
For more information on commercial needs, you can explore our Electrical Panels and Meters page. We prioritize your safety with every wire we touch.
If you’re ready to ensure your home’s electrical system is up to code, call the experts at 801-810-4292 or Request a Free Quote today.