Detector installation done right can be the difference between a close call and a tragedy. You know what? Working smoke alarms cut the risk of dying in a home fire by more than half, yet only 1 in 3 U.S. households have the recommended number installed. Here’s the thing: the right detector, in the right place, tested the right way, can give your family or team the warning time they need.
Why Detector Installation Could Save Your Life
Detector installation is the process of choosing, placing, mounting, wiring, and testing smoke and carbon monoxide (CO) alarms to protect your home or business. Done correctly, it can reduce fire death risk by 54% and CO poisoning deaths by up to 85%.

Here’s the quick version:
- Choose the right detector type (smoke, CO, combination, hardwired, or smart)
- Place it correctly — every level, every bedroom, outside sleeping areas
- Mount it on the ceiling or high on a wall, at least 10 feet from cooking appliances
- Wire it properly — battery units need no electrical work; hardwired units connect to a 120V circuit
- Test every unit after installation and monthly after that
Three out of five home fire deaths happen in homes with no working smoke alarms. That single statistic explains why this matters so much — and why getting the installation right from the start is worth your full attention.
Honestly, most of those deaths were preventable. The detectors exist. The knowledge exists. The problem is often just skipped steps, wrong placement, or expired devices no one replaced.
This guide walks you through all five steps in plain language — whether you’re a first-time homeowner in Ogden updating an older home, a property manager in West Valley City keeping units up to code, or a business owner in Salt Lake City protecting your team.

Introduction
Let me explain the big picture before we grab a drill. Smoke alarms detect particles from fire, CO alarms detect invisible carbon monoxide gas, and combination units can do both in one device. The “best” detector is not always the fanciest one; it is the one that matches the hazard, meets code, is installed in the correct location, and gets tested regularly.
For homes and businesses in Ogden, Roy, North Ogden, West Haven, South Ogden, Pleasant View, Hooper, Riverdale, Washington Terrace, Marriott-Slaterville, Layton, Bountiful, Kaysville, Syracuse, Clearfield, Farmington, Clinton, North Salt Lake, Centerville, and Woods Cross, we always recommend checking local requirements with the authority having jurisdiction, often called the AHJ. NFPA 72 is the national fire alarm standard many codes reference, but local enforcement matters.
Detector Installation in 5 Easy Steps: Choose, Place, Mount, Wire, and Test
The five-step process is simple, but each step matters. A detector mounted in the wrong room, disconnected from the others, or ignored for 12 years is a bit like wearing a bike helmet on your elbow: technically equipment exists, but it is not helping much.
Step 1: Choose the Right Detector Type for the Risk
Different detectors solve different problems:
| Detector type | Best for | Installation notes |
|---|---|---|
| Battery smoke alarm | Quick upgrades, renters, older homes without wiring | Mounts with screws and anchors; no electrical wiring |
| Hardwired smoke alarm | Newer homes, remodels, code upgrades | Connects to 120V power with battery backup |
| Combination smoke/CO alarm | Bedrooms, hallways, living areas near sleeping zones | Saves space; must be placed correctly for both hazards |
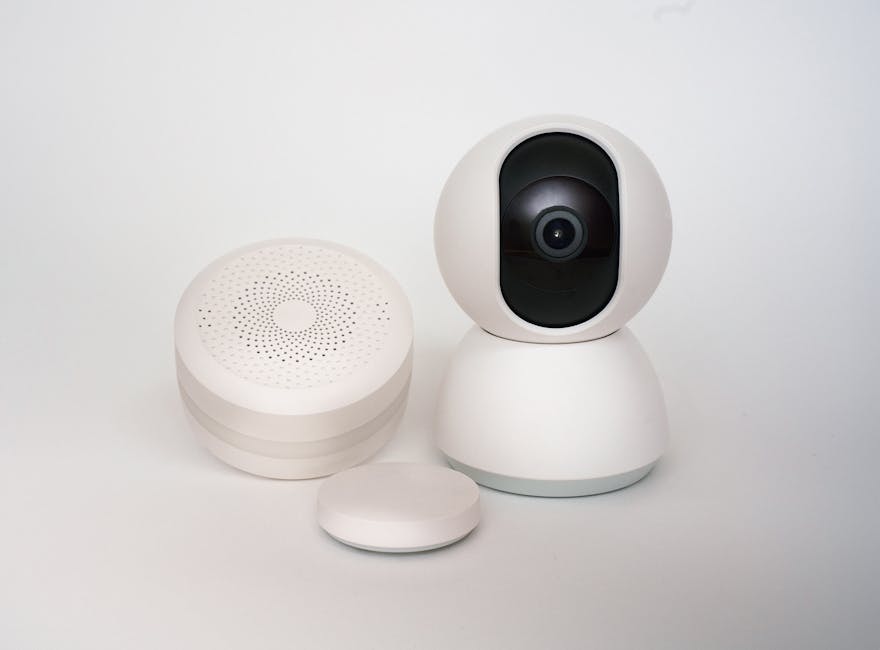
| Smart detector | Remote alerts, voice warnings, automation | May use Wi-Fi, app setup, room naming, and wireless interconnect |
| Commercial detector | Offices, shops, mechanical spaces, fire alarm systems | Often low-voltage, supervised, and tied to a control panel |
Smoke detector technology usually falls into three categories:
- Photoelectric smoke detectors: Better at detecting slow, smoldering fires.
- Ionization smoke detectors: More responsive to fast-flaming fires.
- Dual-sensor detectors: Include both technologies for broader coverage.
CO detectors typically use electrochemical sensors to detect carbon monoxide from fuel-burning appliances, attached garages, fireplaces, or gas equipment. For many homes, combination smoke/CO units are convenient, but separate units may offer better placement flexibility.
For more detail on cost and wiring choices, see our guide: Wired vs Battery: Breaking Down the Cost to Install Wired Smoke Detectors.
Step 2: Place Detectors Where They Protect People Fastest

Here’s the thing: placement is where many detector installations go wrong.
For homes, use these basic placement rules:
- Install smoke alarms inside every bedroom.
- Install smoke alarms outside each sleeping area.
- Install smoke alarms on every level, including basements and finished attics.
- Place alarms near stairways so smoke moving between floors is detected.
- Install CO alarms near sleeping areas and on levels with fuel-burning appliances.
- Keep smoke alarms at least 10 feet from cooking appliances when possible.
- Mount smoke alarms on the ceiling or high on a wall.
- If wall mounting, keep the detector within about 12 inches of the ceiling.
- Keep ceiling-mounted units at least 4 inches from walls or corners to avoid dead-air zones.
- Avoid bathrooms, steamy laundry areas, dusty rooms, garages, and spots near fans, windows, or HVAC supply vents.
For businesses, detector placement depends on building use, occupancy, fire alarm design, mechanical rooms, corridors, and local code. Commercial systems may require fire alarm panel integration, device spacing, documentation, testing records, and inspection approval. For open-area commercial detectors, manufacturers often reference spacing such as 30-foot centers as a starting point, but actual layout must account for ceiling height, airflow, obstructions, and AHJ requirements.
Step 3: Battery-Operated Detector Installation Without Rewiring

Battery-operated detectors are the easiest DIY option. They are great for adding coverage where no detector exists, especially when installing a new hardwired circuit is not practical.
Basic steps:
- Read the manufacturer’s instructions.
- Choose the correct location.
- Hold the mounting bracket against the ceiling or wall.
- Mark the screw holes with a pencil.
- Drill pilot holes using the recommended bit size.
- Insert drywall anchors if needed.
- Screw the mounting bracket into place.
- Insert the battery or pull the battery activation tab.
- Twist the detector onto the bracket.
- Press the test button until the alarm sounds.
- Write the installation date or replacement date on the label.
Sealed 10-year battery alarms reduce the “where did the 9V battery go?” problem. Honestly, that battery usually ends up in a TV remote, a toy, or some mysterious junk drawer ecosystem. Still, even sealed-battery units must be replaced at the end of their rated life.
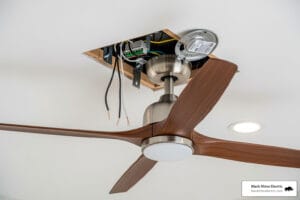
Step 4: Hardwired Detector Installation and Interconnected Alarm Wiring
Hardwired detector installation is more involved because it connects to your electrical system. If you are not trained and comfortable working with line-voltage wiring, this is the point where we strongly recommend calling a licensed electrician.
A typical hardwired smoke alarm uses:
- Black wire: Hot power
- White wire: Neutral
- Red or yellow wire: Interconnect/traveler conductor
- Ground wire: Bonded to the electrical box when required
Most residential hardwired smoke alarms connect to a 120V circuit and include battery backup. Interconnected alarms are commonly wired with 14/3 or 12/3 cable, depending on the circuit. The interconnect conductor allows one detector to trigger all compatible detectors at the same time.
General hardwired process:
- Turn off power at the breaker.
- Verify power is off with a voltage tester.
- Install an approved ceiling or wall electrical box.
- Run the correct cable between detector locations.
- Make approved wire connections using listed connectors.
- Connect the alarm harness according to the manufacturer’s diagram.
- Attach the detector base.
- Install backup batteries.
- Restore power.
- Test every alarm.
Use compatible detectors from the same approved system family, follow manufacturer limits for the maximum number of interconnected alarms, and never mix wiring methods casually. Technical manuals such as the i3 Series photoelectric smoke detector installation guidance also emphasize proper wiring, testing, cleaning, and compatible control equipment for system detectors.
For commercial low-voltage systems, 2-wire and 4-wire detectors may connect to a listed fire alarm control panel. Fire alarm wiring should be supervised, color-coded, separated from unrelated electrical wiring where required, and installed under applicable code.
Step 5: Connect, Sync, and Test Every Detector Together
Interconnection is what makes the system powerful. If a basement alarm detects smoke, everyone upstairs should hear it immediately.
There are three common ways detectors connect:
- Hardwired interconnect: A traveler wire links alarms together.
- Wireless interconnect: Alarms pair by radio signal without a traveler wire.
- Smart integration: Detectors connect to Wi-Fi, an app, a smart hub, or a monitored security system.
After installation:
- Press the test button on one detector.
- Confirm all interconnected detectors sound.
- Test each detector one at a time.
- Confirm voice and location alerts, if available.
- Name rooms correctly in the app.
- Confirm remote notifications work.
- Label the breaker for hardwired units.
- Review escape routes with the household or staff.
For CO alarms, use the manufacturer’s test function. Do not expose CO alarms to vehicle exhaust or unsafe gas sources. For smoke detector sensitivity or aerosol testing, follow the manufacturer’s approved method.
Keep Detectors Working: Maintenance, Codes, Smart Integration, and Professional Help

Installation is only half the job. Maintenance keeps the protection alive.
Follow this schedule:
| Task | How often |
|---|---|
| Press test button | Monthly |
| Clean exterior with vacuum or soft brush | At least yearly |
| Replace removable batteries | At least yearly, or when chirping |
| Replace smoke alarm unit | Usually every 10 years |
| Replace CO alarm unit | Usually every 5 to 10 years, per label |
| Review placement and coverage | During remodels, property sales, or occupancy changes |
| Commercial inspection/testing | Per code, system type, and AHJ requirements |
Smart detectors can add app alerts, voice warnings, room-specific messages, low-battery notifications, and integration with home security or automation systems. Some systems can also support battery backup and cellular backup, which is helpful during outages.
For businesses, duct smoke detectors may be required in HVAC systems, but they are not a substitute for open-area life-safety detection. Duct units depend on airflow and proper sampling tube installation. The D2 Duct Smoke Detector Installation Document notes important requirements such as verified air velocity, proper tube length, and regular cleaning.
If you manage a commercial property, start here: Commercial Smoke and CO2 Detectors.
Test, Maintain, Replace, and Avoid Common Detector Installation Mistakes
Warning signs a detector may be failing include:
- Repeated chirping after battery replacement
- No sound when the test button is pressed
- Yellow trouble light or fault indicator
- Detector is older than its listed lifespan
- Discoloration, paint, dust buildup, or physical damage
- False alarms that continue after cleaning and relocation
- No power light on a hardwired unit
- Interconnected alarms do not sound together
- End-of-life signal from the device
Common mistakes to avoid:
- Installing too few detectors
- Skipping bedrooms
- Mounting too close to kitchens or bathrooms
- Placing units near vents, fans, or windows
- Painting detectors
- Removing batteries to stop nuisance alarms
- Mixing incompatible interconnected devices
- Forgetting battery backup on hardwired units
- Installing commercial detectors without proper panel supervision
- Ignoring permits, inspections, or AHJ requirements
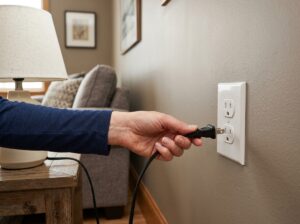
DIY battery detector installation is often reasonable for homeowners. Hardwired, interconnected, panel-based, or commercial detector installation is different. That work touches electrical code, fire code, building safety, and sometimes insurance documentation. If you notice electrical warning signs during installation, such as warm outlets, burning smells, flickering lights, damaged wiring, or breaker issues, read Top 10 Signs You Need an Emergency Electrician and get help quickly.
For ongoing safety planning, we also recommend Electrical Maintenance 101: Everything You Need to Know and The Power of Prevention: Mastering Electrical Panel Maintenance.
At Black Rhino Electric, we help homeowners and businesses throughout Weber County and surrounding Utah communities install safer, code-conscious electrical systems, from detector wiring to panel replacements, whole-home wiring, EV chargers, and hot tub circuits. If you want detectors installed, replaced, interconnected, or checked by licensed electricians, call us at 801-810-4292. You can also Request a Free Quote and we will help you protect your property without turning safety into a guessing game.