Honestly, if you are still dealing with the hum and flicker of old tubes, a Fluorescent to LED conversion is the single most effective upgrade you can make for your property. Have you ever wondered how much money is literally vanishing into thin air every time you flip that switch? Let me explain how you can slash your energy bills and improve your light quality in just a few simple steps.
Contents
Introduction

Fluorescent to LED conversion means replacing your old fluorescent tubes and ballasts with energy-efficient LED lighting — either by retrofitting your existing fixtures or installing new ones entirely. Here is a quick overview of how it works:
- Identify your fixture type – strip light, troffer, wraparound, or high bay
- Choose your conversion method – retrofit kit, LED tube swap, or full fixture replacement
- Select your LED tube type – Type A (plug-and-play), Type B (ballast bypass), or Hybrid
- Bypass or remove the ballast if required by your chosen LED type
- Install and power on – most retrofits take under 10 minutes per fixture
You know what? Most people are surprised by how simple the process actually is — and how fast the savings add up. LEDs use up to 50% less energy than fluorescent tubes, they last 50,000 hours or more, and they produce better, more consistent light with no warm-up time and no flicker.
Whether you manage a warehouse in Ogden, a retail shop in Salt Lake City, or you are renovating a home in Layton, this guide walks you through every step of the conversion process.

Relevant articles related to Fluorescent to LED conversion:
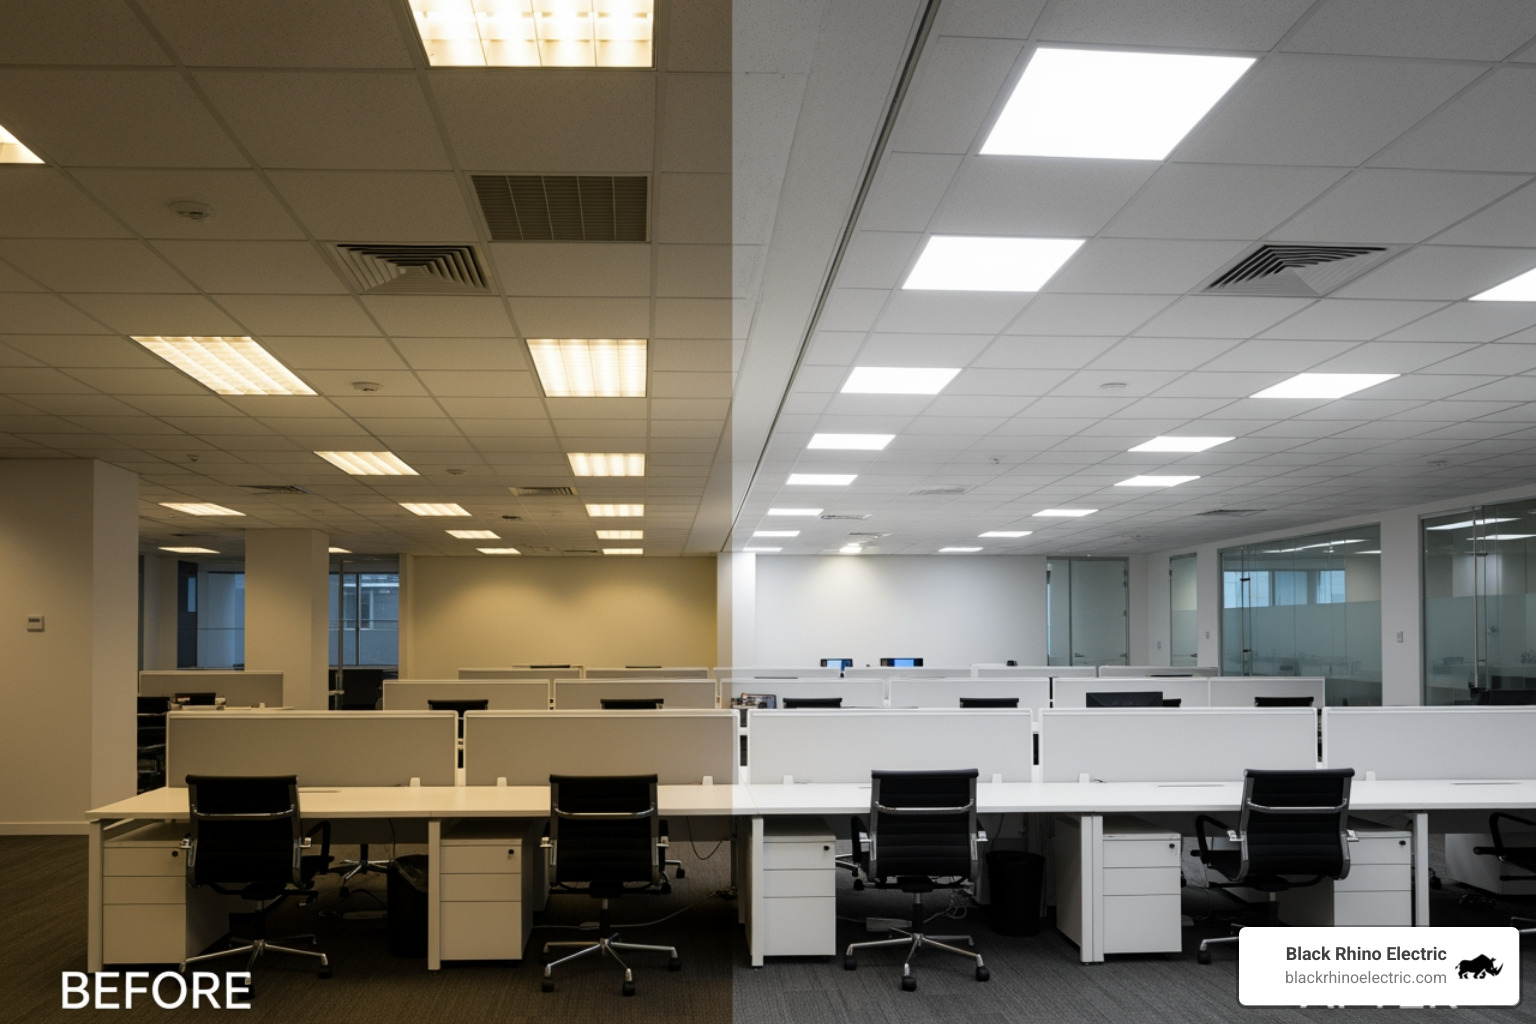
When we talk about upgrading your lighting, we aren’t just talking about a brighter room. We’re talking about a fundamental shift in how your building consumes energy. For years, fluorescent T12 and T8 tubes were the industry standard, but they came with baggage: humming ballasts, flickering starts, and a light output that degraded by 15-30% over time.
A Fluorescent to LED conversion addresses every one of these pain points. By switching to LED, you achieve instant-on capability, superior color rendering (CRI >84), and a massive reduction in maintenance. In fact, some school lighting upgrades have seen project paybacks in less than 30 days. Whether you are looking for residential improvements or commercial overhauls, the Return on Investment (ROI) is undeniable.
Why Choose a Fluorescent to LED Conversion for Your Business?
If you run a business in Weber County, every penny saved on overhead goes straight to your bottom line. Lighting usually accounts for a significant portion of a commercial electric bill. By converting fluorescent strip lights to LED, you can cut energy use by 50% immediately.
| Feature | Fluorescent Tubes | LED Retrofit/Tubes |
|---|---|---|
| Energy Consumption | High (32W-60W per tube) | Low (14W-18W per tube) |
| Lifespan | 10,000 – 20,000 hours | 50,000 – 100,000 hours |
| Light Quality | Flickers, 360° waste | Instant-on, Directional |
| Maintenance | Frequent bulb/ballast swaps | Minimal to zero |
| Heat Emission | Significant | Very Low |
Let me explain why directional light matters. Fluorescent tubes emit light in 360 degrees, meaning half of that light is pointed up into the fixture and wasted unless you have high-quality reflectors. LEDs are directional; they send 100% of their light exactly where you need it. This efficiency, combined with reduced heat output (which lowers your cooling costs in the summer!), makes commercial lighting upgrades a no-brainer.
Understanding LED Tube Types for Fluorescent to LED Conversion
Choosing the right bulb is the most technical part of the process. Here’s the thing: not all LED tubes are created equal. You need to decide how much “under-the-hood” work you want to do.
- Type A (Plug-and-Play): These work with your existing fluorescent ballast. You literally just swap the bulbs. While easy, you are still relying on an old ballast that will eventually fail and continue to draw a small amount of “vampire” power.
- Type B (Ballast Bypass/Direct Wire): This is our preferred method. You bypass the ballast and wire the sockets directly to the building’s line voltage. It eliminates the ballast failure point entirely.
- Type C: These use a dedicated external LED driver instead of a ballast. They are highly efficient but more complex to install.
- Hybrid (Type A/B): These are versatile. They work with a ballast initially, but if the ballast dies, you can rewire the fixture and run them as a direct-wire Type B tube.
Retrofitting vs. Full Fixture Replacement
Should you keep your old metal boxes or tear them out?
Retrofitting is often the most cost-effective path. It involves using the existing fixture housing and replacing the internal components. This reduces waste and saves significantly on labor. It’s perfect for 2×4 troffers in office ceilings or 8-foot industrial strip lights in shops.
Full Fixture Replacement involves installing brand-new LED panels or troffers. While more expensive upfront, it gives you a modern, “clean” look and the absolute highest efficiency. If your current fixtures are rusted, damaged, or aesthetically dated, our lighting electrician team often recommends a full replacement to ensure long-term reliability.
The Benefits of Magnetic LED Strip Retrofit Kits
One of the most exciting innovations in Fluorescent to LED conversion is the magnetic LED strip kit. Honestly, these are a game-changer for commercial spaces.

These kits use high-strength magnets to snap the LED strips and the driver directly onto the existing steel fixture body.
- Speed: A typical 2×4 troffer can be converted in about 3 minutes.
- No Tools Required: Since they are magnetic, you don’t need to drill into the fixture.
- Versatility: They work in troffers, wrap-arounds, and even cove lighting.
- Durability: Most are rated for 50,000 hours and feature aluminum backing for excellent heat dissipation, which keeps the LEDs cool and extends their life.
Step-by-Step Guide to Your LED Retrofit Project
Before you start pulling wires, safety is paramount. Always turn off the power at the breaker—not just the wall switch. If you aren’t comfortable working with line voltage, that’s exactly why we’re here. Proper electrical maintenance ensures your home or business stays safe and code-compliant.
- Disconnect Power: Verify the circuit is dead using a non-contact voltage tester.
- Remove Old Components: Take out the fluorescent tubes and remove the ballast cover.
- Inspect the “Tombstones” (Sockets): Check if they are shunted or non-shunted. This is critical for Type B installations.
- Wiring: Follow the specific diagram for your LED kit.
How to Perform a Ballast Bypass for Fluorescent to LED Conversion
Performing a ballast bypass is the “gold standard” for a permanent Fluorescent to LED conversion. By removing the ballast, you eliminate the most common cause of flickering and failure.
Here is the general process:
- Cut the wires leading to the ballast and remove the unit entirely.
- Identify your sockets. Type B tubes usually require non-shunted tombstones if you are doing single-ended wiring. If you have shunted sockets, you’ll need to replace them or use double-ended power LED tubes.
- Connect the wires. Connect the hot (black) and neutral (white) wires directly to the sockets according to the manufacturer’s instructions.
- Label the fixture. This is a safety step many DIYers skip! Apply a “Modified Fixture” sticker so future electricians know the ballast has been removed and the fixture is now live with 120V-277V at the sockets.
For a visual walkthrough, you can check out this video guide for ballast bypass to see the wiring in action.
Choosing the Right Color Temperature and Wattage
Don’t just buy the first LED you see. The “color” of the light, measured in Correlated Color Temperature (CCT), changes the entire feel of a room.
- 3500K (Warm/Neutral White): Great for retail or hospitality where you want a welcoming vibe.
- 4000K (Cool White): The standard for offices and classrooms. It promotes focus without being too harsh.
- 5000K (Daylight): Best for warehouses, garages, and high-detail task areas like machine shops.
When it comes to brightness, look at lumens, not watts. A 15W LED can often replace a 32W fluorescent tube while providing more “usable” light. Many modern retrofit kits now offer “selectable” options, allowing you to toggle the wattage and CCT with a switch during installation to find the perfect look.
Maximizing ROI with Utility Rebates and Energy Savings
At Black Rhino Electric, we love helping our clients in Ogden and Roy save money. You know what? The cost of a Fluorescent to LED conversion is often offset by utility rebates. Many local utilities offer incentives for installing “DLC Premium” rated products, sometimes covering up to 99% of the project cost!
In one notable school project, the facility achieved 92% project cost savings through rebates, resulting in $60,000 in annual energy savings. The payback period for these types of upgrades is frequently less than 30 days when you factor in the immediate drop in the power bill and the elimination of maintenance costs.
Whether you are looking for commercial electrical services to upgrade a factory in West Haven or need a lighting electrician for your home in North Ogden, we have the expertise to get it done right.
Honestly, the payback period is often less than 30 days. You know what? Upgrading your lighting is the fastest way to boost your bottom line. If you’re ready to future-proof your space in Ogden or Weber County, give us a call at 801-810-4292 or Request a Free Quote today!