Getting an EV is exciting, but preparing your home requires a clear understanding of the electrical requirements for EV charging. This isn't just about plugging something in; it’s about ensuring your home’s electrical system can safely and efficiently power your vehicle for years to come. Let me explain how to plan your installation with confidence, so you can enjoy the full benefits of at-home charging.

Contents
- 1 Understanding Level 1 vs Level 2 Charging Speeds
- 2 Can Your Electrical Panel Handle an EV Charger?
- 3 Why Circuit Sizing is Critical for Safe Charging
- 4 Safety First: GFCI Protection and Local Permits
- 5 Planning Your Installation and When to Call an Electrician
- 6 EV Charging Electrical FAQs: Your Top Questions Answered
Understanding Level 1 vs Level 2 Charging Speeds
When you’re setting up your home for an electric vehicle, you quickly realize not all chargers are the same. This directly affects the electrical requirements, and for home use, your choice really boils down to two options: Level 1 and Level 2. So, what’s the real difference, and why does it matter so much?

The Slow and Steady Level 1 Charger
Think of Level 1 charging like using a standard garden hose to fill a swimming pool. It’ll get the job done… eventually. This method uses a basic 120-volt wall outlet, the same kind you plug your phone or toaster into.
The big upside is simplicity. You don’t need a special installation; just plug it in and you're good to go. But the trade-off is speed—or the lack of it. A Level 1 charger only adds about 3-5 miles of range per hour. Honestly, for a daily commuter who needs a full battery every morning, this kind of trickle charge just can’t keep up.
The Powerful and Practical Level 2 Charger
This is where things get serious. For most EV owners, upgrading to Level 2 is a total game-changer. It’s like swapping that garden hose for a fire hose. It delivers power so much faster, making a full overnight charge not just possible, but completely reliable.
A Level 2 charger needs a dedicated 240-volt circuit, just like an electric dryer or oven. This beefy connection can add 25-60 miles of range per hour, which means you can pull into the garage with a nearly empty battery and wake up to a full one. This convenience is why a professional 240-volt installation is the gold standard for home EV charging.
This shift toward faster home charging isn’t just a local trend. The global EV charging station market is expected to explode from USD 26.87 billion in 2025 to USD 143 billion by 2035. That growth is fueled by the need for smarter grids and serious electrical upgrades. For homeowners here in Utah, it highlights how important it is to make sure your home’s panel can handle a modern Level 2 charger—you’ll often need a 200A panel to avoid a costly service upgrade. You can read the full research about the EV charging market on morningstar.com.
Charging Speed and Electrical Needs Level 1 vs Level 2
Let's break down the differences in a way that’s easy to see. The electrical needs for each level are worlds apart, and that directly impacts how complex the installation is and how the charger performs. Getting these distinctions right is key to picking what works for your car and your life.
| Feature | Level 1 Charger | Level 2 Charger |
|---|---|---|
| Voltage Required | 120 Volts (Standard Outlet) | 240 Volts (Dryer-Style Outlet) |
| Amperage | 12-16 Amps | 30-80 Amps |
| Circuit Needed | Standard shared circuit | Dedicated 40A, 50A, or 60A circuit |
| Installation | Plug-and-play | Professional installation required |
| Miles of Range Per Hour | 3 – 5 miles | 25 – 60+ miles |
| Typical Full Charge Time | 24 – 48+ hours | 4 – 8 hours |
| Best For | Emergency or occasional top-ups | Daily charging and convenience |
So, what’s the bottom line? While a Level 1 charger is plug-and-play, it's really only good for emergencies or topping up a plug-in hybrid. A Level 2 charger offers the speed and reliability that most EV owners actually need for daily driving. The investment in a professional installation pays off with convenience and peace of mind every single morning.
Can Your Electrical Panel Handle an EV Charger?
So, you've picked out a powerful Level 2 charger to keep your EV topped up and ready to go. That's a great move for fast, convenient charging, but it brings up the single most important question: can your home’s electrical panel actually handle it? This is one part of the electrical requirements for ev charging you absolutely cannot afford to guess on.
Think of your electrical panel as the heart of your home. It’s the control center, pumping electricity to every light, outlet, and appliance you own. A Level 2 EV charger is a serious new demand on that heart, and it needs its own dedicated 240-volt, double-pole breaker to work safely.
Performing a Basic Load Calculation
Before you can be sure your panel is up to the task, you need a sense of its current workload. This is done with a load calculation—basically an inventory of your home's total electrical appetite. While a licensed electrician has to perform a formal calculation to meet code, you can do a quick check yourself to see if you might have a problem.
Here’s the thing: your panel has a maximum capacity, measured in amps—usually 100A, 150A, or 200A. The goal is to make sure your existing usage, plus the new charger, doesn’t push past that limit. An EV charger is what we call a "continuous load," meaning it pulls full power for hours at a time, putting a real, sustained strain on your system.
To get a rough idea, just think about your biggest power hogs:
- HVAC System: This is almost always the single biggest user of electricity in a home.
- Electric Water Heater: Another high-demand appliance that draws a ton of power.
- Electric Dryer and Oven: Both of these need their own 240-volt circuits, too.
- Other Appliances: Your fridge, dishwasher, microwave, and lights all add to the total.
If you’ve got several of these big-ticket appliances running, especially in an older home in Weber or Davis counties with a 100-amp panel, you might be closer to maxing out than you realize. Adding a 40-amp or 50-amp charger could easily be the thing that pushes it over the edge.
Warning Signs of an Overloaded Panel
Your home's electrical system will often give you clues that it's already struggling. Ignoring these signs is a bad idea, as an overloaded panel is a genuine fire hazard. Let me walk you through some of the most common red flags.
An overloaded electrical panel isn't just an inconvenience; it's a critical safety risk. Frequently tripping breakers are your system's way of telling you it's being pushed beyond its safe operating limits.
Be on the lookout for these signals:
- Frequently Tripping Breakers: If breakers pop whenever you use a few appliances at once, your panel is likely at or very near its limit.
- Flickering or Dimming Lights: Do your lights dip when the air conditioner kicks on or you fire up the microwave? That’s a classic sign of an overloaded system.
- A Buzzing or Crackling Sound from the Panel: Any weird noises from your electrical panel demand immediate attention from a professional.
- A Burning Smell: A faint smell of burning plastic or ozone near the panel is a major red flag that wires or components are overheating.
- The Panel Feels Warm to the Touch: It’s normal for a panel to be slightly warm, but it should never feel hot.
If you recognize any of these issues, it’s critical to call a licensed electrician before you even think about installing an EV charger. An overloaded panel has to be dealt with first. For a deeper dive, check out our guide on when to call a breakers and panels electrician.
Upgrading to a 200-amp service isn't just about making room for your new car; it’s about future-proofing your home so the whole system runs safely for years to come.
Why Circuit Sizing is Critical for Safe Charging
Let’s get into the technical details that matter most for a safe and reliable charge. Your EV charger isn't like a toaster; it's what the National Electrical Code (NEC) calls a “continuous load.” This means it can pull its maximum power for three hours or more straight. That sustained draw creates a lot of heat, which is why getting the circuit sizing right is one of the most vital electrical requirements for EV charging.
To handle that heat safely, the NEC has a non-negotiable rule: the circuit must be rated for 125% of the charger's max output. What does that look like in the real world? A common 40-amp charger can't just go on a 40-amp circuit. It actually needs a 50-amp circuit (40A x 1.25 = 50A). This safety buffer is absolutely essential to prevent wires from overheating—a serious fire hazard.
Matching Chargers to Common Circuit Sizes
Understanding that 125% rule helps explain why an electrician recommends a specific breaker size. It’s not an upsell; it’s a critical safety code. You’ll usually see a few standard setups for residential Level 2 chargers.
Here’s a quick breakdown of how charger amperage translates to the required circuit size:
- A 32-Amp Charger needs a 40-amp circuit breaker.
- A 40-Amp Charger needs a 50-amp circuit breaker.
- A 48-Amp Charger needs a 60-amp circuit breaker.
The right choice depends on your car’s onboard charging capacity and your daily driving habits. A Tesla Wall Connector, for example, can be set to different power levels, but to get its top speed of 11.5 kW, it must be hardwired to a 60-amp circuit. This ensures it delivers power efficiently without ever pushing your home's wiring past its limits.
The visual guide below walks through the first steps in figuring out if your electrical panel is ready for this kind of dedicated circuit.

As you can see, checking your panel’s total capacity and running a load calculation are the first things to do before deciding if an upgrade is needed to support a new EV circuit.
The Importance of Correct Wire Gauge
A circuit is more than just the breaker in your panel. The wire running from that breaker to your charger is just as critical. Using wire that’s too thin for the amperage is like trying to force a river through a garden hose—it creates dangerous pressure and heat. That’s why wire gauge (its thickness) is strictly specified by code.
For EV charging circuits, you’re almost always going to need thick copper wiring. A thicker wire has less resistance, which allows it to carry more current safely without getting hot during those long overnight charging sessions.
Here’s a table showing the minimum wire gauge for common EV charging circuits using standard NM-B (Romex) or THHN copper wire.
| Circuit Breaker Size | Maximum Charger Amperage | Minimum Copper Wire Gauge |
|---|---|---|
| 40 Amps | 32 Amps | 8-Gauge |
| 50 Amps | 40 Amps | 6-Gauge |
| 60 Amps | 48 Amps | 6-Gauge (or 4-Gauge for long runs) |
A crucial thing to remember: the farther your charger is from the electrical panel, the thicker the wire might need to be to avoid something called "voltage drop." A good electrician will calculate this to make sure your charger gets full power, even if it’s installed on the far side of the garage.
Getting this infrastructure right is becoming more urgent. In 2025, global EV sales jumped 20 percent, but charging infrastructure has struggled to keep pace, with utilization growing nearly 20 percent faster than new chargers were installed. For homeowners in Northern Utah, that trend puts a spotlight on getting our homes ready. A proper Level 2 charger, which typically needs a 240V, 30-50 amp charger on a code-compliant 40-60 amp circuit, is key to reliable charging as more EVs hit the road. You can discover more insights about EV infrastructure demands on evinfo.net.
Ultimately, getting the circuit size and wire gauge right is non-negotiable. It’s how you ensure your charger is powerful, safe, and fully compliant with code, giving you real peace of mind every time you plug in.
Safety First: GFCI Protection and Local Permits
When we're dealing with this kind of power, safety isn't just a priority—it's everything. For your EV charger installation, two things are absolutely non-negotiable: GFCI protection and a proper local permit. Think of these as the seatbelt and airbag for your electrical system. They ensure your charger works great while protecting your family, your home, and your new car from any electrical hiccups.
High-power, continuous loads like an EV charger demand a no-compromise approach to safety. Understanding these protections is a core part of the electrical requirements for ev charging.
Understanding GFCI Protection for EV Chargers
A GFCI (Ground-Fault Circuit Interrupter) is a smart, fast-acting device built to prevent electric shock. It works by constantly monitoring the electricity flowing through a circuit. If it senses even a tiny imbalance—meaning current is leaking out and going where it shouldn't, like through a person—it snaps the power off in a fraction of a second.
Now, let me clear up a common point of confusion. Many modern EV chargers, like the Tesla Wall Connector, have this advanced GFCI protection built right in. However, some local electrical codes—especially here in Salt Lake, Davis, and Weber counties—still require a separate GFCI breaker installed at your electrical panel. This isn't an oversight; it's a "belt and suspenders" safety approach that certain jurisdictions mandate for an extra layer of defense.
A good electrician knows the specific rules for your city and will get it right, whether that means relying on the charger’s internal protection or installing a dedicated GFCI breaker at the panel. For a deeper dive, you can learn more about GFCI power outlets in our article.
Why You Can't Skip the Electrical Permit
You know what? It’s surprisingly tempting for homeowners to think about skipping the permitting process to save a little time or money. This is a huge mistake. An electrical permit isn’t just bureaucratic red tape; it’s a fundamental safety check on your project.
Getting a permit means an official inspector from your local authority will review and sign off on the installation. That inspector’s only job is to verify that every single part of the work—from the circuit breaker and wire size to the final connections—meets the strict safety standards of the National Electrical Code (NEC) and any local rules.
An approved permit is your official proof that the installation was done correctly and safely. It’s critical for your homeowner's insurance, which could deny a claim related to an unpermitted electrical fire, and it’s a key document for future homebuyers.
The demand for EV charging is exploding. Globally, charging ports are projected to increase at a 12.3 percent annual growth rate through 2040 as ultra-fast charging becomes the norm. While commercial fast chargers are in a different league, even a residential Level 2 charger—like a Tesla setup needing a 48A/11.5kW connection—requires professional handling to meet safety codes in Weber or Davis County. This intense growth is exactly why professional, permitted installations are more critical than ever. You can discover more insights about the growing demand for EV charging on smartgridobserver.com.
Here’s a quick, no-fluff checklist of what to expect during the permitting and inspection process here in Northern Utah:
- Permit Application: Your electrician submits the detailed installation plan to your local city or county building department.
- Plan Review: An official reviews the plan to make sure it meets all code requirements before work begins.
- Installation: Once the permit is issued, the electrician gets to work.
- Inspection Request: After the installation is complete, an inspection is scheduled with a local electrical inspector.
- Final Inspection: The inspector visits your home, puts eyes on the work, and confirms the right breaker, wire, and connections were used.
- Approval ("Green Tag"): Once the installation passes, it gets a final approval, and the permit is officially closed out.
This whole process guarantees that a neutral, third-party expert has verified the safety of your EV charger. It’s how you get total peace of mind.
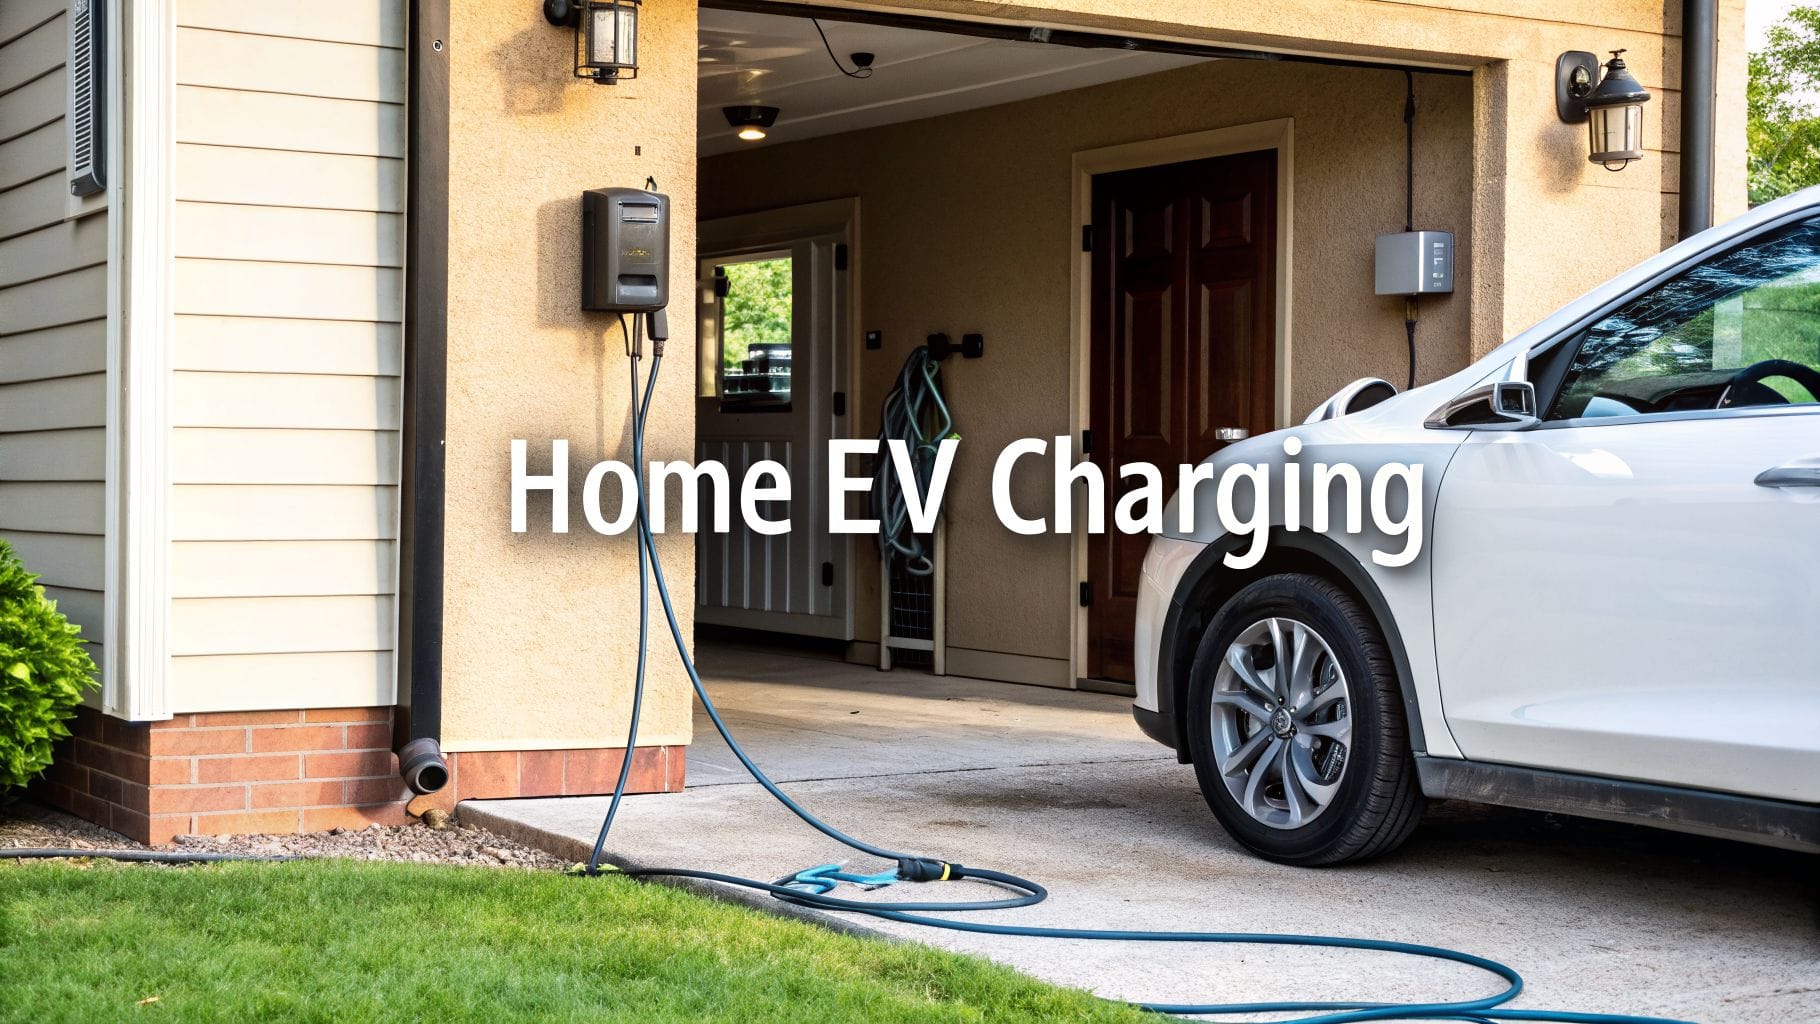
Planning Your Installation and When to Call an Electrician
Now that we’ve covered the technical side, let’s talk about the practical stuff—planning the install. This is where you figure out the physical setup, and more importantly, recognize when a project moves from “thinking about it” to “time to call a pro.” Getting these real-world steps right is a huge part of meeting the electrical requirements for EV charging.
First, where do you want the charger? Inside the garage, safe from the weather, is a popular choice. Or maybe an outdoor spot on the driveway makes more sense for your parking habits. This decision matters because it dictates whether you need a weatherproof outdoor-rated charger and how complex the wiring job will be.
Next, grab a tape measure and find the distance from that spot back to your main electrical panel. Don't eyeball it. This number is critical. The longer the run, the more the wire will cost, and your electrician might need to use a thicker gauge wire to fight off voltage drop. You want full, steady power reaching your car, and a long, undersized wire just won't deliver.
If your plan involves running power to a detached garage or a freestanding charging post, the job gets a bit more involved. It often requires underground utility trenching for electrical lines, which is a good thing to understand upfront as it adds another layer to the project.
Hardwired vs Plug-In Chargers
Another big decision is whether to hardwire the charger directly to the circuit or use a plug-in model with a heavy-duty 240-volt outlet, like a NEMA 14-50.
- Hardwired Chargers: These are permanently connected, which often allows for higher power delivery—like the 48 amps a Tesla Wall Connector needs to hit its top speed. The installation looks cleaner and more permanent.
- Plug-in Chargers: These offer flexibility. If you move, you can unplug the charger and take it with you. The trade-off is that they are usually limited to 40 amps to keep everything safely within the outlet's limits.
For maximum charging speed and a seamless, finished look, hardwiring is usually the way to go. But if portability is a priority, a plug-in unit is a solid choice.
Red Flags: It’s Time to Call a Professional
Let’s be blunt: high-voltage electrical work is not a DIY project. The risks are just too high. Fiddling with a 240-volt circuit without the right training and tools can cause a fire, fry your car's expensive charging system, or even void your vehicle’s warranty.
An improper installation can create hidden dangers that aren't immediately obvious. A licensed electrician doesn't just connect wires; they ensure the entire system—from the breaker to the charger itself—is safe, balanced, and fully compliant with all local codes.
It is absolutely time to call an experienced electrician if you hit any of these roadblocks:
- You need a new 240-volt circuit installed from scratch.
- Your electrical panel is completely full with no open slots for a new double-pole breaker.
- A load calculation shows your panel just doesn't have enough capacity for the charger.
- You’re already seeing signs of an overloaded panel, like lights flickering when the A/C kicks on or breakers that trip for no good reason.
- You're even a little unsure about any part of the process.
A licensed electrician from Black Rhino Electric handles all of this correctly, the first time. We’ll perform a precise load calculation, pull all the necessary permits, and guarantee a safe, reliable installation that meets every single code requirement. To see how we manage the process, check out our dedicated services for a professional EV charger installation electrician.
EV Charging Electrical FAQs: Your Top Questions Answered
Getting a home EV charger installed brings up a lot of good questions, especially about your home's electrical setup. It’s smart to get these details right for a safe, reliable installation. Let’s walk through the most common questions we hear from homeowners.
Do I Really Need a Dedicated Circuit for My EV Charger?
Yes. This is the one part that’s completely non-negotiable.
Think of it this way: a Level 2 EV charger is like running a large appliance for hours on end. It’s a high-power, continuous-load device. If you tried to share that circuit with your garage lights, freezer, and power tools, you’d be asking for trouble. It would constantly trip the breaker and create a serious fire hazard.
That’s why the National Electrical Code (NEC) requires a dedicated circuit. It ensures your charger has all the power it needs without overloading or interfering with the rest of your home’s electrical system.
How Much Does an Electrical Panel Upgrade Cost?
This is where the answer is "it depends." The cost to upgrade an electrical panel can vary quite a bit based on your home’s current setup and local labor rates.
For a standard upgrade, say from an old 100-amp panel to a modern 200-amp one, you’re typically looking at a range of $2,000 to $4,000.
However, that number can climb. If the main service line—the thick cable running from the utility pole to your meter—also needs to be replaced to handle the extra capacity, the project scope and cost will increase. The only way to get a firm number is to have a licensed electrician take a look and provide a detailed quote.
Can I Install an EV Charger Outdoors?
Absolutely. Most of the chargers on the market today are built for the outdoors and carry a NEMA 3R or NEMA 4 rating. This just means they’re designed to handle whatever the weather throws at them—rain, snow, dust, you name it.
An outdoor installation does require the right materials to keep it safe and durable for the long haul. A professional will use:
- Weatherproof outlets and enclosures to shield all the connections from moisture.
- Outdoor-rated wiring (like UF-B cable) that won’t break down from sunlight and water exposure.
- Durable conduit to protect the wiring from physical damage, whether it's from a lawnmower or just the elements.
A pro ensures every piece of the puzzle is code-compliant and built to last. If you have other energy-related questions that go beyond just EV charging, the team at Highflow Energy has a great list of general energy FAQs that might help.
Navigating these requirements is what we do best. The licensed experts at Black Rhino Electric ensure every installation is safe, code-compliant, and perfectly suited to your home and vehicle. To get your project started with a team you can trust, call us at 385-396-7048 or request a free quote online.