Figuring out the true level 2 charger installation cost can feel a bit overwhelming, right? You've got the new EV, and now you need a reliable way to charge it at home without breaking the bank. This guide is here to give you a clear, straightforward breakdown of the real costs so you can budget with confidence.
Contents
What to Expect for Your Installation Budget
So, why isn’t there a single, flat price for everyone? Think of it like a puzzle. Your final installation cost comes together from several key pieces, and your home’s unique electrical setup determines what that final picture looks like.
While every job is a little different, the industry has settled into a pretty predictable range. Nationally, the average for a standard residential installation lands somewhere around $1,400. Here in Utah, the typical all-in cost—that’s for the charger, labor, wiring, and permits—usually falls between $800 and $3,000. You can see how these costs line up with national installation data.
As an experienced electrician, my goal is to give you a quick, easy-to-understand overview right up front. I respect your time, so let’s cover the core numbers first, then we can dig into what actually drives those costs.
A Quick Cost Breakdown
To keep things simple, we can break down the primary expenses into four main buckets. Each one plays a critical role in getting you a safe, reliable home charging setup that won't let you down.
- Charger Hardware: This is the physical unit you’ll plug into every day. Prices swing based on the brand, how fast it charges (amperage), and whether it has smart features like Wi-Fi.
- Professional Labor: This covers the time and expertise of a licensed electrician. You’re not just paying for someone to mount a box; you’re paying for the skill to do it safely and up to code.
- Materials & Wiring: This includes the new circuit breaker for your panel, the heavy-duty copper wiring needed for a 240V circuit, conduit to protect it, and other necessary parts.
- Permits & Inspections: Your local city or county requires a permit to make sure the work is done right and meets safety standards. It’s not just red tape; it’s a final safety check for your home.
Here’s a table that lays out what you can generally expect for each part of the project. It gives you a good starting point for understanding where the money goes.
Typical Level 2 Charger Installation Cost Breakdown
| Cost Component | Typical Price Range | What It Covers |
|---|---|---|
| Charger Hardware | $400 – $800+ | The charging unit itself, from basic models to smart, Wi-Fi-enabled stations. |
| Labor & Installation | $400 – $1,500 | Electrician's time to run wiring, install a new 240V circuit, and mount the unit. |
| Materials | $100 – $500 | Copper wire, conduit, a new 50-60A breaker, and miscellaneous fittings. |
| Permits & Inspection | $50 – $250+ | Fees paid to your local municipality for project approval and final safety inspection. |
As you can see, the hardware itself is often less than half the total cost. The real variables come from the labor and materials needed to connect that charger to your electrical panel safely and efficiently. Next, we'll get into exactly what makes one installation straightforward and another more complex.
Key Factors That Drive Your Installation Price
So, why isn’t there a single, flat price for every EV charger install? That’s a fair question. The truth is, your final level 2 charger installation cost is a puzzle, and a few key pieces determine the complete picture. Every home here in Northern Utah is different. What might be a straightforward job in a new build could get more involved in an older home with a few quirks.
The three biggest variables are almost always your electrical panel's health, the distance from that panel to your garage, and local permitting. Once you understand these, you’ll see exactly where the costs come from and can have a much clearer conversation with an electrician.
Your Home's Electrical Panel
Think of your electrical panel as the heart of your home’s power system. A Level 2 charger isn't a toaster; it's a major new appliance that needs a lot of juice. That means the heart has to be strong enough to handle the extra demand without skipping a beat.
Here’s the thing: if your panel is old, already packed full of breakers, or just doesn't have enough total amperage for the new charger, it’s going to need an upgrade. This is the single biggest factor that can raise your installation cost, but it's a non-negotiable safety requirement. You can learn more about why modern, compliant breakers and electrical panels are so critical on our residential services page.
The Wiring Run and Its Complexity
Next up is the physical journey the new wiring has to take from your panel to the charger's spot in the garage. A shorter, more direct route is always going to be less expensive. It’s that simple.
But things can get a little more complicated. Here are a few common scenarios that add to the cost:
- Long Distances: The longer the run, the more heavy-gauge copper wire we need. That directly bumps up the material costs.
- Finished Walls: Running wires through finished drywall or plaster takes more labor for cutting, patching, and cleaning up than running it along an unfinished basement ceiling.
- Detached Garages: If your garage isn't attached to the house, the project will almost certainly require trenching to bury the electrical conduit underground. That’s a significant addition to labor and complexity.
This infographic breaks down how the charger itself, the labor, and the permits all contribute to the final price.
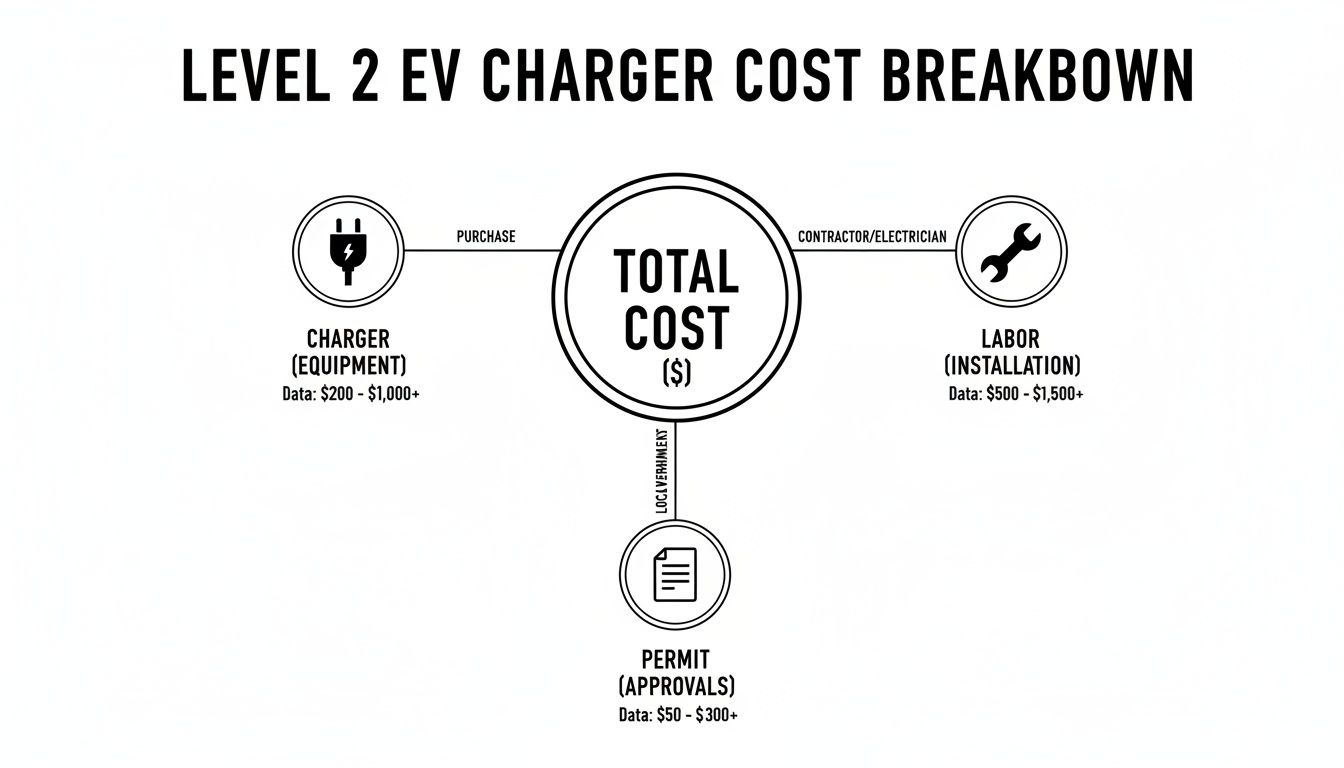
As you can see, professional labor often makes up the biggest slice of the pie. That’s exactly why the complexity of the wiring path matters so much.
Local Permits and Inspections
Finally, every single installation in Weber, Davis, and Salt Lake counties requires a permit from your local city or county. This isn't just a piece of paper; it’s a process that ensures the work is done to the latest safety codes and is double-checked by a third-party inspector.
The cost of the permit itself is relatively small, but it guarantees the installation is safe, protecting your home, your new EV, and your family. It's a crucial step that a professional electrician will always handle for you.
What Goes Into Labor and Materials Costs?
Here’s something that surprises a lot of homeowners: the charger itself often isn’t the most expensive part of the job. When you look at the final level 2 charger installation cost, the lion's share of the invoice usually comes from professional labor and the high-quality materials needed for a safe, code-compliant setup.
Let me explain. This isn't just about paying for someone's time on-site. You're investing in the expertise, safety, and long-term peace of mind that only a licensed and insured electrician from a team like Black Rhino Electric can deliver.
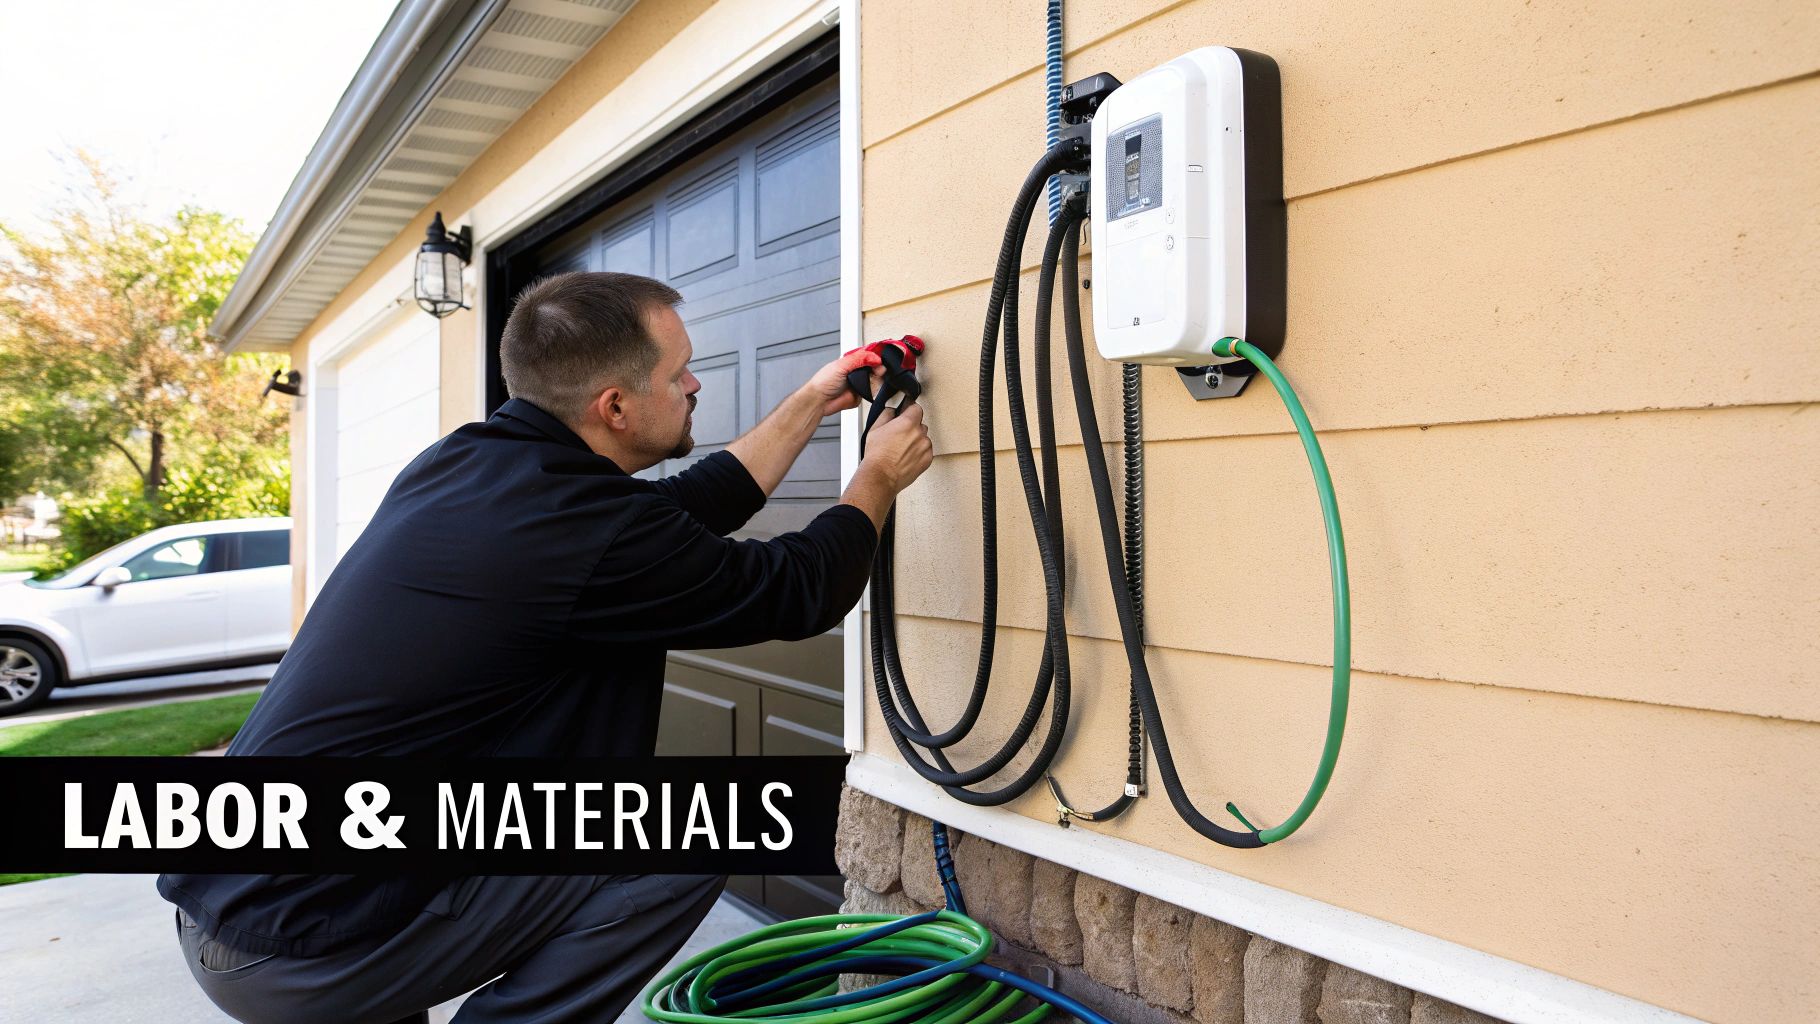
Breaking Down the Professional Labor
So, what are you actually paying for when you hire a pro? It’s a lot more involved than just mounting a box on the wall. This is a detailed electrical project with several critical steps.
- Installing a New 240V Circuit: Your charger needs its own dedicated line from the panel, much like an electric stove or dryer, to handle the heavy, continuous power draw without complaining.
- Fitting the Right Breaker: An electrician will install a new 50A or 60A two-pole breaker in your electrical panel, making sure it’s correctly sized for your charger and your home’s overall capacity.
- Running Heavy-Gauge Wire: The job requires pulling thick, heavy-duty copper wire—often 6-gauge—all the way from the panel to the charger location. This isn't lamp cord; it's serious stuff designed to prevent overheating.
- Mounting and Connecting the Charger: The unit is securely mounted, and every connection is torqued to precise specifications. A solid electrical bond isn't optional; it's essential for safety.
- Testing and Commissioning: Before we call it done, we test the circuit, verify the voltage, and confirm the charger is communicating correctly with your vehicle.
This skilled labor and the materials involved have become a major part of the overall expense. In fact, it's not uncommon for labor and materials to represent 50-70% of the total project price.
Once you subtract the typical $400-$800 equipment cost from the final bill, the electrician's time and wiring often account for $400-$1,500 of the total. You can see more details about how these installation expenses are broken down on SimpleSwitch.io.
The Non-Negotiable Value of Certified Work
It might be tempting to watch a few videos and try a DIY approach to save a few hundred dollars, but this is one area where cutting corners can have serious, expensive consequences. An improper installation just isn't worth the risk.
An incorrectly wired 240V circuit is a major fire hazard. It can also cause catastrophic damage to your EV's sensitive charging components—a repair that costs far more than a professional installation.
Hiring a certified electrician from Black Rhino Electric ensures that every connection is secure, every component is correctly rated, and the entire installation complies with the strict local and national electrical codes. This isn't about following arbitrary rules; it’s about guaranteeing the safety of your home, your expensive new vehicle, and your family. That professional guarantee is the most valuable part of the entire job.
Home vs Business Installation Costs
While this guide is all about getting a charger set up at your house, it helps to see the bigger picture. We often get questions about how a home garage job compares to installing chargers at a business, and the short answer is: they’re worlds apart. The scale, complexity, and especially the cost are on completely different levels.
You know what? The level 2 charger installation cost for a commercial property is significantly higher. It’s not just about a bigger final bill; the project is fundamentally different from the ground up, with unique requirements for hardware, electrical infrastructure, and even the permitting process. A business needs to think about multiple vehicles, public use, and often payment or network systems.
Key Differences in Commercial Projects
Commercial installations are built for high-volume, public-facing use. That introduces several layers of complexity you just don’t run into when you’re plugging in your own car in your own garage. These projects demand tougher, more robust solutions from start to finish.
- Commercial-Grade Hardware: Chargers built for a business parking lot are more durable, usually weatherproofed, and often include features like RFID card readers, network connectivity for tracking usage, and payment processing systems.
- Heavy-Duty Electrical Work: Businesses rarely install just one charger. This often means extensive new trenching to run heavy conduit across a parking lot. Sometimes, it even requires installing a brand-new, dedicated transformer just to handle the massive power load.
- Complex Permitting and Planning: Commercial projects demand detailed site plans, engineering reviews, and strict adherence to commercial building codes, including ADA accessibility requirements. The paperwork and planning are far more involved than a typical residential permit.
Because of these factors, a commercial installation can easily cost 3 to 5 times more per charging port than a home setup. It’s not unusual for the total installed price to land somewhere between $3,000 to $12,000 per unit for a business. If you want to dive deeper, GreenLancer.com offers a good guide on commercial EV charging stations.
This table gives you a quick, side-by-side look at how a simple home installation stacks up against a more involved commercial project.
Residential vs Commercial Installation At a Glance
The differences become pretty clear when you see them laid out. While both provide a charge, the scope and demands are tailored to completely different environments.
| Factor | Residential Installation | Commercial Installation |
|---|---|---|
| Typical Use Case | Single-family home for personal vehicle charging. | Public or employee charging at offices, retail, or apartments. |
| Charger Hardware | Standard, often non-networked units. | Durable, networked chargers with payment systems. |
| Electrical Needs | Single 240V circuit, potential panel upgrade. | Multiple circuits, trenching, new transformers often required. |
| Permitting | Straightforward residential electrical permit. | Complex, involving site plans and commercial codes. |
| Cost Per Port | $800 – $3,000 | $3,000 – $12,000+ |
Ultimately, a home installation is a straightforward, personal upgrade. A commercial one is a public utility investment, and the costs reflect that reality.
Real World Cost Scenarios in Utah
Okay, let's move from theory to real-world numbers. To give you a feel for your own project and better understand the potential level 2 charger installation cost, we’ve laid out three common scenarios we see in homes across Northern Utah. Honestly, seeing how different factors play out in real situations is the best way to get a gut check on where your own project might fall. These examples make the costs tangible and help you see which one sounds the most like your own home.
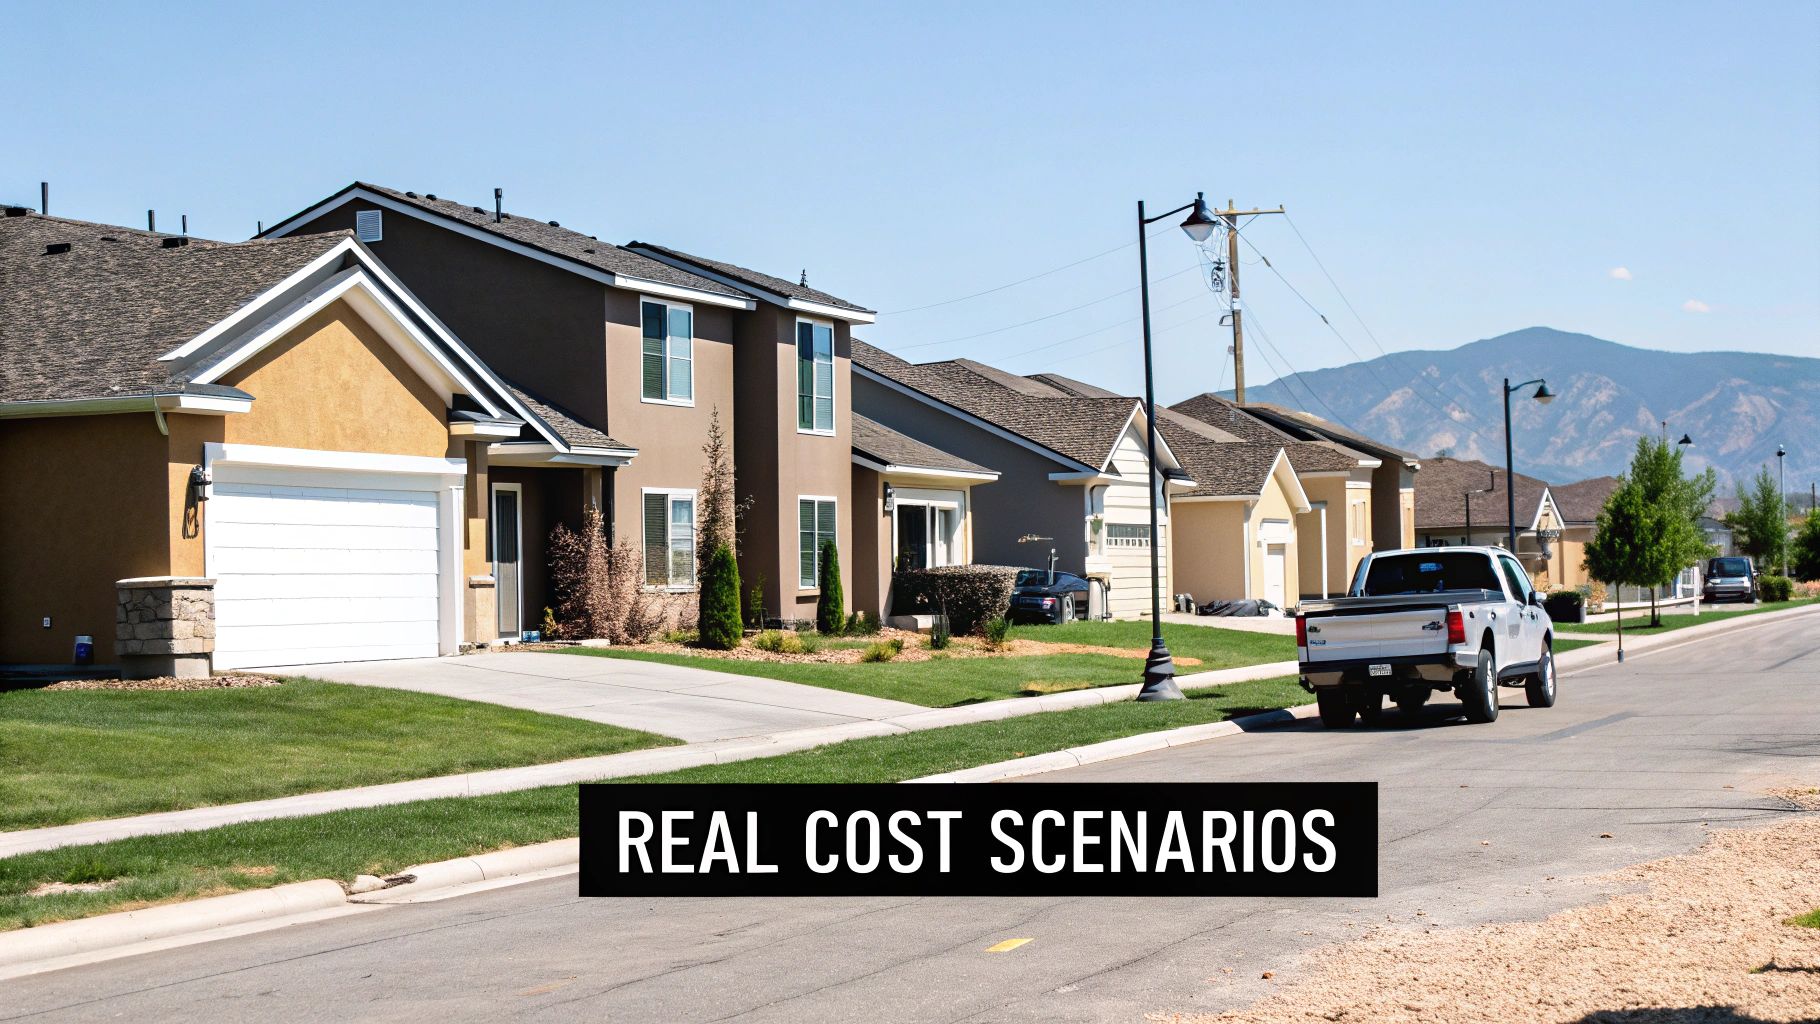
Scenario 1: The Simple and Straightforward Job
Picture a newer home in Lehi with an attached garage. The electrical panel is modern, sitting right on the interior garage wall, and it has plenty of empty slots and available power. The homeowner wants their charger installed just five feet away from that panel.
This is pretty much the ideal setup. The short distance means very little wiring is needed, and because the panel is in great shape, we don't need to touch anything else. An electrician can pop in a new 50-amp breaker, run a short piece of heavy-gauge wire in a surface-mounted conduit, and mount the charger. It’s clean and quick.
- Key Factors: Short wire run (under 10 feet), modern panel with plenty of capacity, easy access.
- Estimated Cost Range: $800 – $1,300
In a job like this, the cost is almost entirely driven by a few hours of standard labor, the charger hardware itself, and the basic materials like the breaker and a small amount of wire.
Scenario 2: The Moderately Complex Case
Now, let's think about a home in Ogden. This time, the electrical panel is tucked away in the basement utility room on the complete opposite side of the house from the attached garage. To get power to the charger's location, the electrician has to run about 75 feet of wire.
That wire has to travel through finished basement ceilings and walls. It involves carefully pulling the cable through floor joists and behind drywall to reach the garage. While the panel itself has enough capacity, the sheer distance and the headache of fishing that wire add significant time and material costs to the project.
- Key Factors: Long wire run (50-100 feet), routing through finished walls/ceilings, more labor-intensive.
- Estimated Cost Range: $1,400 – $2,200
Scenario 3: The Complex Upgrade Situation
Finally, let’s consider a classic, charming home up in the Avenues of Salt Lake City. The house still has its original 100-amp electrical panel from the 1970s. It’s completely full, and it simply lacks the muscle to safely support a new, high-draw EV charger.
This job is really a two-part project. First, the entire electrical panel has to be upgraded to a modern 200-amp panel that can handle the home's existing needs plus the new charger. Only after that critical upgrade is done can the electrician run the dedicated 240V circuit out to the detached garage, which also requires a bit of trenching in the yard.
- Key Factors: Full electrical panel upgrade required, older home wiring, potential trenching for a detached garage.
- Estimated Cost Range: $3,500 – $6,000+
This scenario is a perfect example of how a necessary panel upgrade can become the main cost driver, making it the biggest investment of the three. It’s exactly why a professional, on-site evaluation is the only way to get a truly accurate quote that’s tailored to your home’s specific DNA.
How to Get an Accurate Quote for Your Installation
Now that you’ve seen all the moving parts, let’s talk about the final step: getting a firm, reliable quote. A trustworthy quote is your best defense against expensive surprises down the road. This is where an on-site, professional evaluation becomes absolutely essential to figure out your true level 2 charger installation cost.
Here’s the thing: a quick phone estimate can’t see the specifics of your home. A licensed electrician needs to physically put eyes on your electrical panel to assess its capacity, walk the property to plan the safest and most efficient wiring route, and spot any potential hiccups before a single tool comes out. That in-person look is what separates a vague guess from a solid, dependable number you can actually budget around.
Key Questions to Ask Your Electrician
To make sure your quote is truly comprehensive, it pays to come prepared with a few questions. A real pro will welcome them—it shows you’re serious about a safe, quality installation. This conversation helps guarantee there are no hidden fees waiting for you later.
Make sure to ask these:
- Is the cost of the permit and final inspection included in this price? These are non-negotiable parts of the job that ensure everything is up to code.
- Does this quote cover all necessary materials? This means the breaker, every foot of wire, all the conduit, and the mounting hardware.
- What is the warranty on your workmanship and the materials you provide? A reputable contractor will always stand behind their work.
- Is a potential panel upgrade factored in, or would that be a separate cost? If your panel's capacity is borderline, you need to clarify this from the get-go.
This process isn't just about getting a number; it's about building trust and making sure everyone is on the same page. At Black Rhino Electric, we believe in a transparent, no-surprise approach, ensuring you understand every line item on your estimate. Our commitment to safety-first workmanship is why so many Utah homeowners trust us.
For a more detailed look at what's involved, you can learn more about our dedicated EV charger installation electrician services.
Frequently Asked Questions
Even after digging into the details, it’s completely normal to have a few questions about the level 2 charger installation cost and what the process actually looks like. We hear a lot of the same great questions from homeowners across Weber, Davis, and Salt Lake counties, so let’s clear up a few common ones right now.
Can I Install a Level 2 Charger Myself to Save Money?
The DIY spirit is tempting, especially when you’re looking to save a few bucks, but we strongly advise against it for this kind of project. A Level 2 charger isn't like wiring a new light fixture; it demands a dedicated 240-volt circuit, which is a major electrical undertaking.
Here’s the thing: one wrong connection can be a serious safety hazard, leading to electrical fires or, just as bad, frying your car’s sensitive charging system. On top of that, almost every local building code requires a licensed electrician to pull the permit and perform this kind of installation. Hiring a pro isn’t just about following rules—it’s about protecting your home, your car, and your family.
How Long Does a Typical Installation Take?
Honestly, the timeline is all about the complexity of the job. A straightforward installation—where the charger is going right next to an electrical panel with plenty of extra capacity—can often be wrapped up in just a few hours. Quick and simple.
However, if we need to run wiring a long way through finished walls, install new conduit on the outside of your house, or perform a full electrical panel upgrade, it could easily take a full day or even a bit longer. We’re all about no surprises, so we’ll always give you a clear, realistic timeline with your quote so you know exactly what to expect from start to finish.
Are There Rebates or Tax Credits Available in Utah?
Yes, and taking advantage of them can definitely help reduce your overall cost. The federal government has historically offered tax credits for buying and installing EV charging equipment, and some of those programs are still active.
On a more local level, Utah utility companies like Rocky Mountain Power occasionally roll out rebate programs for home charging setups. These incentives can change from year to year, so it’s always a good idea to check for the latest updates.
For more answers to common electrical questions, feel free to check out our full company FAQ page.
Ready to get a firm, no-surprise quote for your EV charger installation? The experienced, licensed electricians at Black Rhino Electric are here to help. Call us at 385-396-7048 or request a free quote online to schedule your on-site evaluation today.