Planning a new heating and cooling system can feel overwhelming, but a detailed plan makes all the difference. Following a comprehensive hvac installation checklist ensures every critical step, from electrical prep to final testing, is handled correctly for maximum efficiency and safety. This guide breaks down the essential items you need to verify for a smooth, successful project, whether you're a homeowner in Salt Lake County, a property manager, or a general contractor.
Contents
- 1 1. Site Assessment and Load Calculation
- 2 2. Electrical Service and Panel Upgrade Verification
- 3 3. Refrigerant Line Installation and Insulation
- 4 4. Ductwork Design and Installation (or Ductless System Planning)
- 5 5. Outdoor Unit Placement and Foundation Preparation
- 6 6. Thermostat Selection and Installation
- 7 7. System Testing, Evacuation, and Refrigerant Charging
- 8 8. Final Inspection, Startup, System Verification, and Documentation
- 9 8-Point HVAC Installation Checklist Comparison
- 10 Need an Expert Electrician for Your HVAC Project?
1. Site Assessment and Load Calculation
Before a single tool is unboxed, the most critical step of any HVAC installation checklist is a thorough site assessment and load calculation. This process goes far beyond a simple guess based on square footage. It’s a detailed scientific analysis, often using the industry-standard Manual J calculation, to determine the exact amount of heating and cooling your specific property needs to stay comfortable and efficient. Is an improperly sized unit really that big of a deal? Yes, it's one of the most common, and costly, mistakes in HVAC installation.

Here's the thing: an oversized system will cycle on and off too frequently, a process known as short-cycling. This leads to poor humidity control, uneven temperatures, and unnecessary wear and tear, shortening the unit's lifespan. On the other hand, an undersized system will run constantly without ever reaching the desired temperature, driving up your energy bills and leaving you uncomfortable during Northern Utah's peak summer heat or winter cold. Proper load calculation, championed by the Air Conditioning Contractors of America (ACCA), prevents both scenarios.
What Goes Into a Load Calculation?
A certified technician will evaluate multiple factors to calculate your home's unique thermal characteristics, or its "load."
- Measurements: Total square footage and ceiling heights.
- Insulation: The R-value of insulation in walls, ceilings, and floors.
- Windows: The number, size, type (single, double, or triple-pane), and orientation of all windows.
- Air Infiltration: Rates of air leakage through doors, windows, and other gaps.
- Occupancy: The number of people typically living in the home.
- Ductwork: The condition and sealing of your existing duct system.
For example, a 2,500 sq. ft. home in Salt Lake County with old, single-pane windows and poor attic insulation might require a 4.5-ton system. In contrast, a similar-sized, well-insulated modern home might only need a 3-ton unit. This isn't just guesswork; our experience shows that getting this calculation right is the foundation of an efficient system. You can explore more about choosing the right unit in guides on energy-efficient HVAC systems.
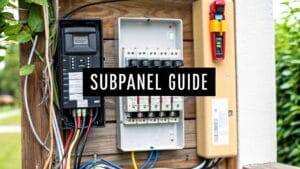
2. Electrical Service and Panel Upgrade Verification
After determining the right-sized unit, the next crucial step in a proper HVAC installation checklist is confirming your electrical system can handle the load. Modern HVAC systems are powerful and have specific electrical demands. Simply plugging one into an outdated electrical panel is a recipe for tripped breakers, poor performance, and a serious fire hazard. This verification ensures your home's electrical panel has the capacity to safely power the new system, which can draw anywhere from 15 to 60 amps.

Let me explain. Many older homes, especially those built before the 1980s in Weber, Davis, and Salt Lake counties, have 100-amp or 150-amp main service panels. These were adequate for their time, but they often lack the extra capacity for a high-efficiency heat pump or central air conditioner alongside today's other electrical appliances. A licensed electrician must assess your panel's current load and determine if an upgrade is necessary. As experts in the field, we know this work is governed by standards like the National Electrical Code (NEC) to guarantee safety and compliance.
Why Is an Electrical Assessment Essential?
A professional electrician will perform a detailed load analysis to prevent electrical system overload.
- Panel Capacity: They verify if the main panel can support the new HVAC circuit without exceeding its total amperage rating.
- Circuit Breaker Sizing: The electrician ensures a dedicated circuit with the correct breaker size is installed to protect the new equipment.
- Wire Gauge: They confirm the wiring from the panel to the HVAC unit is thick enough to handle the electrical current without overheating.
- Grounding: Proper grounding is checked to protect against electrical surges and faults, safeguarding both your equipment and your family.
- Code Compliance: All work is done to meet local codes and NEC standards, which is vital for safety, home insurance, and passing inspections.
For example, a 1970s-era home in Ogden with an original 100-amp service will almost certainly require a 200-amp panel upgrade to safely install a new 5-ton heat pump system. In contrast, new construction in Davis County is often pre-wired with 200-amp service, allowing for direct installation. You can find out more about the complexities of breaker and panel services to understand what your home might need.
3. Refrigerant Line Installation and Insulation
Once the equipment is selected and its placement is planned, the next item on any professional HVAC installation checklist is the refrigerant line set. These insulated copper lines are the vital arteries of your system, carrying refrigerant between the outdoor condenser and the indoor evaporator coil. The correct installation of these lines is absolutely critical for the system's efficiency, performance, and long-term health. It involves carefully running, sizing, and protecting the copper tubing that connects your indoor and outdoor units.

You know what? Improperly installed refrigerant lines can lead to a host of problems. If the lines are too long, kinked, or not insulated correctly, the system can suffer from reduced efficiency, poor performance, and even catastrophic compressor failure. The insulation is particularly important in Northern Utah, where attics and crawl spaces experience extreme temperature swings. Without it, the lines can "sweat" from condensation, leading to water damage and mold, or lose thermal efficiency, forcing your system to work harder and increasing energy costs.
What Goes Into Proper Line Set Installation?
A skilled technician focuses on several key details to ensure the refrigerant lines function perfectly for years to come.
- Proper Sizing: The diameter of the copper lines must match the manufacturer's specifications for your specific unit and the total length of the run.
- Minimal Bends and Length: The route should be as short and direct as possible, with smooth, sweeping bends to avoid restricting refrigerant flow.
- Quality Insulation: High-grade, UV-resistant foam insulation must cover the entire length of the suction line (the larger of the two) to prevent condensation and energy loss.
- Secure Support: Lines must be properly supported and secured to prevent sagging and vibration, which can lead to leaks over time.
- Protection: Technicians must protect the lines from physical damage, such as punctures from nails or sharp edges, often using grommets where they pass through walls.
- Pressure Testing: Before charging with refrigerant, the entire line set is pressure-tested with inert nitrogen to confirm there are absolutely no leaks.
Our experience shows that details matter. For example, a project in Salt Lake City showed that upgrading from old, degraded insulation to new, properly fitted insulation on an attic line set improved the system's overall efficiency by nearly 10%. Conversely, we've seen homes in Weber County with persistent ceiling stains and mold growth, which was eventually traced back to inadequately insulated refrigerant lines sweating in the unconditioned attic space.
4. Ductwork Design and Installation (or Ductless System Planning)
If your HVAC system is the heart, the ductwork is the circulatory system. This network of channels is responsible for delivering conditioned air from the unit to every room in your home. Proper ductwork design and installation are just as important as the system itself in a comprehensive HVAC installation checklist. An expertly designed duct system ensures balanced airflow, consistent temperatures, and optimal efficiency, while a poorly designed one can strangle even the most powerful new furnace or air conditioner.
Here's the thing: many homes, especially older ones, suffer from poorly designed or undersized ductwork. This can cause "hot" and "cold" spots, noisy operation, and high energy bills because the system struggles to push air where it needs to go. For properties without existing ducts or where retrofitting is impractical, a ductless mini-split system offers a powerful alternative, providing zoned comfort without the need for extensive construction. The choice between ducted and ductless is a foundational decision based on your home’s structure and your comfort goals.
Key Aspects of Ductwork and Ductless Planning
A professional technician will use a process called Manual D, the industry standard from ACCA, to design a duct system that perfectly matches your HVAC unit and home layout.
- Sizing and Layout: Ducts must be sized correctly to manage air velocity and minimize friction. The layout must be planned for the most direct, efficient path to all rooms.
- Material Selection: Options include durable sheet metal, flexible ducting (flex duct), or rigid fiberglass duct board, each with specific applications and benefits.
- Sealing and Insulation: All seams, joints, and connections must be sealed with mastic and fiberglass tape, not just duct tape, to prevent costly air leaks. Ducts running through unconditioned spaces like attics or crawl spaces require proper insulation to prevent energy loss.
- Air Balancing: The design should include dampers in supply lines to allow for fine-tuning airflow, ensuring every room receives the right amount of conditioned air.
- Ductless System Placement: For ductless mini-splits, this involves carefully selecting locations for the indoor heads for optimal air distribution and planning the route for refrigerant and electrical lines from the outdoor condenser.
Our expertise confirms the impact of proper ductwork. For example, a 1990s-era home in Ogden with original, undersized ducts was retrofitted with larger return air ducts and had all connections sealed; the result was a 20% improvement in efficiency and far more consistent indoor temperatures. Similarly, a Salt Lake City condo without any existing ductwork successfully installed a three-zone ductless mini-split system, providing customized comfort for each area while avoiding the cost and disruption of installing a full duct network.
5. Outdoor Unit Placement and Foundation Preparation
The outdoor condenser or heat pump is the heart of your HVAC system's cooling and heating power, and its location is far from an afterthought. As a key part of any complete HVAC installation checklist, strategic placement and solid foundation preparation are essential for efficiency, longevity, and quiet operation. Simply plopping the unit down on an uneven patch of dirt is a recipe for disaster, leading to vibration, poor performance, and premature failure.
The outdoor unit works by exchanging heat with the surrounding air. If airflow is blocked, the system can't "breathe," forcing it to work harder, consume more energy, and wear out faster. A proper foundation ensures the unit remains level and stable, preventing stress on refrigerant lines and internal components. For example, a Weber County installation with an inadequate drainage pad led to water pooling, which rusted the base and caused a catastrophic compressor failure—a costly and preventable mistake.
What Goes Into Proper Unit Placement?
A certified technician ensures the location supports peak performance and simplifies future maintenance.
- Clearance: Maintain adequate space on all sides, typically 24-48 inches, to ensure unrestricted airflow. This is non-negotiable.
- Foundation: The unit must sit on a solid, level base, such as a pre-fabricated composite pad or a professionally poured concrete slab.
- Drainage: The site must be graded to direct water away from the unit and your home's foundation, preventing pooling and ice buildup.
- Protection: Shield the unit from direct, intense afternoon sun, falling debris from trees, and snow or ice sliding from eaves.
- Accessibility: Ensure there is enough room for a technician to comfortably and safely service the unit in the future.
- Noise: Position the unit away from windows, patios, and especially bedroom walls to minimize operational noise.
A real-world case from our work in Davis County showed a 15% efficiency loss in a system where dense shrubs grew to block the condenser's airflow. Once the landscaping was trimmed back to provide the necessary clearance, the system's performance and energy consumption returned to normal. For rooftop units in Salt Lake City, this preparation is even more critical, often requiring reinforced concrete pads engineered to handle high winds and manage heavy snow loads.
6. Thermostat Selection and Installation
The thermostat is the brain of your entire HVAC system, acting as the central command center for all heating and cooling operations. Choosing and correctly installing this component is a pivotal step in any complete HVAC installation checklist. A well-chosen thermostat optimizes comfort and efficiency, while a poor choice or faulty installation can undermine the performance of even the most advanced HVAC unit, leading to energy waste and frustration.
Honestly, thermostats are not one-size-fits-all. The right model depends on your lifestyle, your HVAC equipment, and your budget. Options range from simple digital models to sophisticated smart thermostats from brands like Nest, Ecobee, and Honeywell Home. For Northern Utah homeowners, upgrading from a basic model to a programmable or smart thermostat can reduce annual heating and cooling costs by an impressive 10-15%. This is because they allow you to automatically adjust temperatures for when you're away or asleep, preventing unnecessary energy use.
What Goes Into Thermostat Installation?
A professional installation ensures the thermostat communicates perfectly with your HVAC system and accurately reads your home's temperature.
- Compatibility Check: Verify the new thermostat works with your specific HVAC system (e.g., single-stage, multi-stage, heat pump).
- Placement: Mount the thermostat on an interior wall, away from direct sunlight, drafts from windows or doors, and heat sources like lamps or appliances.
- Wiring: Use the proper wire gauge (typically 18-gauge for low-voltage connections) and carefully label all wires before disconnecting the old unit to ensure correct reconnection.
- Calibration: After installation, a technician will test and calibrate the sensors to ensure they are reading the room temperature accurately.
- Smart Features: For smart models, this includes connecting to a stable WiFi signal and configuring settings like learning algorithms, remote access, and maintenance alerts.
The data is clear. A Salt Lake City homeowner recently installed a Nest thermostat and cut their winter heating bill by 12% through its learning and scheduling functions. Similarly, a business in Davis County upgraded to a commercial programmable thermostat with zoning, saving an estimated $2,400 annually. These savings highlight how a small upgrade can have a significant financial impact, making it a critical part of your installation plan.
7. System Testing, Evacuation, and Refrigerant Charging
Once the physical components are securely in place, the system enters a vital, highly technical phase before it can be turned on. This part of the HVAC installation checklist involves comprehensive testing, system evacuation, and precise refrigerant charging. It’s a multi-step process that ensures the system is leak-free, contaminant-free, and charged to perform at peak efficiency and reliability. Skipping or rushing these steps is a direct path to premature component failure and voided warranties.
Here's the thing: your new HVAC system is a closed-loop system, and its lifeblood is refrigerant. If that loop contains leaks, air, or moisture, it can’t function correctly. Moisture, in particular, is a silent killer; it mixes with refrigerant to form corrosive acids that eat away at internal components, leading to catastrophic compressor failure. The procedures popularized by the EPA's Section 608 Certification Program and HVAC Excellence standards are designed specifically to prevent these issues, guaranteeing a healthy start for your unit.
What Goes Into Testing and Charging?
A certified technician with specialized tools is required to perform this work. They follow a strict protocol to prepare the system for operation.
- Pressure Testing: The refrigerant lines are pressurized with inert nitrogen to check for any pinhole leaks that may have occurred during installation.
- Deep Vacuum Evacuation: A powerful vacuum pump is connected to the system to boil off and remove all air and moisture. The technician monitors this process with a micron gauge, aiming for a level below 500 microns.
- Vacuum Hold Test: Once the target vacuum is reached, the pump is shut off, and the system must hold that vacuum for at least 15 minutes to prove it is completely sealed and free of moisture.
- Refrigerant Charging: The exact amount of refrigerant, specified by the manufacturer, is weighed into the system. The final charge is verified using superheat or subcooling measurements, which account for outdoor temperatures.
For instance, a recent Weber County installation revealed a tiny leak in a line set during the nitrogen pressure test. Catching it before charging the system prevented immediate refrigerant loss and long-term compressor damage. Similarly, a retrofit in Salt Lake City where proper evacuation procedures were followed prevented the kind of acid formation that can destroy a new system from the inside out. A properly evacuated and charged system is the only way to achieve the efficiency ratings you paid for.
8. Final Inspection, Startup, System Verification, and Documentation
The job isn’t finished just because the new unit is in place. The final phase of a complete HVAC installation checklist involves a meticulous process of verification, documentation, and planning. This comprehensive final step ensures that every mechanical and electrical component is installed correctly, the system operates to manufacturer specifications in all modes, and you, the owner, are equipped with the knowledge and documents needed for long-term reliability. Skipping this stage can lead to performance issues, voided warranties, and unexpected failures down the road.
This final verification is where all the preceding steps come together. It confirms that the system is not only running but running optimally. A technician will perform a series of tests to measure pressures, temperatures, and airflow, comparing the live data against the design specifications. For example, during a commercial retrofit in Salt Lake City, final testing might document an 18°F temperature differential between the return and supply air, confirming the system is performing within the expected 18-22°F range and effectively cooling the space.
What Does Final Verification and Handoff Involve?
A professional contractor will walk through a detailed checklist to confirm every aspect of the installation is perfect and that you are prepared to operate your new system.
- System Startup and Testing: The technician will power on the system and test all its functions: heating, cooling, emergency heat, and dehumidification. They will record vital statistics like refrigerant pressure, voltage draw, and temperature splits to establish a performance baseline.
- Safety Control Verification: All safety interlocks, such as high-pressure cutoffs, limit switches, and the main electrical disconnect, are tested to ensure they function correctly and protect the equipment. If you ever suspect an electrical issue later, it's wise to contact a professional for troubleshooting electrical problems.
- Documentation and Warranty: You will receive a complete documentation package, including manuals, installation records, and equipment serial numbers. Crucially, the installer should register the warranty with the manufacturer immediately to activate your full coverage.
- Customer Training: The technician should show you how to operate the new thermostat, explain the system’s features, and outline the maintenance schedule. An Ogden-based contractor found that providing this basic training reduced first-season service calls by 40%.
- Maintenance Planning: Before leaving, the contractor should help you schedule your first preventive maintenance visit for the upcoming spring or fall to keep the system running efficiently, especially given Northern Utah's extreme seasonal shifts.
8-Point HVAC Installation Checklist Comparison
| Task/Step | Implementation Complexity | Resource Requirements | Expected Outcomes | Ideal Use Cases | Key Advantages |
|---|---|---|---|---|---|
| Site Assessment and Load Calculation | Moderate | HVAC professional, measuring tools, insulation/windows data, utility bills | Correctly sized system, improved efficiency and comfort | New installs, replacements, renovations in extreme climates | Prevents oversizing/undersizing; optimizes efficiency and lifespan |
| Electrical Service Verification | Moderate–High | Electrical testing tools, panel hardware, permits, utility access | Adequate circuit capacity, reduced overload/fire risk | Older homes, high-capacity HVAC, homes needing future upgrades | Ensures safety, enables full system performance, future-proofing |
| Refrigerant Line Installation | Moderate | Copper tubing, climate-rated insulation, supports, access to chase spaces | Minimized thermal loss/condensation, reduced leaks, better efficiency | Split systems, long line runs, attic/crawlspace installations | Improves efficiency, prevents moisture damage and refrigerant loss |
| Ductwork/Ductless Planning | High | Duct materials or mini-split equipment, sealing materials, installers | Balanced airflow, reduced leakage, improved indoor air quality | Homes with poor ducts, new construction, ductless retrofits, zoning needs | Optimizes comfort and efficiency; supports zoning and IAQ control |
| Outdoor Unit Placement | Low–Moderate | Concrete pad or mounting, vibration mounts, clearance space | Proper airflow, reduced vibration/noise, longer equipment life | Outdoor installations in snowy/windy areas or tight yards | Protects unit, improves performance and maintenance access |
| Thermostat Installation | Low | Low-voltage wiring, compatible thermostat, Wi‑Fi for smart models | Improved control, automation, ~10–15% energy savings (smart models) | Energy-conscious homes, smart home integration, zoning control | Remote control, scheduling, diagnostics, long-term energy savings |
| System Testing & Charging | High | Manifold gauges, vacuum pump, leak detectors, certified technician | Leak-free system, correct refrigerant charge, reliable operation | New installations, retrofits, systems with contamination or long runs | Prevents compressor failure, ensures efficiency and environmental compliance |
| Final Inspection & Handoff | Moderate | Test equipment, documentation tools, trained techs, digital storage | Verified system performance, warranty activation, maintenance plan | Project closeout, resale, warranty-reliant installations | Catches defects early, provides performance baseline and warranty proof |
Need an Expert Electrician for Your HVAC Project?
A successful HVAC installation depends heavily on a safe, compliant, and robust electrical system. From panel upgrades and dedicated circuits to final connections and safety checks, the electrical work is not a place to cut corners. If you're in Weber, Davis, or Salt Lake counties and need a licensed electrician to ensure your new HVAC system is powered correctly and safely, give Black Rhino Electric a call at 385-396-7048 or request a free quote online to get started.