Thinking about that new home office, workshop, or maybe finally finishing the basement? Sooner or later, that leads to the big question of how to add circuit to electrical panel. Before you dive in, it’s crucial to understand that this is more than just connecting wires; it's about ensuring your home's entire electrical system can handle the new demand safely and reliably.
Contents
Is Your Electrical Panel Ready for a New Circuit?
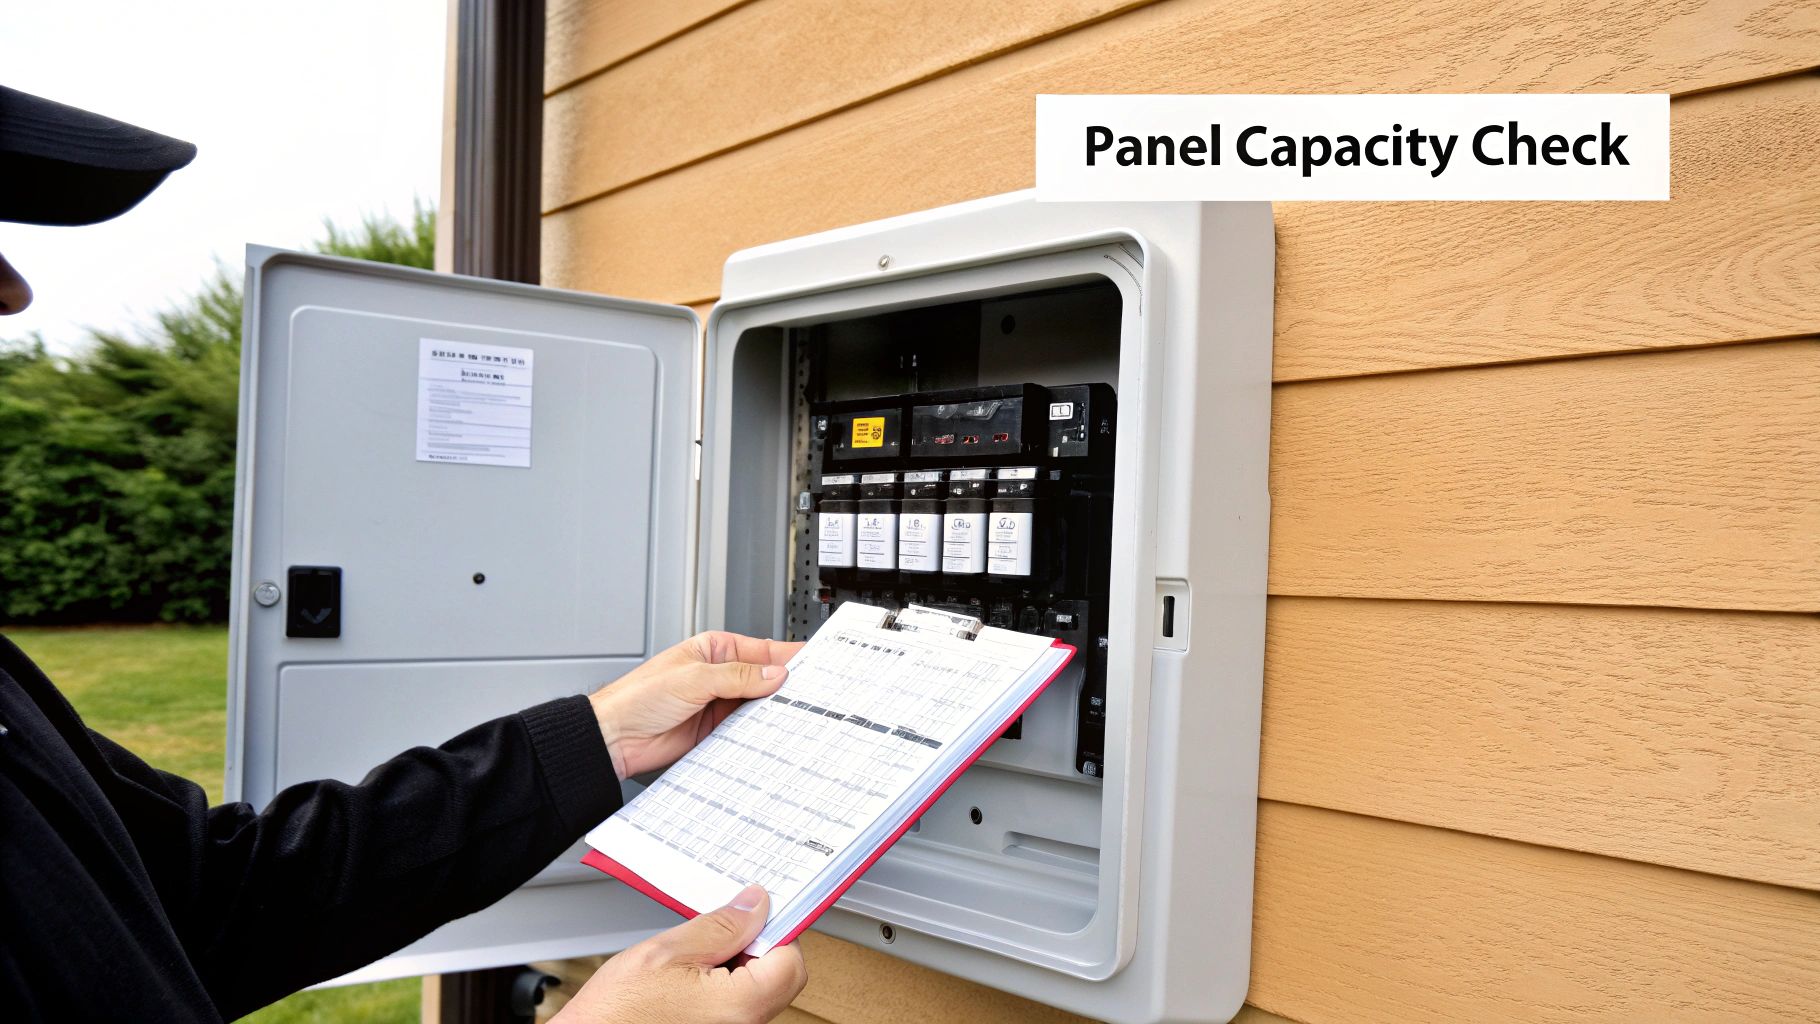
Before you buy a single breaker or a foot of wire, the first move is always a hard look at your existing electrical panel. Let me explain. Just because you see an empty slot doesn't automatically mean your panel can handle more power. Honestly, this is the single most overlooked step, and it’s where many well-intentioned DIY projects run into serious trouble.
Think of your home's electrical panel as the heart of its power system. It has a maximum capacity, and you can't just keep adding demand without making sure it can handle the strain. This initial check is all about preventing an overload, which can lead to constantly tripped breakers or, in a worst-case scenario, a serious fire hazard.
Checking Your Panel's Max Amperage
So, where do you begin? Start by finding your panel's maximum amperage rating. Open the panel door and look for the main breaker—it’s usually the biggest one at the very top or bottom. The number stamped on it, typically 100, 150, or 200, tells you the total amperage your service can deliver.
- 100-Amp Panels: Common in older homes, these can get pushed to their limits pretty quickly with modern appliances. Adding a major new circuit, like one for a hot tub, might require a full panel upgrade.
- 150-Amp Panels: These offer a bit more breathing room and can usually support additions like a new home office circuit or a dedicated line for a workshop.
- 200-Amp Panels: This is the modern standard for new construction. It provides plenty of capacity for most homes, even those with EV chargers and all-electric appliances.
If your home has a 100-amp service, you need to be especially careful. Many of these older panels here in Utah are already running close to their maximum load after decades of appliance additions.
The Importance of a Load Calculation
The next critical step is a load calculation. This is how you figure out how much power your home is currently using and whether there’s enough capacity left for the new circuit you want. While a full, code-compliant calculation is complex work best left to a pro, you can do a simplified version to get a rough idea.
A basic load calculation involves adding up the wattage of all the major appliances and lighting in your home. It gives you a snapshot of your home's total electrical demand.
Key Takeaway: An open slot in your breaker box is not an invitation. It's just a space. The real green light comes from confirming your panel’s service rating and current load can safely accommodate more demand.
Don't Forget About Local Permits
Finally, never skip the permit process. In areas like Weber, Davis, and Salt Lake counties, most significant electrical work legally requires a permit. This isn't just bureaucratic red tape; it's a critical safety check.
The permitting process ensures that the work is inspected by a professional who verifies it meets local codes. Skipping this can create huge headaches if you ever decide to sell your home, as unpermitted work can void your homeowner's insurance and lead to some pretty hefty fines. You can explore more about what goes into safe and professional electrical panel services to understand why compliance is so important.
Gathering the Right Tools and Materials
Having the right gear is the first step in knowing how to add circuit to electrical panel, and this goes way beyond just convenience—it’s the foundation of a safe and successful job. Attempting electrical work with a half-empty toolbox is a recipe for frustration and dangerous mistakes.
Before you touch a single wire, take the time to get every single item lined up. Pausing mid-project to run to the hardware store is the last thing you want to do with a live panel open.
Your Essential Safety and Hand Tools
Working inside an electrical panel is no place for improvisation. Certain tools are completely non-negotiable for protecting you from electric shock and ensuring your connections are rock-solid. You know what? If you buy one thing, make it a reliable voltage tester.
- Voltage Tester (Non-Contact): This is your first line of defense. You’ll use it to prove, without a doubt, that the power is off before your hands go anywhere near the panel’s guts.
- Insulated Screwdrivers: You'll need both flathead and Phillips head screwdrivers with handles rated for electrical work. They’re designed to protect against accidental contact with a live component.
- Wire Strippers: A quality pair of strippers cleanly removes the plastic sheathing without nicking the copper wire beneath, which is absolutely critical for a safe, strong connection.
- Lineman's Pliers: These are the workhorses. You’ll use them for cutting thick electrical cables and twisting wires together before capping them with a wire nut.
- Needle-Nose Pliers: Perfect for bending the end of a wire into the perfect hook needed to wrap it around a terminal screw on an outlet or switch.
- Flashlight or Headlamp: Let’s be real, electrical panels are usually tucked away in dark basements, closets, or garages. Good lighting isn't a luxury; it’s a necessity for seeing what you’re doing.
Before you start any electrical project, ensuring you have the right gear is critical. You can find more information on this topic in a detailed guide covering essential electrical tools and equipment to make sure your toolkit is complete.
Selecting the Correct Breaker and Wire
The materials you choose are just as important as the tools you use. The circuit breaker and the wire must be correctly matched to each other and to the panel itself. Using the wrong combination isn't just a minor mistake—it's a significant fire hazard.
A common mistake is installing a 20-amp breaker on a 14-gauge wire. The wire can overheat and melt its sheathing long before the breaker ever trips, creating a hidden fire risk inside your walls.
Let's break down the components you'll need to grab. The new circuit breaker must be the correct type and brand for your specific panel. No, brands are not interchangeable. A Square D breaker, for example, won't fit properly or safely in a Siemens panel.
The wire gauge is determined by the breaker's amperage. For a standard 120-volt circuit, the rules are pretty simple: a 15-amp breaker requires 14-gauge wire, and a 20-amp breaker requires 12-gauge wire. The cable will be clearly labeled, for instance, as "NM-B 14/2," which means it contains two insulated conductors (plus a bare ground wire) of 14-gauge thickness.
Here's a quick checklist of the essential tools and materials you'll need for a safe and compliant circuit installation. Getting these right from the start saves a ton of headaches.
Essential Tools and Materials for Circuit Installation
| Item | Specification or Type | Pro Tip |
|---|---|---|
| Circuit Breaker | Match panel brand (e.g., Square D, Eaton). Select amperage (15A or 20A). Choose type (Standard, AFCI, or GFCI). | Take a clear photo of your existing breakers and the panel label before heading to the store to guarantee a perfect match. |
| Electrical Wire | NM-B Cable. 14/2 AWG for 15-amp circuits. 12/2 AWG for 20-amp circuits. | Buy about 25% more wire than you think you'll need. It's always better to have extra than to come up short mid-pull. |
| Cable Connectors | Sized to match the knockout hole in the panel (typically 1/2 inch). | Use plastic snap-in connectors for a quick and secure installation where the cable enters the panel box. They're a real time-saver. |
| Wire Nuts | Assorted sizes. | Choose a wire nut rated for the number and gauge of wires you are connecting. Don't guess—it ensures a tight, safe splice. |
Once you’ve got all your gear laid out and ready, you're prepared to move on to the next phase: safely prepping the panel itself for the new circuit.
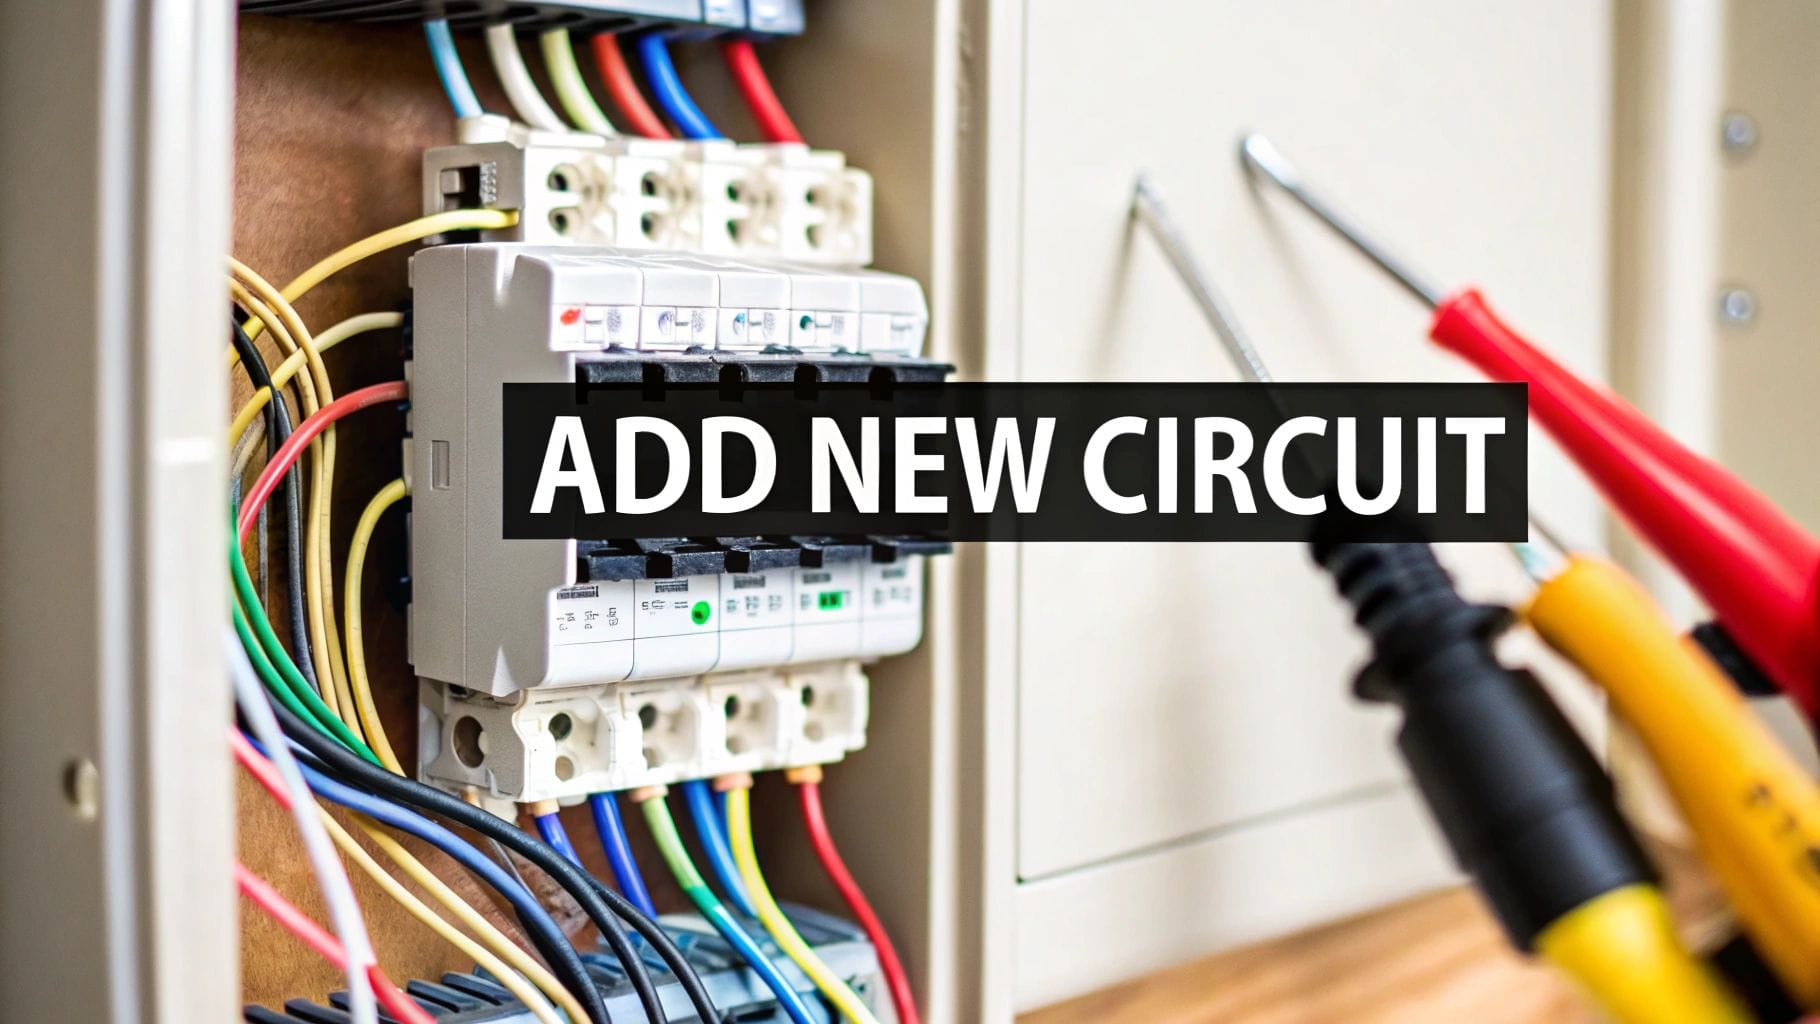
A Step-by-Step Guide to Installing a New Circuit
Alright, this is where the rubber meets the road. Every single move you make from here on out matters. Taking the time to do this properly and safely is the thin line between a successful upgrade and a serious, life-altering hazard. We’re going to walk through the entire process, focusing on the meticulous details that keep you safe and ensure the job is done right.
Think of this less as a simple to-do list and more as a safety-first protocol.
First Things First: De-Energizing the Panel
Before you even think about grabbing a screwdriver to take off that panel cover, you have to guarantee there is zero power flowing through it. This is the most critical step of the entire job. There are no shortcuts.
- Kill the Main Breaker: Find the largest breaker, usually sitting right at the top of your panel. Flip it firmly to the "OFF" position. This should cut power to every circuit in your home.
- Verify with a Voltage Tester: Now, grab your non-contact voltage tester. Carefully open the panel door and touch the tip of the tester to the terminal screws on a few of the individual circuit breakers. It shouldn't light up or make a sound. Nothing.
- Double-Check the Main Lugs: Here's a crucial point: even with the main breaker off, the fat wires coming into the top of the panel from your meter are still live. Never, ever touch these. Use your voltage tester near them to confirm it’s working—it should light up here, indicating power. Then, go back and test the breaker terminals one last time to be absolutely certain they are de-energized.
Expert Insight: Always, always treat every wire as if it's live until you've proven otherwise with a reliable tester. This one habit can prevent a life-threatening accident. Trust your tester, not your assumptions.
Prepping the Panel and Running Your New Cable
Once you've confirmed the panel is dead, you can safely get it ready for the new circuit.
Go ahead and remove the screws holding the panel cover (we call it the "dead front") and set it aside. You're now looking at the guts of the panel. Find an available knockout—that's one of the small, partially punched-out metal circles on the box. A screwdriver and a firm tap from a hammer will pop it right out.
Next, you'll need to run your new electrical cable from its destination—maybe a new outlet in the garage—all the way back to the panel. Make sure you leave at least 18-24 inches of extra cable hanging where it enters the panel. Trust me, you'll be grateful for that slack when you're trying to make clean, stress-free connections.
The breaker, the wire, and the tester are your core tools for this job, and each one plays a vital role in safety and function.
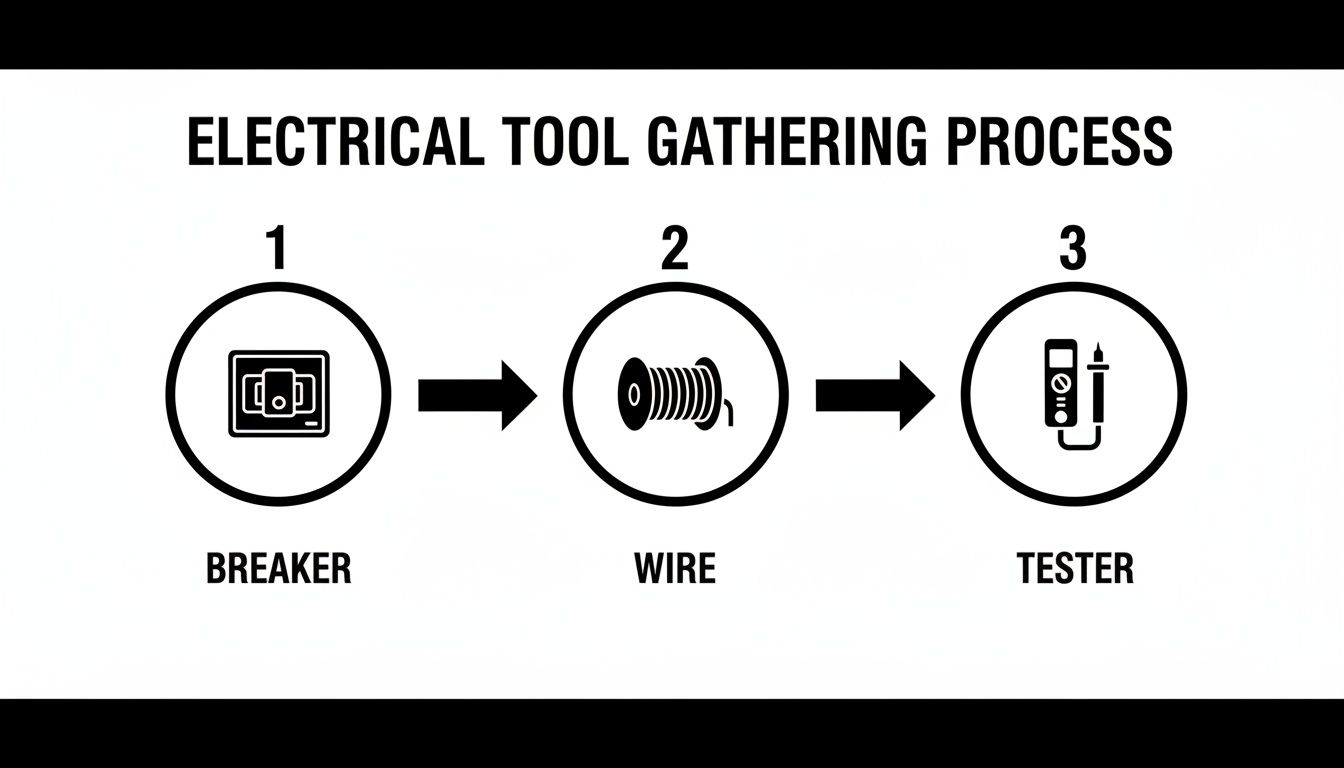
The breaker protects the circuit, the wire carries the load, and the tester protects you.
Making Connections Inside the Panel
This is where precision is everything. You'll be connecting the three wires from your new cable to three specific spots inside the panel.
Start by carefully stripping about 6-8 inches of the outer plastic sheathing from the cable. This will expose the insulated black (hot) and white (neutral) wires, plus the bare copper ground wire. Now, strip about 3/4 of an inch of insulation off the ends of the black and white wires.
- Land the Ground Wire: Take the bare copper ground wire and guide it over to the grounding bus bar. This is a metal strip, usually with green screws, where all the other grounds are connected. Pop the wire into an open terminal and tighten the screw down firmly.
- Connect the Neutral Wire: Next, do the same with the white neutral wire, but connect this one to an open spot on the neutral bus bar. This bar typically has silver-colored screws. Get it snug, but don't crank on it so hard you damage the wire.
- Hook Up the Hot Wire: Finally, the black hot wire connects directly to the terminal screw on your new circuit breaker.
With the wires landed, it's time to install the breaker itself. Just align it with an open slot on the panel's main bus and press it firmly into place. You should hear and feel a solid "click" as it seats securely.
If you're in the middle of a bigger project, understanding how this fits into the grand scheme is helpful. You might find our guide on electrical work during a remodel useful.
Finalizing and Testing Your New Circuit
You're in the home stretch. Carefully tuck all the wires into the sides of the panel so nothing gets pinched or strained. Put the panel cover back on, making sure to pop out the little metal tab that corresponds to your new breaker's location.
Now you can bring the power back on. First, make sure the new circuit breaker you just installed is in the "OFF" position. Then, flip the main breaker back to "ON." Finally, switch on your new breaker.
The moment of truth: go to the new outlet or fixture you installed and plug in a lamp or use a circuit tester to confirm you have power. The last job is back at the panel—label the new breaker clearly in the directory. You'll thank yourself later, and so will any future homeowner.
Adding a dedicated circuit is a pretty common project. On average, a professional installation can cost between $570 and $1,100, depending on things like how far the wire has to run and how complex the job is.
Understanding AFCI and GFCI Breaker Requirements
Adding a new circuit isn’t just about getting power from point A to point B. It’s about delivering that power safely. Have you ever wondered why there are so many different kinds of breakers? Installing the wrong one when you add a circuit to an electrical panel isn't a minor slip-up—it's a serious safety violation. This is where you’ll run into a bit of an alphabet soup: AFCI and GFCI. Let's clear up what these critical safety devices actually do.
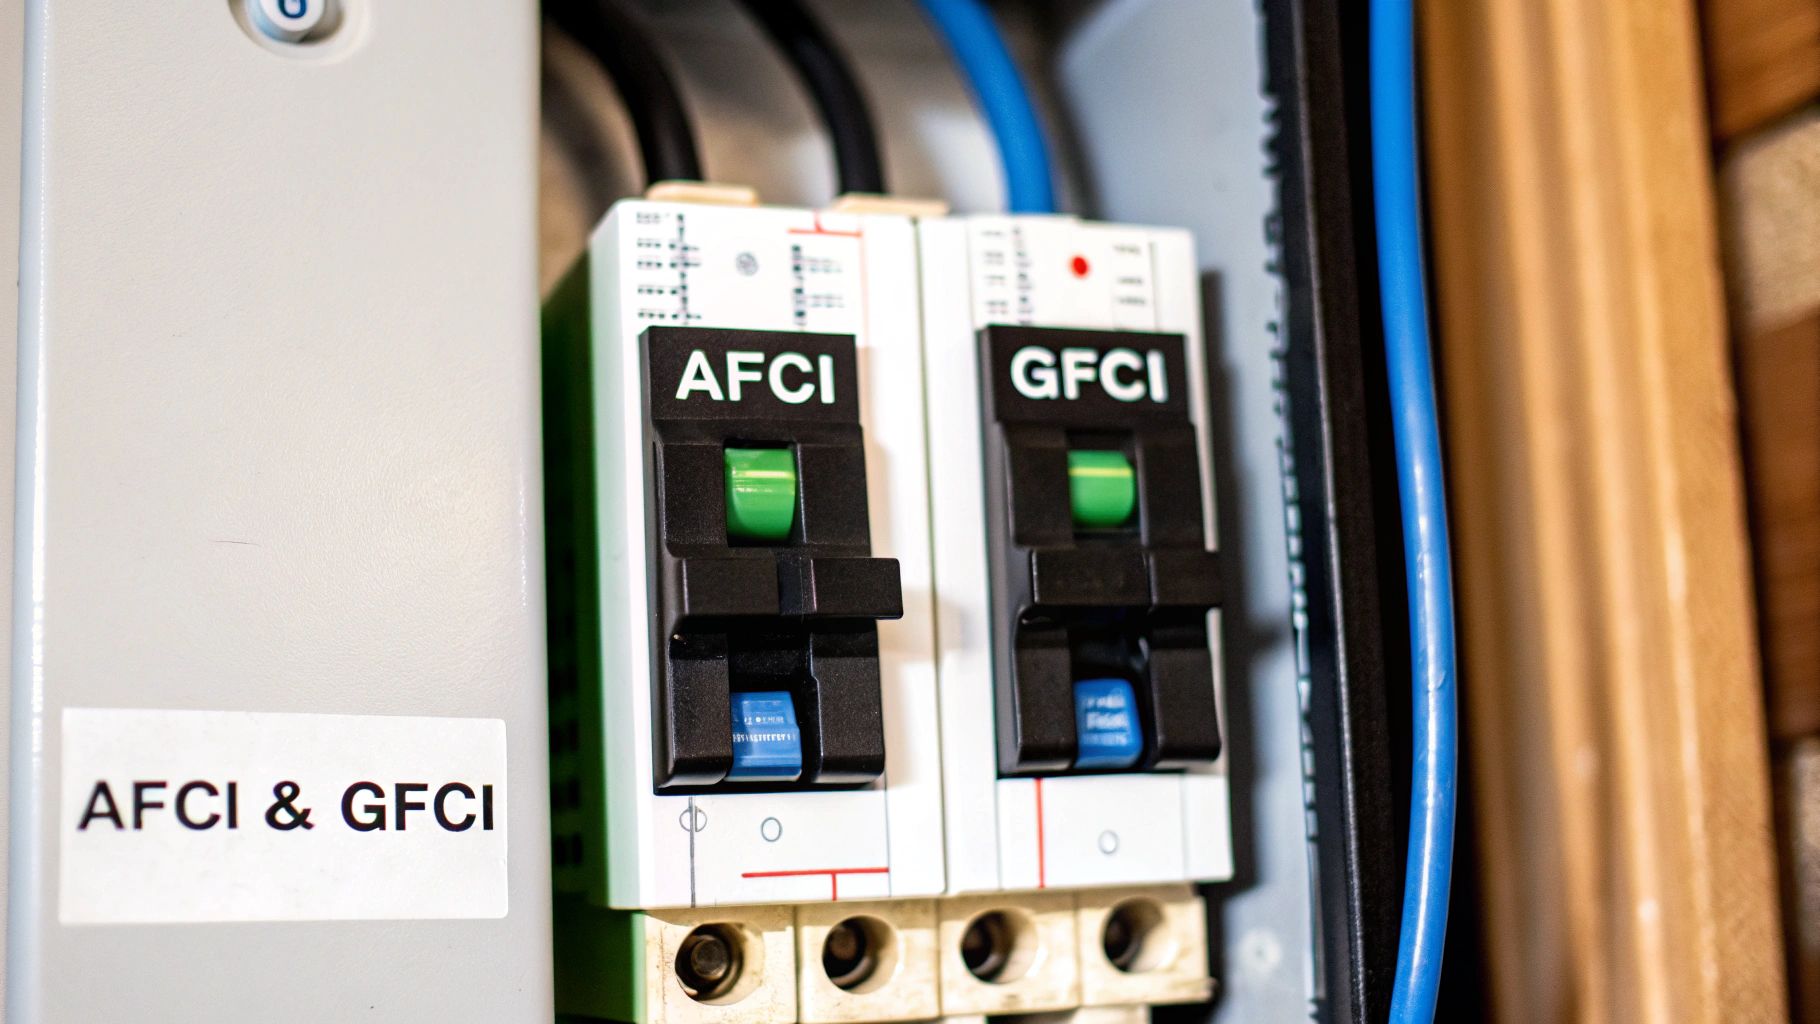
What GFCI Breakers Do
A Ground-Fault Circuit Interrupter (GFCI) is your frontline defense against electric shock. Its one job is to monitor the flow of electricity in a circuit. If it detects even a tiny imbalance—meaning some current is leaking out and potentially flowing through a person—it shuts the power off in a fraction of a second.
This rapid response is exactly why GFCI protection is mandatory anywhere electricity and water might cross paths.
- Bathrooms: All outlets here need it. No exceptions.
- Kitchens: Specifically for outlets serving countertop surfaces.
- Garages and Unfinished Basements: Concrete floors can hold moisture, creating a perfect path to ground.
- Outdoors: Any exterior receptacle needs this protection.
- Laundry Areas: Around sinks and washing machines.
What AFCI Breakers Do
While GFCIs protect people from shock, an Arc-Fault Circuit Interrupter (AFCI) protects your home from fire. It’s a more sophisticated device designed to detect dangerous electrical arcs—the kind that happen from a frayed cord, a loose connection, or a nail accidentally driven through a wire.
These tiny arcs create intense heat that can easily ignite surrounding materials like wood framing or insulation. An AFCI breaker recognizes the unique electrical signature of a dangerous arc and cuts the power before a fire can even start.
Key Takeaway: Think of it this way—GFCI is for personal safety from shock, while AFCI is for property safety from fire. Under current codes, both are non-negotiable.
Where You Need Each Type of Protection
The National Electrical Code (NEC) has expanded its requirements over the years, making AFCI and GFCI protection mandatory in more and more places. Here's the thing: for many new circuits, you might even need a dual-function breaker that provides both types of protection. If you want to dive deeper, you can learn more about the specifics of GFCI power outlet requirements and how they apply in different settings.
Here’s a simplified breakdown for new 120-volt, 15- and 20-amp circuits.
| Location in Home | Required Protection | Primary Risk |
|---|---|---|
| Kitchens | Both AFCI & GFCI | High risk of both shock (sinks) and fire (high-power appliances). |
| Bathrooms | GFCI | High risk of electric shock due to water presence. |
| Bedrooms & Living Rooms | AFCI | High risk of arc-faults from damaged cords (lamps, chargers). |
| Laundry Rooms | Both AFCI & GFCI | Risk of shock from water and arc-faults from appliance motors. |
| Garages & Outdoors | GFCI | High risk of shock due to moisture and grounded surfaces. |
Navigating these requirements is one of the most compelling reasons to bring in a professional. An experienced electrician will know the exact, up-to-date codes for your specific area in Utah, ensuring your new circuit is not only functional but completely safe for you and your family.
Common Mistakes and When to Call a Professional
Even with the best intentions, DIY electrical work is filled with landmines that can create some seriously hazardous situations. Learning how to add circuit to an electrical panel from a guide is one thing, but pulling it off flawlessly in your own home is a completely different ballgame.
Even small mistakes—nicking a wire’s insulation or grabbing the wrong size breaker—can have major consequences down the road.
Common Pitfalls We See in DIY Electrical Work
We get called in to fix a lot of well-meaning DIY projects. One of the most frequent—and dangerous—mistakes is mismatching the wire gauge to the breaker's amperage. Putting a 20-amp breaker on a 14-gauge wire, which is only rated for 15 amps, creates a massive fire hazard. The wire can get dangerously hot long before the breaker ever thinks about tripping.
Another classic issue is not leaving enough slack inside the panel. A messy, crowded panel with wires pulled taut is a nightmare to work in. Worse, it puts stress on the connections, which can lead to loose terminals and dangerous arcing over time.
A few other common slip-ups include:
- Incorrect Wire Connections: Swapping the neutral and ground wires or landing them on the wrong bus bars can create shock hazards and fry sensitive electronics.
- Over-Tightening Terminals: Cranking down on terminal screws with all your might can damage the wire and the breaker itself, creating a poor connection that's prone to overheating.
- Working on an Energized Panel: This is the ultimate mistake. Failing to properly shut off the power—and then verifying it's truly dead—can be fatal. No shortcuts, ever.
When you're dealing with electricity, safety protocols aren't optional. For a deep dive into risk assessment and arc flash prevention, the NFPA 70E electrical safety guidance is the industry standard.
When the Job Is Too Big to Handle Alone
Knowing your limits is the smartest tool you can have in your bag. While adding a simple outlet might seem straightforward, certain red flags should immediately tell you it's time to put down the pliers and call a licensed electrician. Electrical systems, especially in older homes, can hide a lot of ugly surprises.
Research from the Electric Power Research Institute (EPRI) shows that a huge number of homes aren't ready for modern electrical demands. Around 30% of single-family homes may need panel or service upgrades to handle full electrification, and over 20% of households are still running on 100-amp service or less. You can see the full breakdown on panel capacity across the U.S..
The takeaway here is critical: your panel might already be maxed out, making a professional load calculation and assessment non-negotiable.
Red Flags That Mean It's Time to Call Black Rhino Electric
Some jobs are just not worth the risk. The safety, code compliance, and sheer peace of mind you get from a professional installation are invaluable.
Deciding when to tackle a project yourself versus calling in a pro can be tough. This table should help clarify when it's safe to proceed with caution and when it's time to pick up the phone.
DIY vs Professional: Which Is Right for Your Project?
| Scenario | DIY Feasibility | When to Call an Electrician |
|---|---|---|
| Simple 120V Circuit | Possible for experienced DIYers. Requires strict adherence to code and safety protocols. | Always if you feel unsure at any step, especially when making final panel connections. |
| Panel is Full | Not a DIY job. Requires major work like adding a subpanel or upgrading the main service. | Immediately. This is a complex job that requires a permit and a licensed electrician. |
| 240-Volt Circuit | Strongly discouraged. Involves high amperage and complex wiring for EV chargers, hot tubs, or ranges. | Always. The risks of fire, equipment damage, and serious injury are extremely high. |
| Aluminum Wiring | Not a DIY job. This wiring requires special connectors and techniques to prevent fire hazards. | Immediately. If you discover aluminum wiring, stop work and call a professional for an assessment. |
For complex or high-stakes jobs like installing an EV charger, hooking up a hot tub, or dealing with an outdated, full panel, the expertise of a licensed electrician is your best insurance policy.
Frequently Asked Questions About Adding a Circuit
Even the most detailed guide can leave you with a few questions, and that's completely normal. When you're dealing with your home's electrical system, you want to be sure. Getting it right is non-negotiable. Here are some of the most common questions we get from homeowners across Utah, answered from our years of experience in the field.
How Do I Know if My Electrical Panel Is Full?
This one can be tricky. A panel that's physically full—where every single slot has a breaker—is easy to spot. But a panel can be electrically "full" even if you see open slots. Think of it like a weight limit. You might have a 100-amp panel with empty spaces, but if the total load is already close to that limit, adding one more circuit could be the straw that breaks the camel's back.
Here are a few signs your panel might already be overloaded:
- Breakers trip for no obvious reason.
- Lights flicker or dim when a big appliance, like the air conditioner, kicks on.
- You hear a faint buzzing or humming coming from the panel itself.
It's a fact: a study on U.S. homes found that houses built before the 1960s have 100-amp or smaller panels at rates 5 to 9 times higher than homes built after 2000. For these older homes, it's pretty common to find zero remaining breaker spaces.
An experienced electrician can perform a professional load calculation. It’s the only way to know for sure what your panel's true capacity is and confirm if it's safe to add another circuit.
What Is the Difference Between a 15-Amp and 20-Amp Circuit?
The main difference here is how much power they can safely handle, and you can't just pick one at random. The National Electrical Code has strict rules about where each can be used.
A 20-amp circuit is the heavy lifter. It uses a thicker, 12-gauge wire and is required for areas with high-draw appliances. We’re talking kitchen countertop outlets for microwaves and blenders, bathroom outlets for hair dryers, and laundry rooms.
The 15-amp circuit, on the other hand, uses a thinner, 14-gauge wire. It’s perfectly fine for general lighting and the standard outlets you'll find in bedrooms and living rooms. Here's the critical part: you should never, ever install a 20-amp breaker on 14-gauge wire. It’s a serious fire hazard because the wire can overheat and melt long before the breaker ever trips.
Can I Add a Circuit for an EV Charger or a Hot Tub Myself?
This one is a firm "no" for DIY. EV chargers and hot tubs aren't like adding another outlet in the garage. They require a dedicated 240-volt circuit with high amperage, often between 40A and 60A. This puts a huge load on your electrical system and involves working with thick, heavy-gauge wire and a big double-pole breaker.
The risks are simply too high. One small mistake can lead to catastrophic failure, including electric shock, fire, or frying your very expensive equipment. Because of the complexity, safety risks, and strict code requirements, this is a job that should always be handled by a licensed and insured electrician. They know how to do it safely and correctly the first time.
How Much Does It Cost to Have a Professional Add a New Circuit?
For a standard 120-volt circuit, the cost in Utah generally falls somewhere between $250 and $900. The final price really depends on a few key factors: how long the wire run is, how easy it is to access the walls and ceiling, and the type of breaker needed. AFCI/GFCI breakers, for example, cost more than standard ones.
If your project is more involved and requires a full panel upgrade or the installation of a subpanel to make room, the cost will naturally be higher.
When it comes to the safety of your home and family, there's no substitute for professional expertise. If you're ready to add a circuit and want the job done right, the team at Black Rhino Electric is here to help. Call us today at 385-396-7048 or request a free quote online for a clear, transparent estimate.