Pulling into a dark driveway after sunset gets old fast. A skilled outdoor lighting electrician helps turn that space into something safer, easier to use, and a lot more inviting, especially with Northern Utah’s snow, ice, and wide temperature swings.
Contents
The Vision Behind Your Outdoor Lighting Plan
A good lighting plan starts before anyone opens a trench or mounts a fixture. It starts with one question. What do you want the yard to do after dark?
Some homeowners want better visibility from the street to the front door. Others want a patio that still feels comfortable after sunset. Some care most about highlighting stonework, trees, or a retaining wall they invested real money in. All of those are valid, but the plan changes depending on the goal.

The demand behind this kind of work is real. The global outdoor lighting market was valued at USD 13.20 billion in 2024 and is projected to reach USD 22.01 billion by 2030, with North America holding 35% market share, according to Grand View Research’s landscape lighting market analysis. Homeowners are putting more thought into outdoor lighting because it affects security, curb appeal, and how the property feels every night.
Three jobs your lighting should do
Most successful systems handle some mix of these three priorities:
- Safety on walking surfaces: Steps, side yards, driveways, and transitions between lawn, patio, and hardscape need clear light, not harsh glare.
- Security around entries and dark zones: Back gates, corners of the house, garage areas, and pathways matter more than random bright spots in the middle of the yard.
- Aesthetics that look intentional: Uplighting a textured wall, washing a fence line, or softly lighting a tree canopy can make the whole property feel finished.
Practical rule: If every fixture is trying to be the brightest light in the yard, the design usually fails.
What to walk and identify before installation
Before choosing fixtures, walk the property at dusk. That tells you more than looking at it at noon.
Ask yourself:
- Where do people walk? Front path, side gate, stairs, patio edge.
- What disappears at night? Address numbers, grade changes, planters, low walls.
- What deserves attention? Mature trees, masonry, entry columns, garden beds.
- What should stay quieter? Bedroom windows, neighbors’ property lines, seating areas where glare gets annoying fast.
A lot of Utah homes also have layered outdoor spaces. You may have a driveway approach, front entry, backyard patio, and a detached path or side run. Those areas don’t all need the same brightness. They need the right kind of light in the right place.
Design for Utah conditions, not just for the photo
Northern Utah weather changes the conversation. Freeze-thaw cycles, irrigation, snow buildup, and shifting soil all affect fixture placement and wiring protection. A lighting plan that looks good on paper can still become a maintenance headache if fixtures are placed where snow gets piled, water sits, or lawn equipment keeps clipping them.
That’s why a professional plan isn’t only about beauty. It’s also about survivability.
Warm, targeted lighting usually beats broad, overpowering light. It feels better, looks cleaner, and works better with the architecture most homes already have.
If you’re standing in the yard wondering whether to light the path, the patio, the trees, or the front elevation first, start with the areas people use and the areas that disappear at night. The best-looking systems usually begin with practical needs, then build outward into ambiance.
Choosing Your System Low-Voltage vs Line-Voltage
This is the biggest technical fork in the road. Most residential projects in Weber, Davis, and Salt Lake counties are better served by low-voltage lighting, but not every property is the same.

Low-voltage systems typically run at 12V or 24V through a transformer. Line-voltage systems run at 120V and require a different level of installation discipline, protection, and inspection. That difference matters for safety, fixture selection, trenching, and long-term serviceability.
Side by side comparison
| Feature | Low-Voltage (12V) | Line-Voltage (120V) |
|---|---|---|
| Typical use | Path lights, accent lights, garden features, most residential yards | Large-area floodlighting, some commercial needs, longer heavy-duty runs |
| Safety profile | Safer to work with when properly designed and transformed | Higher risk if installed incorrectly |
| Power source | Requires transformer stepping down voltage | Direct 120V circuit |
| Installation complexity | Flexible and common for residential design work | More complex and stricter for burial and inspection |
| Fixture flexibility | Wide range of decorative and accent fixtures | Better for certain high-output applications |
| Best fit | Homes wanting layered lighting and easier future changes | Sites needing stronger coverage or specific commercial-style lighting |
What works for most Utah homes
Low-voltage usually wins for homes because it gives you more flexibility. It’s easier to fine-tune fixture placement, easier to expand later, and better suited for paths, beds, façade accents, and outdoor living areas.
That said, low-voltage only works well when the layout is designed correctly. A professional 10-step installation approach includes a site survey, load calculation to 80% of transformer capacity, and use of 12/2 direct-bury cable for runs up to 100 feet, which helps prevent voltage drop. Voltage drop is a major issue because it causes 35% of DIY project failures, based on Volt Lighting’s installation guidance.
Where line-voltage makes sense
Line-voltage has a place. On some larger properties, commercial sites, or installations that need more powerful flood coverage, 120V can be the right call. But it’s not casual work.
For line-voltage (120V) systems, licensed electricians must run direct-bury UF-B cable and schedule inspections before burial, and common low-voltage mistakes include overloading transformers, which causes 25% of failures, plus dimming from wrong wire gauge over distance, according to Home Depot’s landscape lighting installation guide.
If a system is dim at the far end, that’s usually not a “bad fixture” problem. It’s often a design problem.
Real trade-offs homeowners should think through
- If you want expandability: Low-voltage is usually the cleaner choice.
- If your yard has multiple focal points: Low-voltage supports layered lighting better.
- If you need broad, powerful coverage: Line-voltage may be worth discussing.
- If you want fewer risks during future landscaping changes: Low-voltage is generally easier to manage.
The wrong system isn’t always the one that costs more up front. It’s the one that forces rework later because the original layout didn’t match the property. Good electricians don’t just ask what fixtures you like. They ask how far the runs are, where the transformer belongs, how the yard drains, and whether the system may need to tie into bigger electrical upgrades later.
Most homeowners want straight answers on cost. That’s fair. The challenge is that outdoor lighting pricing depends heavily on scope.
Repairs are easier to estimate than full installs. Outdoor lighting electricians typically charge $50 to $120 per hour for repair work, with minimum service fees of $75 to $150, and a common fix averages around $250, according to IBISWorld’s electrician industry data. Full project pricing varies based on fixture count, trenching difficulty, transformer size, access to power, and whether the plan includes smart controls or other electrical coordination.
What usually changes the price
- Fixture quantity and type: A few path lights cost less to install than a layered design with accent, wash, and feature lighting.
- Distance and layout: Long runs, elevation changes, and separated zones take more labor and planning.
- Existing power access: Nearby power simplifies things. Limited access can mean added electrical work.
- Site conditions: Rock, root zones, irrigation lines, and finished hardscape all slow the job down.
- Future-proofing decisions: If the plan includes smart controls or panel planning for later upgrades, labor may be more strategic up front.
Why permits matter
Permits aren’t red tape for the sake of red tape. They protect the homeowner. If work requires permitting, that process helps verify the installation meets code, is buried correctly where required, and doesn’t create problems for future repairs, resale, or insurance questions.
In Northern Utah, permit needs can vary by project type and jurisdiction. Low-voltage work may be simpler in some situations, while line-voltage work usually demands more formal compliance. A licensed electrician should tell you early whether the job needs a permit, who handles it, and what inspection steps are involved.
Good permit handling is part of good workmanship. If a contractor gets vague when you ask about inspections, keep asking.
If you want pricing that reflects your actual property instead of a guess, the cleanest next step is to request a quote for your lighting project. A site-specific estimate is the only way to know whether the project is simple, complex, or somewhere in between.
How to Hire the Right Electrician for the Job
A lot of people can install a fixture. Far fewer can design an outdoor lighting system that performs well through Utah winters, avoids callbacks, and doesn’t create hidden electrical problems.
That’s why hiring a lighting electrician is different from hiring a general handyman. You’re not only paying for labor. You’re paying for judgment about load, voltage drop, burial method, weather exposure, service access, and code compliance.

Questions worth asking before you hire
Take these seriously during the estimate process:
- Are you licensed and insured in Utah? That’s the baseline, not a bonus.
- Do you regularly handle outdoor and grounds lighting work? Outdoor electrical work has different failure points than interior lighting.
- How do you address voltage drop and transformer sizing? A real pro should answer this clearly.
- What’s your plan for utility locating and avoiding irrigation or existing lines?
- Will you handle permit and inspection requirements if the project needs them?
- What kind of fixtures, connectors, and weather-rated components do you prefer, and why?
- What happens if I want smart controls or future expansion later?
What competent answers sound like
A trustworthy electrician usually talks in specifics. They’ll discuss fixture placement, wire path, access to power, and how the layout affects brightness. They should also be comfortable explaining trade-offs without trying to force one solution.
If you want context on the training behind professional electrical work, this guide on paths to becoming an electrician gives a useful overview of the skill path behind the license. That background matters because outdoor lighting looks simple from the surface, but it sits on top of real electrical decision-making.
Red flags that should slow you down
- Vague pricing: If the estimate is too loose to understand, the job may be too loose to trust.
- No site walk: Outdoor lighting should be seen in person before it’s priced seriously.
- Pressure to start immediately: Reliable contractors usually explain the process instead of pushing for a rushed yes.
- No mention of code, burial, or weather protection: Those aren’t details. They’re the job.
- One-size-fits-all layouts: Every property has different circulation, focal points, and power access.
The electrician you want will talk as much about what not to do as what to install.
For homeowners comparing options, residential lighting electrician services are one example of the kind of specialized service page worth reviewing because it helps you see whether a contractor works in this area or just lists it loosely. Let me explain. The best hire is usually the one who can connect design goals with electrical realities without making either side feel like an afterthought.
The Installation Process Safety and Maintenance
Once the design is approved, the work should feel organized, not chaotic. A professional install has a sequence, and each step protects the next one.

What installation day should look like
A clean project usually follows this order:
- Final layout confirmation so fixture positions match the plan and real site conditions.
- Utility locating and hazard review before trenching starts.
- Transformer placement where service access is practical and protected.
- Cable routing and trenching with attention to existing irrigation, roots, and hardscape edges.
- Fixture mounting and aiming so beams hit the intended surfaces instead of windows or eyes.
- Testing after dark because outdoor lighting can’t be judged properly in daylight.
- Cleanup and walkthrough so the homeowner understands controls, zones, and maintenance points.
Why professional sequencing matters
Outdoor electrical work fails when the crew rushes the hidden parts. The visible fixture may look fine while the problem sits underground in poor connections, bad routing, or weak load planning.
One practical reference homeowners may find helpful is this article on enhancing your Peoria home with lighting, which shows how much the final effect depends on placement and restraint, not just fixture count. The same principle applies here in Utah, except local weather makes build quality even more important.
Maintenance that protects the investment
A good system still needs occasional attention, especially after winter.
- Check fixture alignment: Snow removal, pets, mowing, and yard work can knock lights off target.
- Clean lenses and shrouds: Dirt and mineral buildup reduce output and distort the beam.
- Inspect exposed components: Look for cracked housings, loose stakes, or damaged wire at surface transitions.
- Test timers and controls seasonally: Sunset changes fast through the year in Utah.
- Watch problem areas after storms: Saturated soil and freeze-thaw movement can expose weaknesses.
A lighting system should age gradually, not fail all at once. When several lights start acting up together, the issue is usually upstream.
The goal is simple. Keep the system performing without waiting for a small issue to become a wiring repair. When the installation is thoughtful from the start, maintenance tends to stay manageable.
Smart Lighting Controls and Troubleshooting
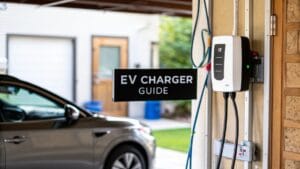
Outdoor lighting doesn’t have to live on a basic timer anymore. A well-planned system can tie into broader home electrical decisions, especially when a homeowner is already thinking about smart devices, remodel work, or EV charging.
As EV adoption increases, residential charger installations grew 52% in 2025, and homeowners can run into problems when outdoor lighting and EV wiring are planned separately. DIY low-voltage kits also fail in 30% of smart integrations, while a licensed electrician can handle NEC compliance and load balancing for a unified setup, according to this discussion of landscape lighting issues and smart integration.
Smart controls that make sense
The best upgrades are the ones you will use:
- Astronomical timers that adjust with seasonal sunset changes
- Wi-Fi enabled controls for app-based scheduling
- Zoned control so the front yard, backyard, and accent features don’t all run the same way
- Planning for future panel load if an EV charger may be added later
You know what? Many DIY plans often fall apart at this point. The lighting itself may work, but once someone adds smart switching, a garage circuit change, or charger planning, the original setup starts showing its weaknesses.
Quick troubleshooting before you call
Try this basic check:
- One light is out: Check the lamp or fixture connection first.
- A whole run is dim: That often points to load, wire sizing, or a connection issue.
- Nothing turns on: Check the control, timer settings, or transformer power.
- Intermittent operation: Look for moisture exposure or loose termination points.
If the problem goes beyond a simple fixture issue, it’s worth reviewing professional electrical troubleshooting support instead of guessing. Outdoor systems are connected to the rest of the home’s electrical picture, and treating them that way usually saves time and frustration.
If you want a lighting plan that looks right, works through Utah weather, and leaves room for smart controls or future EV charging, Black Rhino Electric can help. You can call 385-396-7048 or request a free quote to talk through your project.