So, you're ready to bring the convenience of an EV charging station right into your own garage. Learning how to install an EV charger at home is a game-changer, turning the dream of waking up to a full "tank" every morning into your daily reality. Honestly, it's the single best upgrade for making EV ownership simple, affordable, and completely stress-free.
The Real Benefits of Home EV Charging
Most people think EV charging happens at those big, flashy public superchargers. You know what? The truth is, the vast majority of charging happens quietly, overnight, right in your own garage. This is the single biggest lifestyle upgrade you can make as an EV owner.
Think about it. Relying solely on public infrastructure means planning your day around finding a station that’s both available and working. But what if you could flip that script completely?
- Ultimate Convenience: Your car refuels while you sleep, eat dinner, or just relax. You start every day with a full battery, which means no more detours or waiting in line at a charging station.
- Significant Cost Savings: Public charging, especially the fast-charging kind, can be 2 to 4 times more expensive than charging at home. At home, you’re just paying your standard residential electricity rate.
- Eliminates Range Anxiety: That nagging feeling about whether you have enough juice for the day? It pretty much disappears. For your daily commute and local errands, you'll probably never need to visit a public charger again.
Why Home Charging is the Future
This shift toward home charging isn't just a passing trend; it's the bedrock of the entire EV transition. Projections from the U.S. Department of Energy suggest that by 2030, the country will need around 28 million charging ports. Here’s the kicker: a massive 92% of those—nearly 26 million—are expected to be private chargers in single-family homes.
This really underscores how installing a charger at home is the most practical way forward. A good Level 2 charger, which uses a 240-volt outlet, can add up to 25 miles of range per hour—perfect for an overnight top-up. You can dig into these EV charging projections and see the data for yourself.
Key Takeaway: Installing a home charger isn't just about adding another appliance to your garage. It’s about creating your own personal, reliable, and affordable fueling station that fits seamlessly into your daily life.
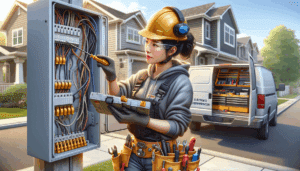
This is especially true here in Northern Utah, where the public charging network is still playing catch-up with the growing number of EVs on the road. As electricians with years of on-the-ground experience, we at Black Rhino Electric see this every day. Having your own charger gives you a level of dependability that public stations can't always promise. It’s an investment in a smoother, cheaper, and all-around better EV experience.
Your Pre-Installation Home Electrical Check
Before you even start shopping for a sleek new charger, let's pump the brakes for a second. Spending just a few minutes getting to know your home's current electrical setup can save you from some major headaches and unexpected costs down the road.
Frankly, this is the single most important part of the process. It lays the groundwork for a safe, successful project.
This initial check isn't about you doing any electrical work. It’s about playing detective and gathering the key intel a professional electrician will need to give you a real, accurate quote.
Sizing Up Your Electrical Panel
Think of your home's electrical panel as its central nervous system. It’s that gray metal box, usually tucked away in the garage, basement, or a utility closet. And it’s the key to figuring out if you can even add a powerful new circuit for an EV charger.
Here’s what to look for (without touching anything inside):
- Find the Main Breaker: Open the panel door. You should see one large breaker at the top, separate from all the smaller ones. It will have a number stamped on it: 100, 150, or 200. This is your home's total amperage capacity. Most modern homes have 200-amp service, which is usually the sweet spot for adding an EV charger without a major upgrade.
- Count Your Open Slots: Now look at the rows of smaller breakers. Are there any empty spaces where a new one could pop in? A Level 2 charger needs a 240-volt circuit, which takes up two adjacent slots. If your panel is totally full, that’s an immediate sign you might need a smaller sub-panel or a full panel upgrade.
Just knowing your panel’s capacity and the number of open slots gives you the first major piece of the puzzle. It's often the difference between a simple, straightforward job and a much more involved project.
Measure the Distance
Alright, next, grab a tape measure. You need to figure out the most practical path from your electrical panel to the spot where you'll be parking your car to charge.
The length of this wire run directly impacts your installation cost. It’s simple math: a longer distance means more heavy-gauge copper wire—which isn't cheap—and more labor to run it cleanly. A quick 10-foot run from a panel right there in the garage is way more affordable than a 75-foot run from a basement panel on the opposite side of the house.
Pro Tip: Don't just measure a straight line. Think like an electrician for a minute. The wire has to follow walls, go up into the attic, or run along the ceiling inside a conduit. A realistic measurement will give you a much better idea of the true scope and cost.
The Big Question: What is a Load Calculation?
So, you’ve got a 200-amp panel with plenty of open slots. You’re good to go, right? Not so fast.
Here's the thing: the final—and most critical—piece of this puzzle is something called a load calculation. This isn't a DIY task; it's a detailed analysis that only a licensed electrician can perform according to code.
Let me explain. A load calculation adds up all the existing electrical demands in your house—your A/C, electric range, water heater, dryer, everything. Then, it determines if the panel can safely handle the sustained power draw of an EV charger on top of it all. An EV charger is what we call a "continuous load," meaning it pulls a huge amount of power for hours at a time, and the National Electrical Code has very strict rules to prevent overloading a home's system.
This calculation is the ultimate decider. It tells us with 100% certainty whether your current service can handle the new load or if an upgrade is required for a safe installation. For any professional, safety-first company like Black Rhino Electric, this is a non-negotiable step. It protects your home, your new car, and your family.
Choosing Your Ideal Home EV Charger
Now that you’ve gotten a handle on your home's electrical setup, we can get to the good stuff—picking the actual charger. Trust me, not all chargers are built the same, and the hardware you choose will directly impact your daily routine. This decision is central to a successful home charging setup.
Let’s get one thing straight: the Level 1 charger that probably came with your car? It’s fine in a pinch, but it’s painfully slow. It plugs into a regular wall outlet and might give you just 3-5 miles of range for every hour it's plugged in. For most drivers, that’s simply not going to cut it for daily use.
This is why the conversation almost always turns to Level 2 (240V) chargers. They are the gold standard for home charging, delivering the speed and reliability you need to wake up to a fully charged car every single morning.
The Great Debate: Level 1 vs Level 2 Chargers
The leap from a Level 1 to a Level 2 charger is a game-changer. Imagine trying to fill a swimming pool with a garden hose versus a fire hose. Sure, they both deliver water, but one is clearly designed for the job.
Here’s a quick breakdown of what you're really looking at in this responsive table.
| Feature | Level 1 Charger | Level 2 Charger |
|---|---|---|
| Voltage | 120-Volt (Standard Outlet) | 240-Volt (Dryer Outlet) |
| Charging Speed | Extremely Slow (3-5 miles/hour) | Much Faster (15-40+ miles/hour) |
| Installation | Plug into any wall outlet | Requires professional installation of a new circuit |
| Best For | Emergency use or plug-in hybrids | Daily overnight charging for any EV |
| Cost | Included with your vehicle | $400 – $800+ for the unit, plus installation |
As you can see, investing in a Level 2 charger is less of a luxury and more of a practical necessity for a seamless EV experience. It effectively turns your garage into your own private, high-speed fueling station.
Key Features to Look For
So, what separates a good Level 2 charger from a great one? It really boils down to two things: how much power it can deliver and whether it has smart features.
Power Output (Amperage): You’ll see chargers rated anywhere from 30A up to 50A or more. This number is all about speed. A 40-amp charger running on a 50-amp circuit is a popular sweet spot for a reason—it can easily add over 200 miles of range in a standard 8-hour overnight session. It strikes the perfect balance between performance and cost for most homeowners.
Smart Capabilities: This is where modern chargers really shine. A "smart" charger connects to your Wi-Fi, giving you control right from your phone. Why is that a big deal? You can schedule charging to start late at night when electricity rates are dirt cheap, track exactly how much energy you’re using, and even get reminders to plug in your car. This feature alone can easily save you hundreds of dollars a year.
Plug-In vs. Hardwired: Some chargers plug into a NEMA 14-50 outlet (the kind your electric stove or dryer might use), while others are hardwired directly into the circuit. Hardwired units are generally safer, more durable for outdoor installations, and can often deliver a bit more power. Plug-in models give you some flexibility if you think you might move, but for a permanent setup, hardwired is the way to go.
Expert Insight: For most homes here in Northern Utah, a hardwired, 40-amp smart charger is the setup our team at Black Rhino Electric recommends most often. It delivers fantastic charging speed, unlocks significant cost savings with smart scheduling, and provides the highest level of safety and reliability for your home and vehicle.
For Tesla drivers, the Tesla Wall Connector is an incredibly popular choice. It’s a sleek, powerful, and smart-enabled hardwired unit that integrates perfectly with their vehicles. If you're going this route, our team has a ton of hands-on experience with the specifics of a professional Tesla EV charger installation.
Ultimately, picking the right charger means matching the hardware to your car's capabilities, your driving habits, and what your home's electrical system can support. A little bit of thought here goes a long way toward years of easy, affordable charging.
What a Professional EV Charger Installation Looks Like
You’ve done the research, sized up your electrical panel, and picked the perfect charger. Now comes the most important part. I can't stress this enough: this is a job for a licensed, professional electrician.
Messing with a 240-volt, high-amperage circuit is no joke. It's incredibly dangerous if you don't know exactly what you're doing. But knowing what a professional installation actually entails will give you confidence and help you spot a job done right. Here’s a peek behind the curtain at how our team at Black Rhino Electric tackles every installation to make sure it's safe, up to code, and built to last.
The On-Site Game Plan
Before any tools come out of the truck, we start with a thorough on-site walkthrough. This is where experience really shines. We’ll map out the most efficient and least disruptive path for the wiring, running from your electrical panel to where you want the charger.
But honestly, it's about more than just finding the shortest route. We’re planning a clean, professional-looking install that doesn't turn your garage into a mess. This is also when we double-check the local permit requirements, because the rules in Salt Lake City can differ from those up in Ogden.
Running a Dedicated Circuit
This is the real heart of the installation. Your EV charger can’t share a circuit with anything else—not your garage fridge, not your power tools, nothing. It needs its own dedicated line straight from the panel. This guarantees it gets the steady, uninterrupted power needed to charge your car safely and quickly.
Here’s what that involves:
- Installing a New Breaker: A new 240-volt double-pole circuit breaker gets added to your electrical panel. We match its amperage (like a 50-amp breaker) precisely to your charger's needs and the wire we're running.
- Pulling the Right Wire: We run a heavy-gauge copper wire from that new breaker all the way to the charger's location. The thickness of this wire is absolutely critical. Using a wire that's too thin for the amperage is a major fire hazard and, frankly, one of the most common mistakes we see in DIY attempts.
- Protecting It with Conduit: All the new wiring is run inside a protective conduit. This shields it from physical damage and is a non-negotiable requirement of the National Electrical Code (NEC).
This flowchart breaks down the key decisions you'll make when picking a charger, which directly influences the kind of installation you'll need.
As you can see, the jump from basic Level 1 charging to a feature-rich smart Level 2 charger is what necessitates a dedicated, professional installation.
Mounting and Connecting the Charger
With the new circuit in place, the final steps are pretty straightforward for a pro. We securely mount the charging unit itself (or the NEMA 14-50 outlet) to the wall at a height that's convenient for you to plug in your car every day.
Then, we make the final connections, making sure every single wire is properly terminated and torqued down to the manufacturer's specifications. You’d be surprised how many electrical problems come from loose connections, so this meticulous detail is absolutely essential for a safe, reliable setup.
A Quick Word on Safety: A professional job is built around the National Electrical Code (NEC), which sets the bare minimum for electrical safety. A truly experienced electrician doesn't just meet these standards; we aim to exceed them to give you and your family maximum peace of mind.
The Final Inspection and Handoff
The job isn’t finished just because the charger is on the wall. The final, mandatory step is the official inspection. A local city or county inspector will visit your home to verify that all the work was done correctly and is 100% compliant with all electrical codes.
This isn't just red tape; it's your official guarantee that the installation is safe.
Once the work passes inspection, we "commission" the charger. We'll power it up, test it with your vehicle to make sure everything is perfect, and walk you through any special features, like setting up the app for a smart charger. We don't leave until you're confident and your EV is charging happily.
From planning and permitting to the final inspection, every step is designed to protect you, your home, and your investment. It’s the only way to get the job done right.
Decoding the Costs of a Home Charger Installation
Let's get right to it and talk about the bottom line. What does it actually cost to get a Level 2 charger installed at your home here in Northern Utah? Getting a handle on the real-world numbers is a critical step, and I believe in being completely transparent about what you can expect.
Honestly, there isn't a single magic number. The final price tag is more of a range, and it hinges entirely on your home's unique electrical situation. Think of it less like buying an appliance off the shelf and more like a small, custom home improvement project.
What Goes into a Standard Installation Cost
For a typical, straightforward job in our area, you can generally expect the cost to land somewhere between $800 and $2,000. That ballpark figure covers both the professional labor and all the necessary materials. This price usually applies when your electrical panel is already in the garage, has plenty of capacity, and the spot you've picked for the charger is close by.
So, what pushes a project toward the lower or higher end of that range? A few key things.
- Distance from Panel to Charger: This is almost always the biggest variable. A short, 10-foot run of wire from a panel on the same garage wall is a simple job. A 50-foot run that has to be fished up into an attic and across the house? That’s a different story and will cost more in labor and materials.
- Wiring Complexity: Is the path for the new wire through an open, unfinished basement ceiling, or does it involve cutting into finished drywall? Navigating finished spaces requires more finesse and time for patching, which naturally adds to the labor cost.
- Permit Fees: Every municipality, from Ogden down to Salt Lake City, has its own schedule of fees for electrical permits. This isn't optional—it's a required cost that ensures the work is done to code and gets officially inspected for your safety.
The Big Variable: Electrical Panel Upgrades
The question I hear most often is, "Will I need to upgrade my electrical panel?" It’s a great question because a panel upgrade is the single biggest factor that can drive up the cost, often adding $2,000 to $4,000+ to the project.
Here's the thing: not every home needs one. You're much more likely to need an upgrade if your home fits one of these common scenarios:
- You have an older 100-amp main panel, which was the standard in many homes built before the 1990s.
- Your existing panel is physically full, with no open slots for the new double-pole breaker the charger needs.
- A professional load calculation shows that your current service just can't safely handle the sustained power draw of an EV charger on top of your other big appliances like your A/C, dryer, and electric range.
Expert Insight: A panel upgrade might seem like a daunting expense, but I encourage homeowners to see it as a major investment in their home's safety and future-readiness. It not only gets you ready for your EV but also sets you up for any other electrical projects you might want down the line, like a hot tub or a kitchen remodel.
Don't Forget About Incentives
Okay, we've talked about the costs. Now, how do we bring them down? This is where a little planning can really pay off.
Several fantastic incentives can dramatically cut your out-of-pocket expense. The federal 30C tax credit, for instance, is a big one. It can cover 30% of your total installation cost—that includes both the charger and the labor—up to a maximum of $1,000.
On top of that, many of our local Utah utility companies offer their own rebates for installing a smart charger. You can find more details on how these incentives slash the cost of EV charging and make the whole project far more affordable.
By stacking federal credits with local rebates, homeowners often find they can slash their final costs significantly. It’s an essential final step in figuring out the true price of your installation.
Your Top Home EV Charging Questions Answered
We get a ton of great questions from homeowners all over Northern Utah about what goes into an EV charger installation. It's a big upgrade, and it's smart to do your homework. Here are some straight-up answers from our experience as certified electricians to the questions we hear the most.
Do I Need a Permit to Install an EV Charger in Utah?
Yes. I can say with about 99% certainty that you will. Here's the deal: adding a new 240-volt circuit isn't like plugging in a new toaster; it's significant electrical work.
Every municipality I know of, from Salt Lake City to Ogden, requires a permit to make sure the installation is safe and up to code. This isn't just about paperwork—it's a critical safety measure that protects your home from fire and electrical hazards. A qualified electrician will handle the entire permitting process, from filing the application to scheduling the final inspection.
How Long Does the Actual Installation Take?
The on-site work is usually a lot quicker than people think. For a straightforward job—say, your electrical panel is already in the garage with enough space—we can often get the physical installation done in just a few hours.
The whole process, though, is a bit longer. When you factor in the initial assessment, waiting for the city to approve the permit, the install day, and the final inspection, the full timeline can be anywhere from a few days to a couple of weeks. It really just depends on how complex the job is and how booked up your local inspectors are.
Key Takeaway: The hands-on work is fast, but the complete process includes crucial administrative and safety steps. Never let an electrician skip the permit and inspection; it’s your guarantee of a safe, professional job.
Can I Use a Tesla Charger for My Ford or Hyundai EV?
Absolutely, and it's a great choice. All you need is a simple adapter. Tesla's Wall Connector uses the NACS (North American Charging Standard) plug, while most other EVs use the J1772 plug.
A good NACS-to-J1772 adapter connects them perfectly, letting you use a high-quality Tesla charger for any electric vehicle. A lot of homeowners go this route. They like the design, and honestly, the NACS plug is well on its way to becoming the new standard for everyone. We've covered a bunch of other common questions in our electrical services FAQ if you're curious for more.
How Much Will My Electric Bill Go Up?
It will go up, but it’s almost always going to be way less than what you were paying for gas. How much exactly depends on how much you drive and your local power company's rates.
The real trick to keeping costs down is to use a "smart" charger to schedule your charging for off-peak hours. This is usually late at night when electricity is at its cheapest. Most Utah utility companies offer time-of-use plans that can make a huge difference in your monthly bill and help you save the most money.
Ready to Make Home Charging a Reality?
You’ve got the full roadmap. From digging into your home's electrical setup and picking the perfect charger to understanding what a professional install really looks like, you're now in a great position to move forward with confidence. This isn't just another home project; it's a genuine investment in convenience and a smarter way to own an EV.
Think about it: waking up every morning to a fully charged car, completely skipping the hassle of hunting for a public charging station. That’s the real freedom of having a charger at home. It’s all about making your life with an electric vehicle truly seamless.
This is more than just an electrical upgrade. It’s a lifestyle upgrade that simplifies your daily routine and cuts down your fuel costs for good.
If you’re in Northern Utah and want this done right—safely, professionally, and without any surprises—our certified team is ready to help. We built our reputation on doing things correctly and keeping you in the loop every step of the way.
At Black Rhino Electric, we handle everything so you don't have to, ensuring your new charger is installed to meet the highest safety and performance standards. Ready for a clear, no-pressure price for your specific setup? You can easily request a free quote right now, or just give us a call at 385-396-7048 to chat with an expert today.