Upgrading to a GFCI is one of the smartest safety moves you can make for your home. Knowing how to install GFCI outlets is a project that genuinely protects your family from electrical shock, especially in places like kitchens, bathrooms, and garages. Honestly, the process isn't complicated, but getting the safety steps right is the most critical part of the whole job.
Contents
- 1 Why a GFCI Outlet Is a Non-Negotiable Safety Feature
- 2 Gathering Your Tools and Understanding the Parts
- 3 Identifying Line and Load Wires Correctly
- 4 Wiring and Mounting Your New GFCI Outlet
- 5 Testing, Troubleshooting, and Final Checks
- 6 When to Call a Professional Electrician
- 7 Frequently Asked Questions About GFCI Installation
Why a GFCI Outlet Is a Non-Negotiable Safety Feature
So, what makes a Ground Fault Circuit Interrupter (GFCI) so important? Think of it as a small, incredibly fast bodyguard for your electrical circuit. A standard outlet just delivers power, no questions asked. A GFCI, on the other hand, is constantly monitoring the electricity flowing through it.
If it detects even a tiny imbalance—the kind that happens when electricity finds an unintended path to the ground through water or, worse, a person—it shuts off the power in a fraction of a second. That rapid response is what prevents a serious electrical shock.
The Real-World Impact of GFCI Protection
This isn't just theory; it has a massive real-world impact. The market for GFCI receptacles is projected to climb to $2,057.2 million by 2031, which tells you that homeowners are taking electrical safety more seriously than ever. More importantly, data shows that about two-thirds of all electrocutions in U.S. homes could be prevented with proper GFCI installation. You can explore the market trends and safety statistics here.
Before we get into the step-by-step, let's walk through the most crucial prep work. Get this right, and you can tackle the project with confidence.
- Understanding What a GFCI Does: We'll demystify how this little device actually keeps you safe.
- Confirming Power Is Off: You'll learn the correct and safe way to shut down power at the breaker box. No shortcuts.
- Verifying with a Tester: We'll show you how to use a simple voltage tester to be 100% certain the circuit is dead before you touch a single wire.
Gathering Your Tools and Understanding the Parts
Before you start unscrewing a single plate, let's talk about preparation. Honestly, having the right tools on hand is the difference between a quick, successful project and a frustrating, halfway-finished job that has you running back to the hardware store. It’s all about setting yourself up for a smooth—and most importantly, safe—installation.
You know what? This part is just as much about understanding the device you're installing as it is about the tools you're using. We’ll break down both so you feel confident before you even touch a wire.
The Essential Toolkit for a Safe Installation
Having the correct gear isn't just for convenience; it's a fundamental safety measure. Each item plays a specific role in protecting you and ensuring the job is done right. Good news is, you likely have many of these at home already.
Here’s a quick rundown of what you'll need and why it's so important.
Essential Tools and Materials for GFCI Installation
| Item | Purpose and Key Feature |
|---|---|
| Non-Contact Voltage Tester | Your most important safety tool. It allows you to confirm that the power is 100% off without touching any wires, preventing accidental shock. Never, ever start without it. |
| GFCI Outlet & Wall Plate | The core of the project. Make sure you buy a GFCI receptacle that matches your circuit's amperage (usually 15A or 20A) and a new, matching wall plate for a clean finish. |
| Screwdrivers | You will need both a flathead and a Phillips head screwdriver for removing the old outlet and securing the new one. An insulated set is always a smart investment for electrical work. |
| Wire Strippers/Cutters | Essential for cleanly stripping insulation from wires without nicking the copper conductor itself. Most models also include a cutting function for trimming wires to the perfect length. |
| Needle-Nose Pliers | Perfect for bending wires into the hook shape needed to wrap around the terminal screws. This little detail ensures a secure and lasting connection that won't loosen over time. |
| Electrical Tape | Used for wrapping around the terminal screws after wiring. This adds an extra layer of protection, preventing the screws from accidentally contacting the side of a metal electrical box. |
Think of this list as your pre-flight checklist. Having everything ready to go keeps the project moving and your mind focused on the task at hand.
Dissecting the GFCI Outlet
At first glance, a GFCI outlet looks a bit more complicated than a standard one, with its buttons and little light. Let me explain what each part does, because this knowledge is critical for a proper installation.
- Test and Reset Buttons: The two buttons in the center are the heart of the GFCI's function. The "TEST" button simulates a ground fault, tripping the circuit to cut power. The "RESET" button restores power after it has been tripped.
- Indicator Light: This small light provides an at-a-glance status update. On most models, a green light means the outlet is powered up and providing protection. If the light is off or red, it could signal a problem, like a tripped circuit or a faulty unit that needs replacing.
Expert Insight: That little indicator light is more than just a convenience. It's an instant safety check. If you ever notice the light is off, it’s a clear signal to investigate the outlet before assuming it’s working correctly.
The Most Crucial Detail: Line vs. Load
Now for the single most important part of understanding the hardware: the "LINE" and "LOAD" terminals. Mixing these up is the most common mistake I see DIYers make when they first learn how to install GFCI outlets.
Flip the GFCI over. You'll see a set of screw terminals covered by a piece of yellow or black tape. These are the LOAD terminals. The other set of terminals are the LINE terminals.
- LINE Terminals: This is where the incoming power from your circuit breaker connects. Think of these wires as the "hot" ones—they bring electricity to the outlet.
- LOAD Terminals: These terminals are used to send protected power downstream to other regular outlets on the same circuit. If you connect wires here, those other outlets will also gain GFCI protection. It's a great feature, but only if you need it.
If your electrical box only contains one set of wires (one black, one white, one ground), you will only use the LINE terminals. Leave that little tape sticker right where it is. Getting this part wrong means the outlet won't provide any shock protection, and any downstream outlets won't work at all. Getting it right is foundational to the entire process.
Identifying Line and Load Wires Correctly
Here's the thing: mixing up the LINE and LOAD wires is the single most common mistake people make when they tackle this project. It’s an easy error, but it completely disables the shock protection for any other outlets down the line, making your hard work pointless and unsafe.
Getting this part right is everything. I'm going to walk you through it logically, so you can feel confident you’ve done it correctly. It's not just about following steps; it's about understanding how the electricity flows and why this distinction is so critical.
Why This Distinction Matters So Much
Before we touch any wires, let's get crystal clear on the "why."
The LINE terminals are where the power comes in from your electrical panel and breakers. Think of it as the source. The LOAD terminals are the exit point, sending that now-protected power out to other standard outlets further down the same circuit.
If you get them backward, the outlet might still power whatever you plug into it, giving you a false sense of security. But the GFCI’s protective brain won't be monitoring the current correctly, and it absolutely will not protect any of the other outlets connected to its LOAD terminals. Honestly, that’s more dangerous than having no GFCI at all.
This diagram breaks down the key parts of the job you'll be working with.
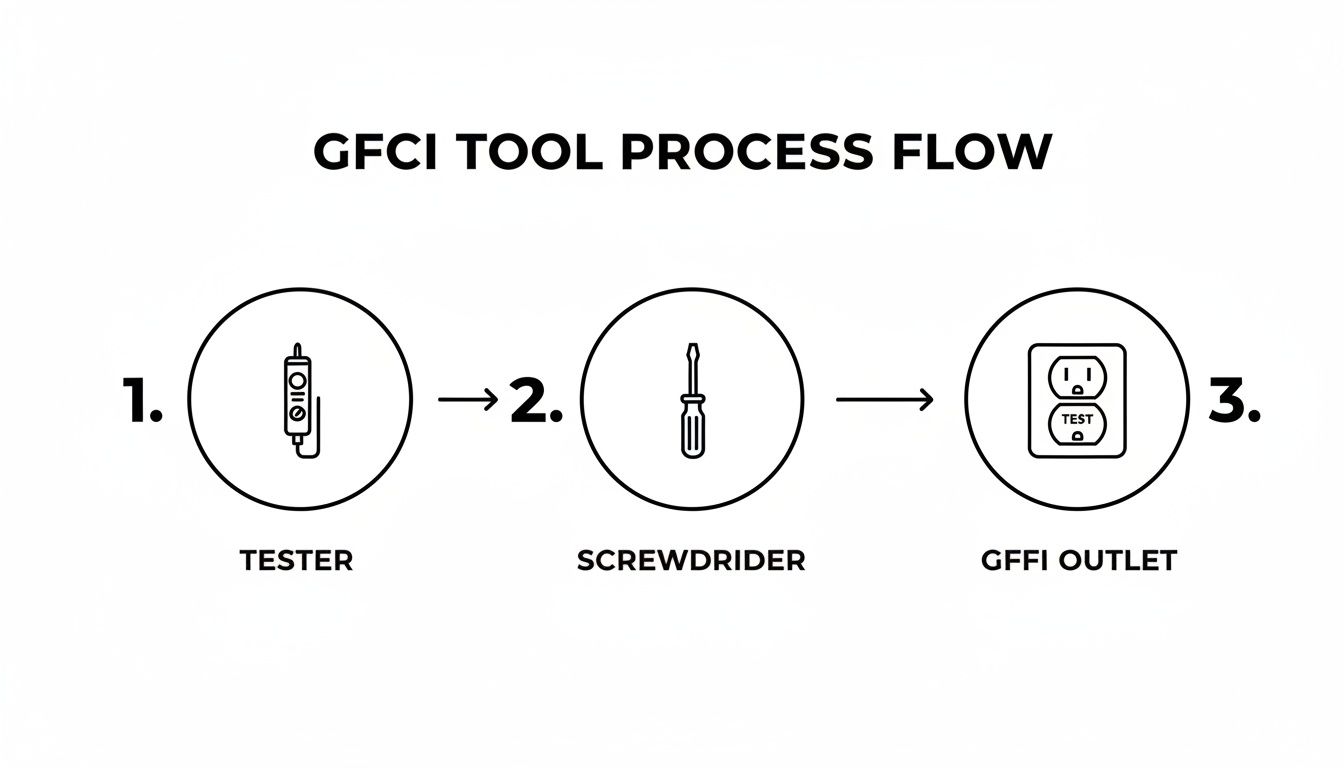
Notice how using a tester comes first. That's not a suggestion—it's the only safe way to start.
Safely Identifying the Line Wires
Alright, let's figure out which wires are which. With the power still turned off at the breaker, carefully pull the old outlet from the electrical box. Don't disconnect any wires just yet. You'll likely see one of two setups.
- Scenario A: One set of wires (one black, one white, one ground) is connected to the outlet. This is the simplest situation you can hope for. These are your LINE wires, and you won't use the LOAD terminals on the new GFCI at all.
- Scenario B: Two or more sets of wires are in the box. This means one set is the LINE (bringing power in), and the other set(s) are the LOAD (sending protected power out). This is where you have to get it right.
If you have Scenario B, follow these steps with extreme caution:
- Carefully unscrew all the wires from the old outlet and separate them inside the box. Make sure none of the bare copper ends are touching each other or the sides of a metal box.
- Go back to your breaker panel and turn the power back ON for this circuit. This is the only time the power should be on during this process.
- Using your non-contact voltage tester, carefully bring the tip near each black wire. Only one of the black wires will make the tester light up and beep—that's your live, hot LINE wire.
- Found it? Great. Immediately go back and turn the power back OFF at the breaker. Use your tester one last time on that wire to confirm the circuit is dead.
Critical Safety Tip: Never rely on memory. The moment you've identified the LINE wires (the hot black wire and its corresponding neutral white wire), wrap a small piece of electrical tape around each one. This simple act prevents dangerous mix-ups when you go to wire the new outlet.
Now that you've confidently labeled the LINE and LOAD wires, you’re ready for the actual connection. This careful prep work ensures you're not just connecting wires—you're activating a powerful safety feature for your home. You've just navigated the most confusing part of learning how to install GFCI outlets.
Wiring and Mounting Your New GFCI Outlet
Alright, you’ve done the detective work and your LINE and LOAD wires are tagged and ready. This is the satisfying part—where prep work pays off and you actually install the new GFCI. We’re aiming for clean, secure connections that will give you safe, reliable power for years to come.
This part is pretty straightforward, but the details are everything. A loose wire isn't just a minor annoyance; it can generate heat, create dangerous arcs, and become a serious fire risk. Let’s get it done right.
Making Secure Wire Connections
First, take a good look at the ends of the wires you’ll be connecting. If they look nicked, frayed, or otherwise beat up, snip off the damaged part and strip about 3/4 of an inch of fresh insulation with your wire strippers. A clean start is a safe start.
Now, let's connect the wires to the right spots on the new outlet. It’s color-coded for a reason.
- The black LINE wire goes to the brass-colored LINE terminal screw.
- The white LINE wire goes to the silver-colored LINE terminal screw.
- The bare copper (or green) ground wire connects to the green ground screw.
Here’s a trick of the trade: use your needle-nose pliers to bend a small “shepherd’s hook” at the end of each wire. Loop that hook clockwise around the terminal screw. Why clockwise? Because when you tighten the screw, it pulls the loop in tighter, creating a rock-solid electrical and mechanical bond.
Protecting Downstream Outlets with the Load Terminals
Did you find a second set of wires in the box that you identified as the LOAD set? Perfect. This is where you get to use a fantastic feature of GFCI outlets—extending protection to other regular outlets down the line without buying more GFCIs.
That little piece of tape covering the second set of screws is there for a reason. Peel it off to expose the LOAD terminals. You’ll connect the second set of wires just like you did the first:
- The black LOAD wire connects to the brass LOAD terminal.
- The white LOAD wire connects to the silver LOAD terminal.
A Pro Tip from the Field: After you tighten down each screw, give the wire a gentle but firm tug. Does it move? Even a little? Tighten it again. This simple, five-second check prevents a world of headaches later.
Handling Common Installation Curveballs
Let's be honest, electrical work in older homes is rarely textbook-perfect. You might open a box and find a surprise. Here’s how we handle a couple of common issues we see all the time in homes across Weber, Davis, and Salt Lake counties.
| Challenge | Our Recommended Solution |
|---|---|
| The Electrical Box Is Too Shallow | GFCI outlets are much bulkier than standard ones. If it’s a tight squeeze, don't just jam it in there. You can sometimes find a shallow-depth GFCI, but a better fix is an "outlet box extender." It adds just enough depth to prevent crushed wires. |
| The Wiring Is Old and Brittle | Older wire insulation can get crispy and crack or flake off when you bend it. If you see this, handle the wires with extra care. If a bit of insulation breaks off and exposes the copper, wrap that spot securely with electrical tape. If the wiring is brittle all over, that's a red flag that the circuit should be evaluated by a pro. |
Once every wire is securely fastened, it's time to get the outlet mounted. Gently fold the wires back into the electrical box, kind of like an accordion or in an "S" shape. This keeps them from getting pinched or stressed when you push the outlet in.
Finally, screw the GFCI receptacle into the box. Take a second to make sure it sits flush and straight against the wall before attaching the new wall plate. Now you're ready for the most important step of all: testing your work.
Testing, Troubleshooting, and Final Checks
Alright, your new GFCI outlet is in the wall, the plate is on, and it looks sharp. But don't pack up your tools just yet. This last part is every bit as important as getting the wires right in the first place. You have to be sure its life-saving feature actually works.
Let me walk you through the proper way to test it. It’s a straightforward process, but doing it in the right order will give you total confidence that your work is safe and ready to protect your family.
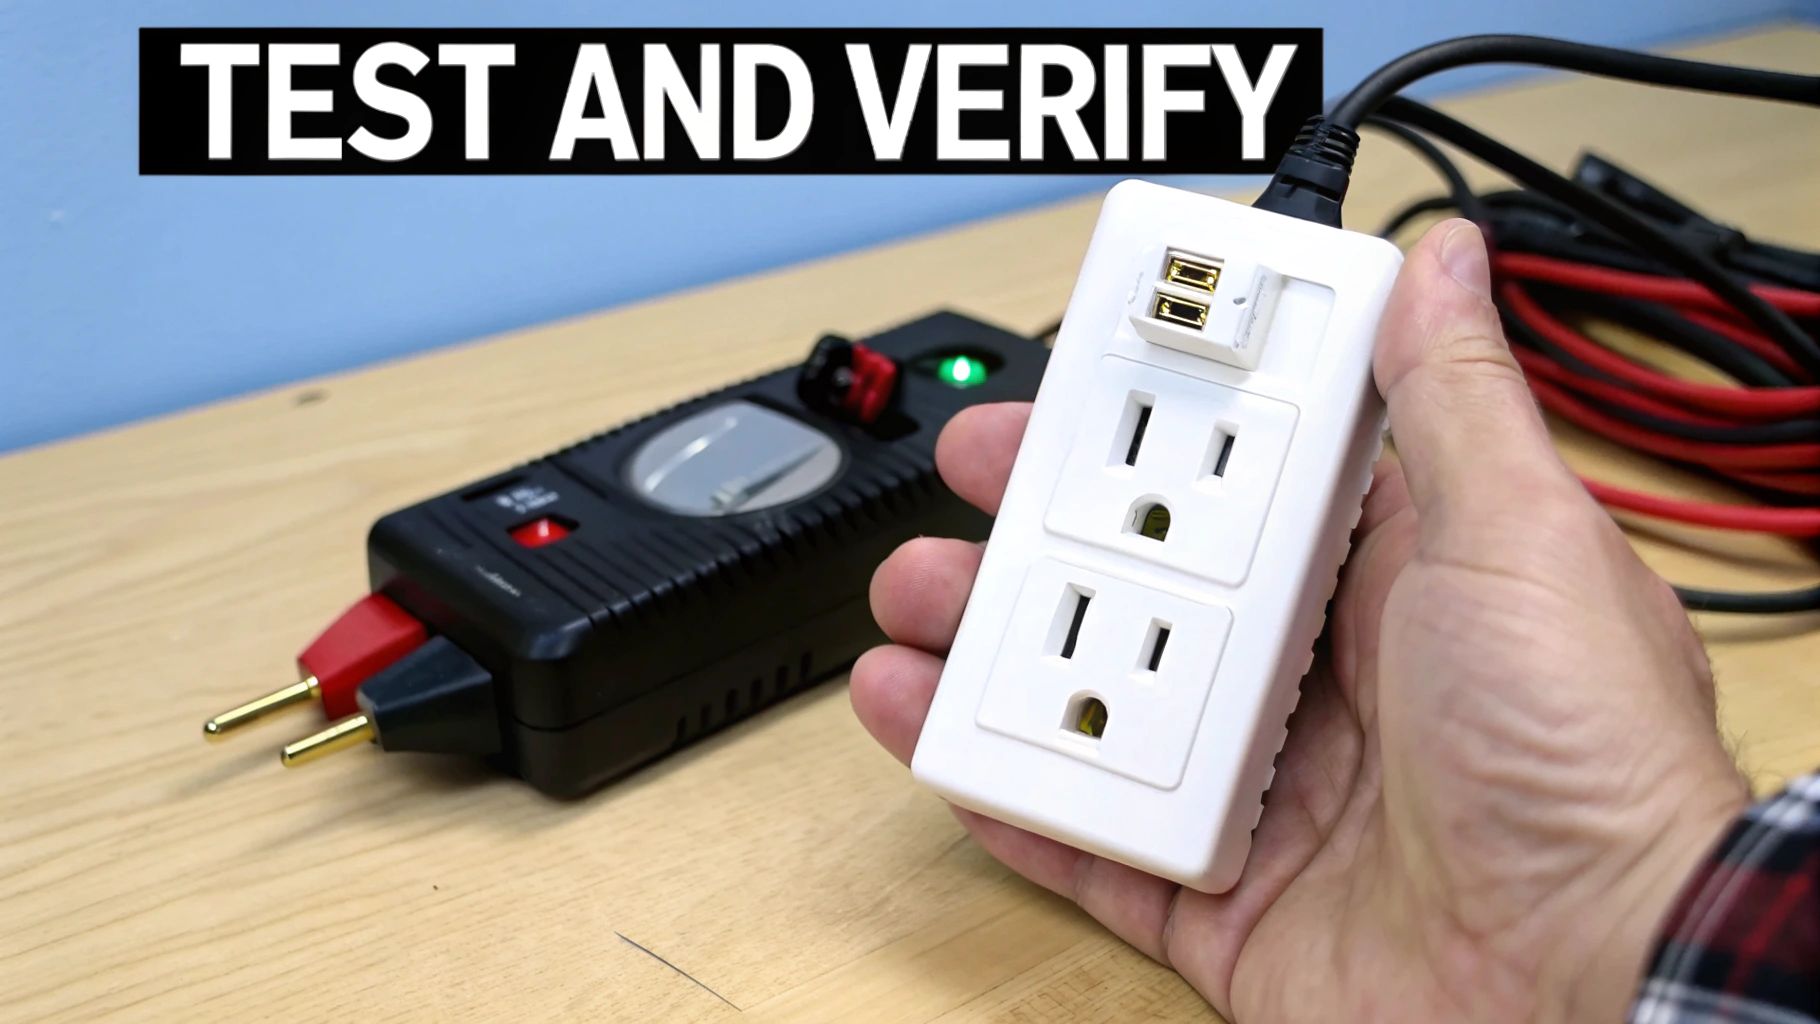
The Two-Part Verification Process
First thing's first: head back to your circuit breaker and flip the power back ON for that circuit. You should see a small indicator light on the GFCI turn on (it's usually green), which tells you it has power. Now, let’s make sure it’s protecting you.
- The Built-In Button Test: Press the "TEST" button firmly. You should hear a solid click as the "RESET" button pops out. The indicator light will go off. This manually creates a ground fault to confirm the internal trip mechanism is working.
- Restore and Verify: Now, press the "RESET" button. It should click back into place, and the light should come back on. If that sequence works, the GFCI’s core function is good to go.
For an extra layer of certainty, I always recommend using a plug-in GFCI tester. It's an inexpensive tool that not only tests the trip function but also confirms your wiring is correct (like making sure hot and neutral aren't swapped). Just plug it in and hit its test button—it should trip the outlet just like the built-in button did.
Common Problems and How to Fix Them
What if it doesn't work as planned? Don't panic. If the outlet won't reset or it trips the second you turn the power back on, it's almost always one of a few common issues. You can usually figure it out with a little careful thinking.
Here’s a rundown of the usual suspects and how I’d approach them.
| Symptom | Common Cause(s) | How to Troubleshoot |
|---|---|---|
| Outlet won't reset at all. | Reversed LINE/LOAD wiring is the #1 cause. You might also have a faulty GFCI right out of the box—it happens! | Power OFF. Double-check that the incoming power wires are on the LINE terminals and the downstream wires are on the LOAD terminals. If they're right, the GFCI itself might just be a dud. |
| Outlet trips immediately. | This often points to a real ground fault somewhere down the line. It could be a bad appliance or a wiring issue. | Power OFF. Disconnect the LOAD wires and cap them safely. Restore power. If the GFCI now holds, the problem is in the wiring or an outlet further downstream. If it still trips, the fault is between the panel and this GFCI. |
| Outlet works, but downstream outlets do not. | This almost always means the downstream outlets are wired to the LINE terminals, bypassing GFCI protection. | Power OFF. The wires going to the other outlets must be moved from the LINE terminals to the LOAD terminals. This is what ensures they get that protected power. |
For most homeowners, the cost of a GFCI outlet is a small price for huge peace of mind. The receptacles themselves usually cost between $10 and $20. Having a pro install one can add $100 to $200 in labor, but for tricky situations, it’s invaluable. For homeowners here in Weber, Davis, and Salt Lake counties, that means a typical professional installation might range from $125 to $220 per outlet.
Key Takeaway: If a GFCI trips, it's doing its job. The goal isn't just to reset it, but to figure out why it tripped. Never ignore a GFCI that trips over and over—it's signaling a real safety hazard.
If you’ve run through these checks and still can't get it working right, that’s a clear sign of a more complex problem. Stubborn electrical issues are frustrating, but it’s always better to be safe than sorry. Our team specializes in expert electrical troubleshooting and can track down the root cause fast.
When to Call a Professional Electrician
Learning how to install GFCI outlets is a great skill to have, but the real wisdom is knowing your limits. Honestly, even the most seasoned DIYer needs to know when to put the tools down and call a professional. Some situations are more than just a simple swap; they're signs of deeper, more complex electrical issues hiding in your walls.
You know what? It’s not about giving up. It's about being smart and putting safety first. If you open up an electrical box and anything—anything at all—gives you pause, that’s your cue.
Red Flags That Demand a Professional
Certain discoveries should stop you in your tracks. These aren't minor hiccups; they are serious electrical hazards that need a licensed electrician's touch, period.
- Discovering Old Aluminum Wiring: If you see dull gray wires instead of shiny copper, you’re looking at old aluminum wiring. Common in homes from the 60s and 70s, this stuff is notorious for creating loose connections that can lead to fires. It requires special connectors and techniques to handle safely.
- A Dangerously Crowded Box: Sometimes, you’ll find a junction box so packed with wires it looks like a rat's nest. Overcrowding isn't just messy; it can lead to pinched wires and overheating, which is a significant fire risk.
- Repeated Tripping After Installation: So you finished the job, but the new GFCI trips constantly. If you've already double-checked your wiring and run through the troubleshooting steps, it's signaling a persistent ground fault somewhere else on the circuit. Finding that ghost is a job for a pro with the right diagnostic tools.
For homeowners in Weber, Davis, and Salt Lake counties, our local codes and building standards are strict for a reason—they keep families safe. A professional installation guarantees your home meets those standards without question.
Ultimately, peace of mind is what matters most. If you feel even slightly unsure at any point, want to guarantee the work is 100% up to code, or just prefer knowing an expert handled the job, that’s the right call to make. Electrical work is one area where it’s always better to be safe than sorry.
Frequently Asked Questions About GFCI Installation
Even with a solid guide, a few questions always come up when you’re learning how to install GFCI outlets. Honestly, it’s a good sign—asking the right questions shows you’re paying attention to the details that matter most for safety. Let’s tackle a few of the most common ones we hear from homeowners around here.
Why Does My New GFCI Keep Tripping?
This is the number one question we get, hands down. A GFCI that keeps tripping isn’t necessarily broken; more often than not, it’s doing exactly what it's supposed to do: detecting a ground fault where electricity is leaking.
That leak could be coming from a faulty appliance plugged in downstream, or it could be a sign of an issue within the wiring itself. We also see it happen from reversed LINE and LOAD connections or even a bit of moisture that’s found its way inside the electrical box.
A smart first step is to unplug absolutely everything from the GFCI and any other outlets it protects. If the GFCI stays on, a bad appliance is the likely culprit. If it still trips with nothing plugged in, it’s time to have a professional safely diagnose the circuit.
How Many Outlets Can One GFCI Protect?
There’s no magic number here. The real limit is the total electrical load on the circuit, which is set by your circuit breaker—usually 15 or 20 amps. When you connect standard outlets to the GFCI's "LOAD" terminals, you extend its ground-fault protection to every outlet downstream.
On a typical residential circuit, a single GFCI can easily protect several other outlets in the same room, like a kitchen counter or a bathroom.
Expert Tip: If you want to protect an entire room or circuit, installing a GFCI breaker at the panel is a great whole-home solution. But for targeted protection in a specific area, using the LOAD terminals on a GFCI outlet is a perfect, cost-effective approach.
GFCI Outlets vs. GFCI Breakers
Both of these devices provide the exact same critical ground-fault protection, they just do it from different places.
- A GFCI outlet is installed right in the wall. It protects that specific receptacle and any other standard outlets wired to its "LOAD" side.
- A GFCI circuit breaker is installed in your main electrical panel. It protects the entire circuit it’s connected to—every single outlet, switch, and light fixture on that line.
You can learn more about how different types of GFCI power outlets work in commercial and residential settings in our detailed guide.
If you've tackled this project and still have questions, or you’d just prefer the peace of mind that comes with a professional installation, Black Rhino Electric is here to help. Our licensed electricians serve homeowners across Weber, Davis, and Salt Lake counties. You can call us at 385-396-7048 or request a free quote online for a safe, code-compliant installation you can trust.