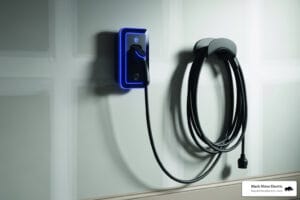
Installing a hot tub can transform your backyard into a personal oasis, but that excitement can fade if the electrical setup isn’t right. Proper hot tub wiring is a critical safety measure that protects you, your family, and your investment from serious electrical hazards. This guide will walk you through the essential steps for a safe, compliant installation.
Contents
Pre-Wiring Essentials: Planning for a Safe Installation
Here’s a quick overview of the seven key steps:
- Turn Off Power: Shut off the main power at the service panel.
- Mount Spa Panel: Install the GFCI disconnect switch at least 5 feet from the tub.
- Run Conduit: Dig trenches and run PVC conduit from the breaker panel to the spa panel, then to the tub.
- Pull Wires: Pull four copper wires (two hot, one neutral, one ground) through the conduit.
- Wire Spa Panel: Connect service wires to the spa panel, then the load wires going to the tub.
- Connect to Hot Tub: Wire the tub’s control box per the manufacturer’s diagram.
- Test and Inspect: Restore power, test the GFCI, and schedule a professional inspection.

Before touching a wire, let’s lay down a solid foundation of understanding and preparation.
Understanding Your Hot Tub’s Electrical Needs
Hot tubs are power-hungry, and their electrical demands vary.
120V Plug-and-Play vs. 240V Hard-Wired
- 120V Plug-and-Play: These smaller tubs use a standard 120V outlet, often on a 15-20 amp dedicated circuit. They’re easy to install but have limited heating and jet power. A dedicated circuit is still crucial to prevent tripping.
- 240V Hard-Wired: Most traditional hot tubs require a dedicated 240V/50-amp GFCI breaker. This setup allows heaters, jets, and lights to run simultaneously without compromising performance. With a more powerful heater (4–5.5kw), they heat faster and maintain temperature better. Some large swim spas can even demand 60-100 amp circuits.
Dedicated Circuit and Amperage
Every hot tub needs a dedicated circuit, meaning its breaker isn’t shared with other devices. Most 240V tubs need a 50-amp service, which determines the wire and breaker size. Your home’s electrical panel must handle this extra load. Most modern homes have 100-200A service, but an electrician should always assess the existing system to ensure it can accommodate the new circuit without overloading.
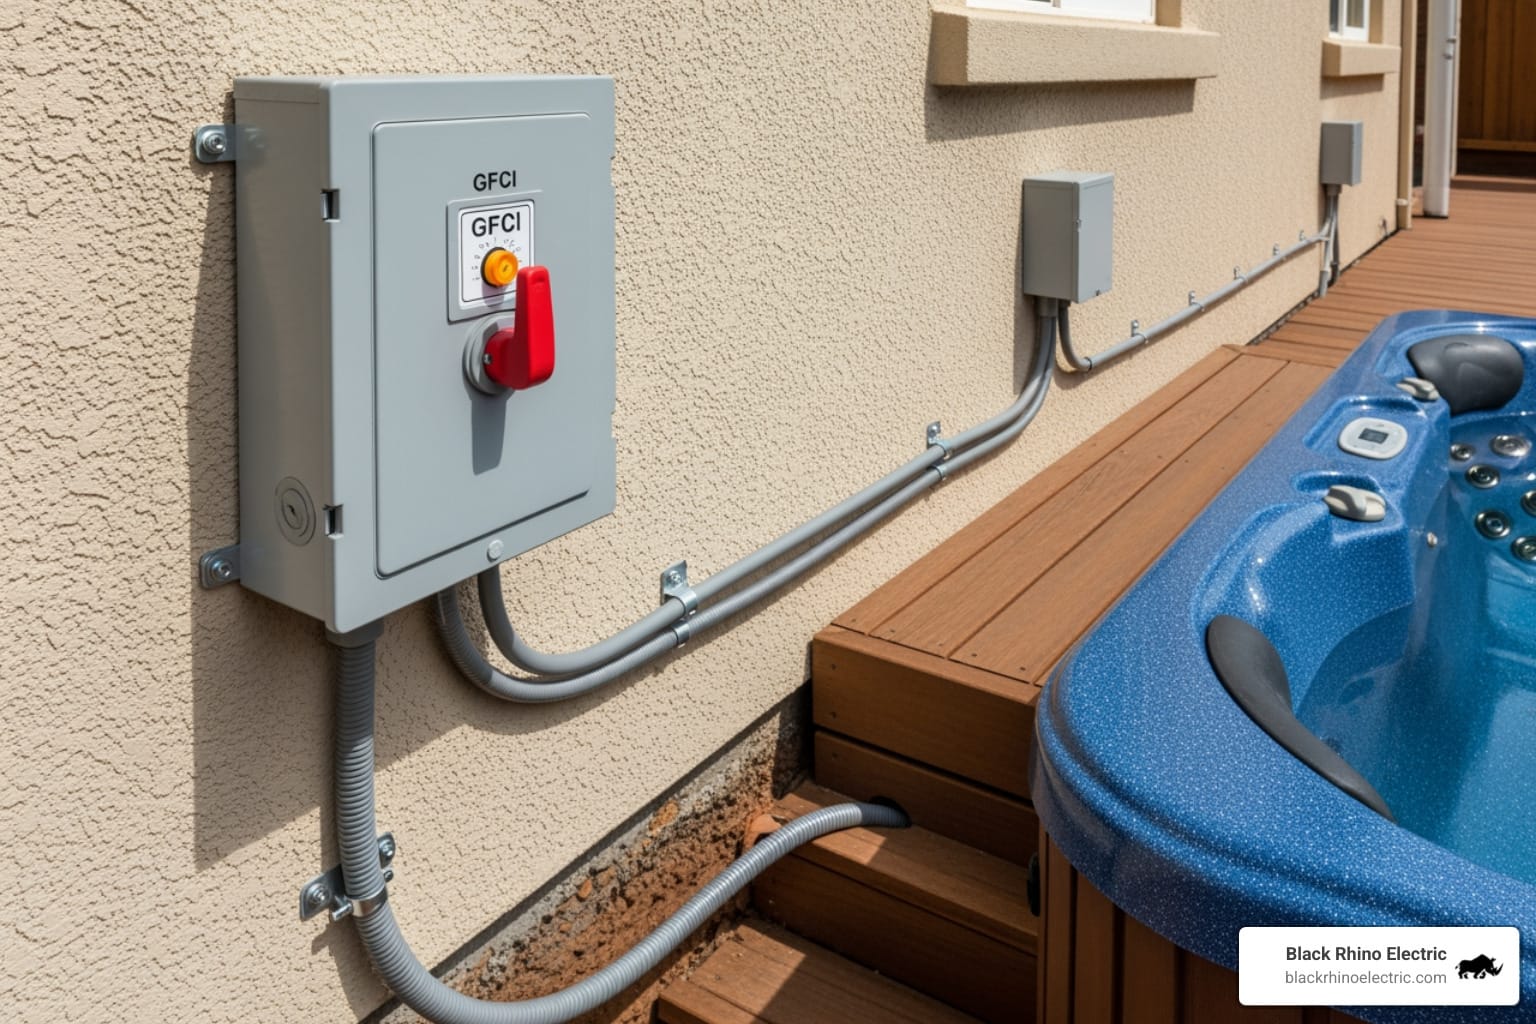
Why GFCI Protection is Mandatory
Here’s the thing: electricity and water are a dangerous mix. That’s why Ground-Fault Circuit Interrupter (GFCI) protection is mandatory. A GFCI is a life-saving device that shuts off power the instant it detects a ground fault, protecting you from electric shock. Without it, an electrical fault in a wet environment can be fatal. The National Electrical Code (NEC) requires hot tubs to be hard-wired into a GFCI-protected circuit.
Essential Tools and Materials for Hot Tub Wiring
Having the right gear makes the job smoother and safer.

Tools We’ll Need:
- Safety Gear: Gloves, safety glasses.
- General Tools: Tape measure, level, shovel.
- Electrical Tools: Multimeter, wire strippers, pliers, screwdrivers, conduit cutter, and fish tape.
Materials We’ll Need:
- GFCI Breaker: A 2-pole, 240V GFCI breaker (typically 50-amp).
- Spa Disconnect Panel: A manual disconnect with a GFCI breaker.
- Wire: No. 6 gauge THHN stranded copper wire (two hot, one neutral, one ground). Aluminum wire is not permitted for the final connection.
- Conduit: Schedule 80 PVC for underground runs and flexible liquid-tight conduit for the final connection (“whip”).
- Fittings & Supplies: Conduit fittings, PVC cement/primer, wire lubricant, electrical tape, and sealant.
Key Safety Codes and Permit Requirements
This is the most crucial part of planning. Electrical codes are legally binding rules designed to prevent injury and property damage.
National Electrical Code (NEC) and Local Permits
In Utah, all hot tub wiring must comply with the NFPA 70: National Electrical Code, plus any local rules. This is why getting permits and scheduling inspections is non-negotiable. An electrical inspection is the best insurance you can buy.
Disconnect Switch Placement
The NEC requires the spa panel to be:
- Within sight of the hot tub.
- No closer than 5 feet and no further than 15 feet away.
- Lockable in the “off” position for maintenance safety.
Overhead Power Lines and Conduit Burial Depth
- Overhead Power Lines: Keep hot tubs at least 10 feet away from overhead power lines. No power or communication cables are permitted above the tub.
- Conduit Burial Depth: Underground PVC conduit must be buried at least 18 inches deep. If using rigid metal conduit, the depth is six inches. Always check with your local building department in Ogden or Weber County for specific requirements.
The 7-Step Installation Process for Hot Tub Wiring
With our planning complete, it’s time to get to work. We’ll break down the hot tub wiring process into seven manageable steps, focusing on precision and safety.

Steps 1-3: Installing the Disconnect and Conduit
These first steps create the infrastructure to safely power your hot tub.
Step 1: Turn Off Power
This is the golden rule: ALWAYS turn off the power at the main breaker before starting. Flip the main breaker to “off,” then use a voltage tester to confirm the circuit is dead. Your safety depends on it.
Step 2: Mount the Spa Panel
The spa panel (disconnect box) is a critical safety feature. Mount it securely to an exterior wall, ensuring it’s level and sealed against weather. Per NEC guidelines, it must be:
- No closer than 5 feet and no further than 15 feet from the tub.
- Within line of sight of the hot tub.
- Readily accessible and lockable in the “off” position.
Step 3: Run the Conduit
This creates a protective path for the wires.
- Trenching: Dig a trench 18 inches deep for PVC conduit from your house to the spa panel, and then to the tub’s location. Always call 811 before you dig to locate underground utilities.
- Conduit Assembly: Use durable Schedule 80 PVC. Cut sections to fit, and use PVC primer and cement for watertight connections. Use sweep fittings (large radius elbows) to make wire pulling easier.
- Final Connection: Use a short length of flexible liquid-tight conduit (a “whip”) for the final connection from the spa panel to the hot tub’s control box.
Steps 4-5: Pulling Wires and Connecting the Spa Panel
Now for the electrical connections. Precision is key.
Step 4: Pull the Wires
For a 240V hot tub, you’ll pull four insulated copper wires (two hot – black/red, one neutral – white, one ground – green) using a fish tape.
- Wire Gauge: For a 50-amp circuit, No. 6 AWG THHN copper wire is standard.
- Technique: Feed the fish tape through the conduit. Securely attach the wires to the end, apply wire-pulling lubricant, and have one person pull while another feeds the wires. Leave extra wire at each end for connections.
Step 5: Wire the Spa Panel
This is where the GFCI protection is housed.
- Service Wires (from main panel): Connect the two hot wires to the GFCI breaker, the neutral wire to the neutral bar, and the ground wire to the ground bar.
- Load Wires (to hot tub): Connect the two hot wires to the load terminals of the GFCI breaker. The neutral wire connects to the GFCI breaker’s neutral terminal (a common mistake is connecting it to the wrong bar, which causes tripping). The ground wire connects to the ground bar.
- Connections: Ensure all screw connections are tight to prevent overheating. In a subpanel like this, the neutral and ground bars must be separate (not bonded).
Steps 6-7: Final Connections, Testing, and Inspection
We’re almost there! These final steps ensure everything is safe and ready.
Step 6: Connect to the Hot Tub
- Control Box: Connect the flexible conduit whip to the hot tub’s control box.
- Wiring: Open the control box and follow the manufacturer’s specific wiring diagram for your model. Connect the hot, neutral, and ground wires to the corresponding terminals, ensuring all connections are tight.
Step 7: Test and Inspect
Honestly, this final step is the most important for your peace of mind.
- Power Up: Go back to the main panel and turn the main breaker on, then turn on the GFCI breaker in the spa panel.
- Voltage Test: Use a multimeter to verify correct voltages at the hot tub’s terminals (e.g., 240V between hots, 120V from each hot to neutral).
- GFCI Test: Push the “TEST” button on the GFCI breaker. It should trip immediately. Reset it to confirm it’s working.
- Final Inspection: Schedule your final electrical inspection with your local building department. Do not use the hot tub until it has passed inspection. Improper wiring can cause nuisance tripping, damage your hot tub, void your warranty, or create serious fire and shock hazards.
While this guide covers the technical steps, the expertise of a professional ensures every connection is perfect and every code is met. For a project this critical, trusting a certified electrician like the team at Black Rhino Electric is the smartest decision you can make. Our licensed electricians in Ogden and Weber County guarantee a safe, compliant, and worry-free installation. Ready to enjoy your new hot tub without any electrical worries? Give our expert team a call at 801-810-4292 to discuss your project. You can also Request a Free Quote online today for swift and superior service.