Upgrading your home's lighting is a fantastic way to enhance its comfort and style, and learning how to install dimmer switch is one of the most impactful DIY projects you can tackle. It gives you precise control over the ambiance of any room, perfect for everything from a bright workspace to a cozy movie night. This simple change not only adds a touch of sophistication but also helps you save on energy costs.
Contents
Choosing the Right Dimmer for Your Lights
Before you even think about touching a wire, let’s talk about picking the right dimmer. Honestly, this is the single most critical step, and it's where a lot of DIY projects go sideways right from the start. You absolutely have to match the dimmer to your light bulbs and your home's wiring. Get this wrong, and you're in for a headache of flickering lights and buzzing sounds—or worse, a safety hazard.

There’s a reason you see so many dimmer options at the hardware store. Homeowners love them for the ambiance and energy savings they offer. It’s a simple upgrade that makes a huge difference in how a room feels.
Match the Dimmer to Your Bulbs
The first piece of the puzzle is the type of light bulb you’re using. An old-school dimmer designed for incandescent bulbs just won't play nicely with modern LEDs.
- LEDs and CFLs: These bulbs need a specific CL-rated dimmer. Using the wrong kind is the number one cause of that annoying flickering, humming, or buzzing that drives everyone crazy.
- Incandescent/Halogen: These are the old workhorses. They’re more forgiving and will work with most standard dimmers, but it's still good practice to double-check the packaging.
Pro Tip: Always, and I mean always, choose bulbs that are explicitly labeled "dimmable." Not all LEDs are created equal. Even with the right CL-rated dimmer, a non-dimmable bulb simply won't work properly.
To make it even easier, here's a quick reference chart to help you pair the right dimmer with your bulbs and switch type.
Dimmer Switch Compatibility Chart
| Dimmer Type | Compatible Bulb Types | Best For |
|---|---|---|
| CL (CFL/LED) Dimmer | LED, CFL, Halogen, Incandescent | The modern universal choice for preventing flicker and buzz with energy-efficient bulbs. |
| Standard/Incandescent | Incandescent, Halogen | Older-style dimmers for simple, traditional bulb setups. Not for use with LEDs. |
| Single-Pole | All compatible bulb types | Controlling a light fixture from one single switch location. |
| 3-Way | All compatible bulb types | Controlling a single light fixture from two separate switch locations, like a hallway. |
This table should help clear up any confusion at the hardware store. Just remember: CL for LEDs, and match the switch type.
Understand Your Switch Type
Next, you need to know what kind of switch you're replacing. Is it the only one that controls the light? Or are there two switches for the same fixture, like at the top and bottom of a staircase?
- Single-Pole: This is the most common switch in any home. It controls one light fixture from a single location.
- 3-Way: This setup controls one light fixture from two different locations. If you're swapping one of these out, you must buy a specific 3-way dimmer switch.
Calculate the Load Capacity
Finally, you have to do a little math. Every dimmer has a maximum load rating, which is the total wattage it can safely handle. Don't skip this part.
To figure this out, just add up the wattage of all the bulbs that one switch controls. For example, if you have a dining room chandelier with six 10-watt LED bulbs, your total load is 60 watts. You'll need a dimmer rated for at least 60 watts.
Overloading a dimmer is a serious fire hazard. It's not a suggestion; it's a hard-and-fast rule.
Taking a few minutes to check these three things—bulb type, switch type, and wattage—ensures you buy a dimmer that's perfectly compatible and safe. If you run into a more complex setup or have questions about your home’s lighting, our team is here to help with professional lighting installation services.
Essential Tools and Safety Preparations
Before we even think about touching a wire, let’s talk prep. When it comes to any electrical project, safety isn't just a priority; it's the only priority. Getting your gear together and following a strict safety shutdown from the very beginning is what separates a successful DIY job from a dangerous mistake.
Proper prep means you won't have to stop mid-job to hunt for a tool. More importantly, it keeps you safe.

Gathering Your Essential Toolkit
You don’t need a professional-grade toolbox, but having the right tools makes the work smoother and a whole lot safer. Before you do anything else, make sure you have these items ready.
- Non-Contact Voltage Tester: This is the most critical tool on the list. It's a non-negotiable safety device that confirms a circuit is dead without you having to touch a single wire.
- Screwdrivers: You'll need both a Phillips head and a flathead to get the old switch plate off and disconnect the switch itself.
- Wire Strippers: These cleanly remove the plastic insulation from the wire ends, which is essential for a secure connection.
- Wire Connectors (Wire Nuts): You’ll use these to connect the wires from your new dimmer to the existing house wiring.
The Unbreakable Rule: Shut Off the Power
Let me explain the single most important step you will take: always, without exception, turn off the power at the circuit breaker. Never, ever attempt to work on a switch or any electrical component with the power on.
Once you’ve flipped the breaker, you have to verify the power is completely off. Go back to the switch and flip it a few times to make sure the light doesn't turn on. Then, grab your non-contact voltage tester and hold its tip near the wires and screws of the old switch. The tester should not light up or make a sound.
This double-check method—flipping the switch and then using a voltage tester—provides absolute confirmation that the circuit is de-energized and safe. Skipping this is a risk you should never take.
Understanding how to safely manage your home's electrical panel is fundamental. If you're ever unsure which breaker controls which circuit, our guide on electrical breakers and panels can clear things up.
Quick Inspection of Your Existing Wiring
With the power confirmed off, take a quick peek inside the electrical box. Knowing what you’re working with prevents surprises later.
- Check for a Ground Wire: This is usually a bare copper or green-coated wire. It’s a key safety feature, and modern dimmers require it for a proper installation.
- Identify the Box Material: Is the box metal or plastic? Metal boxes need to be grounded themselves, which might affect how you connect your new switch.
Taking these few preparatory steps seriously is the hallmark of a smart DIYer. You know what? It’s this attention to detail that truly makes a difference between a project that goes smoothly and one that doesn't.
Installing a Single-Pole Dimmer Switch
Alright, with the power off and your tools handy, it’s time to get down to business. Installing a single-pole dimmer is one of the more straightforward electrical projects you can tackle. The real trick is to be methodical—take it one step at a time, focus on solid connections, and handle the wires with care.
This is the part where all that prep work pays off. We'll go from yanking out the old switch to wiring up the new dimmer, making sure every move is clear and, more importantly, safe.
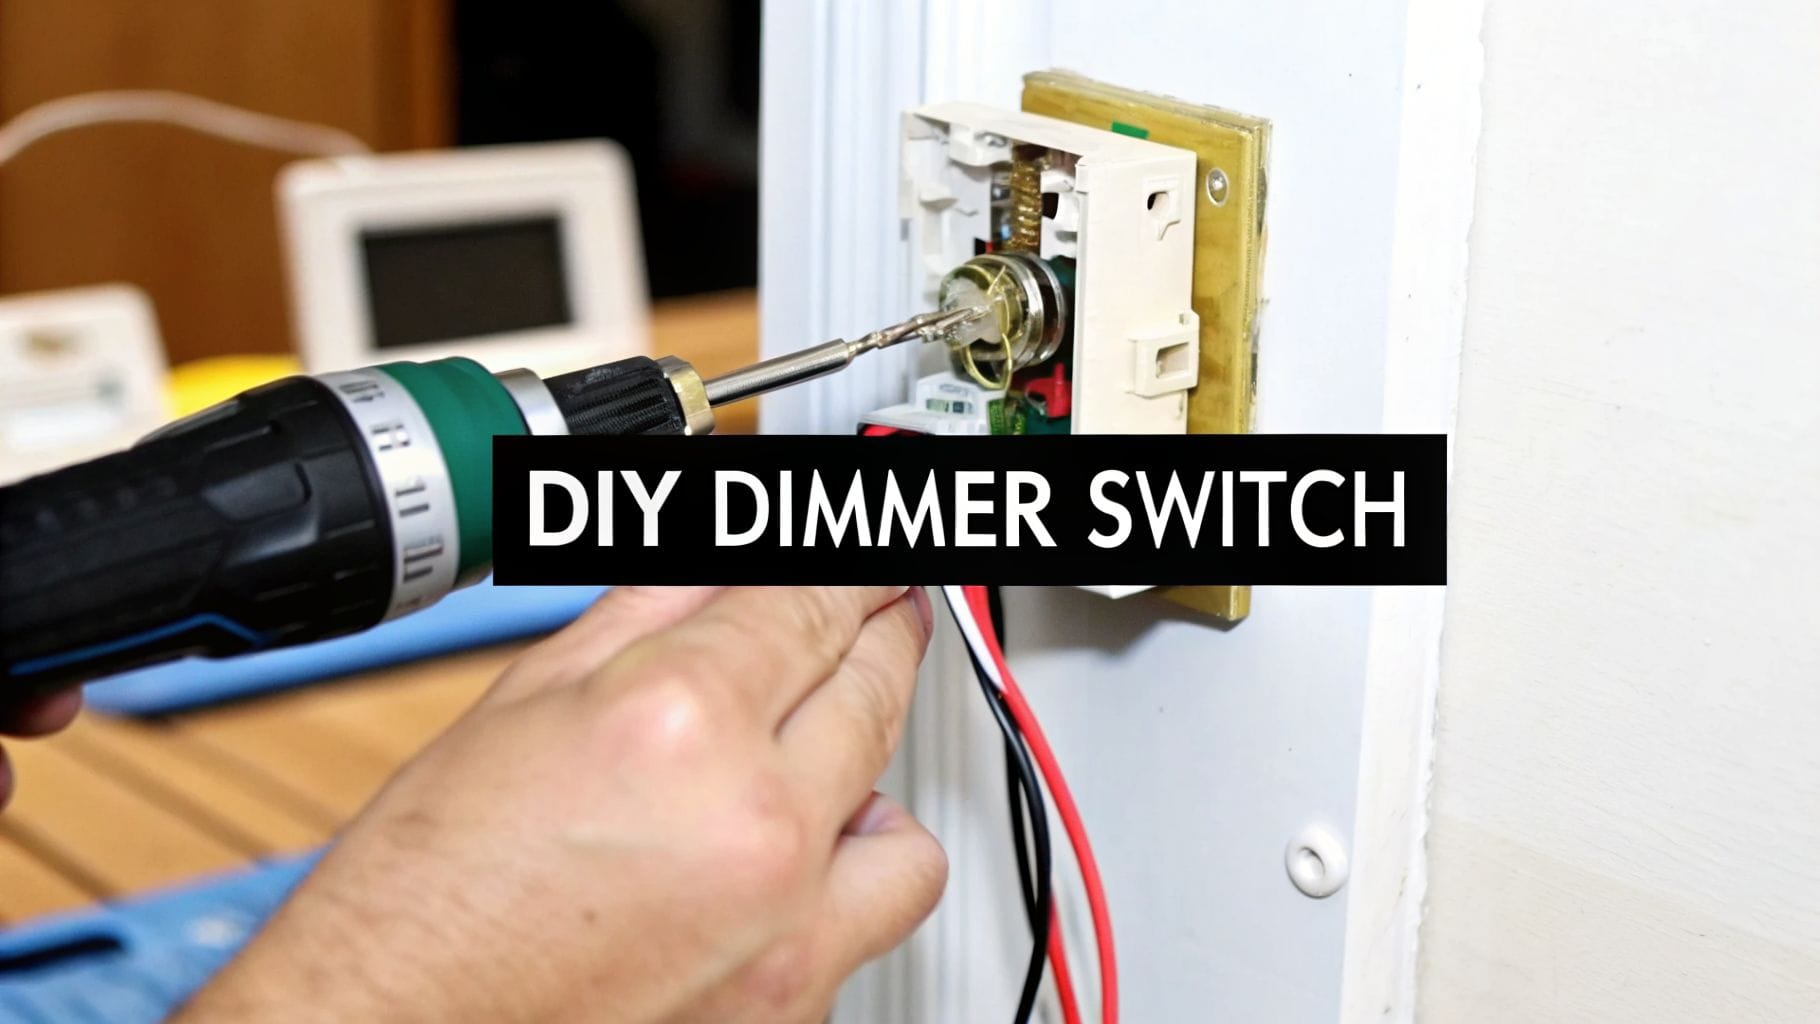
Removing the Old Switch
First, grab your screwdriver and pop off the two little screws holding the switch plate to the wall. Set that plate and its screws somewhere you won't lose them. Now you’ll see the switch itself, held in the electrical box by two longer screws, one at the top and one at the bottom. Loosen these up.
You don’t need to remove them completely, just back them out until you can gently pull the entire switch assembly straight out of the wall.
Go easy here. Don't just yank it out. The wires behind it are usually stiff copper and they've been sitting in that exact position for years. Pull it out just far enough to give yourself some room to work.
Identifying the Wires
Okay, take a look at what you’ve got. In a standard single-pole switch setup, you should find three types of wires connected to the old switch.
- Hot Wire: This is the live wire bringing power in from your circuit breaker. It’s almost always wrapped in black insulation.
- Load Wire: This one carries the power from the switch on up to your light fixture. It’s also typically black.
- Ground Wire: This is purely for safety. It's usually a bare copper wire, but sometimes it has green insulation.
Don’t sweat it if both the hot and load wires are black. On a simple switch like this, it doesn't matter which is which; their positions are interchangeable. Your main job here is to correctly identify that ground wire.
Disconnecting and Connecting the New Dimmer
With the wires identified, you can disconnect them from the old switch. Most switches have little screws on the sides called screw terminals. Just loosen each screw until you can unhook the wire. Simple as that.
Now, grab your new dimmer. You'll notice most modern dimmers come with short wires already attached—we call these pigtails. You’ll connect these pigtails to your house wiring using the wire connectors (often called wire nuts) that came with the dimmer or in your toolkit.
- Start with the ground. It’s the most important safety connection. Twist the green wire from your dimmer together with the bare copper (or green) wire from the box. Cap them off with a wire nut, twisting it clockwise until it’s good and tight.
- Next, connect one of the dimmer's black wires to one of the black wires in the box. Again, secure it with a wire nut.
- Finally, connect the remaining black wire from the dimmer to the other black wire in the wall. Cap it off.
Give each connection a gentle tug. The wires shouldn't pull out. A solid connection is absolutely critical for both safety and performance. A loose wire can cause annoying flickering or, in a worst-case scenario, create a serious fire hazard.
A Quick Note on Wire Connections
Before you twist on the wire nut, make sure the copper ends of the wires are straight and held tightly together. A good, secure connection will feel snug, not wobbly. If a wire pulls out easily, take the nut off and start that connection over.
Finishing the Installation
Here’s a step people often rush: getting all those wires tucked back into the box neatly. Don't just cram them in there.
Carefully fold the wires in an accordion or "S" shape as you gently push the new dimmer switch back into the electrical box. This simple move prevents you from pinching or stripping the wire's insulation, which could cause a short circuit down the line.
Once the dimmer is sitting flush against the wall, secure it to the box with the two long screws. Don't crank down on them too hard—you can actually crack the dimmer's plastic housing. Just get them snug.
Lastly, attach the new switch plate, head back to your breaker panel to flip the power on, and go test your work. You should have beautiful, smooth dimming control. Nice work.
How to Tackle a 3-Way Dimmer Switch
Alright, let's talk about the 3-way dimmer. Moving from a simple, single switch to one that controls a light from two spots—like at the top and bottom of the stairs—can feel like a major league jump. You've got more wires, and the logic is a bit different. But here’s the truth from our experience: once you get the concept, it’s entirely doable.
Here’s the thing: a 3-way circuit uses a common wire and two traveler wires to hand off power between the two switches. Think of the common wire as the main track where power either comes into the switch or leaves to go to the light. The two travelers are the alternate routes that run between the switches. One switch flips the power from one traveler to the other, giving the second switch a new path to complete the circuit. The absolute key to learning how to install a dimmer switch in this setup is identifying that all-important common wire before you disconnect a single thing.
This quick visual breaks down what you’re really doing, whether it’s a simple switch or this 3-way setup.

It always comes down to the same three moves: get the old one out, wire the new one in, and button it all up.
Finding the Common Wire
With the power off at the breaker and double-checked with your voltage tester, gently pull one of the two switches out of the wall box. You should see three wires screwed into the switch body, plus a bare copper or green ground wire.
Your target is the wire connected to the oddball screw. Two of the terminal screws will be the same color (usually brass), but the third will be different—typically black or dark bronze. That's the common terminal.
The wire attached to that dark-colored screw is your common wire.
Before you do anything else, grab a small piece of electrical tape and wrap it around this common wire. Seriously. This is the single most important tip for a 3-way installation. It will save you from a world of headache and guesswork in about five minutes.
Once you’ve tagged that common wire, you can disconnect it and the other two wires from the old switch. Those other two (not counting the ground) are your travelers. Don’t worry about which is which; they’re interchangeable.
Wiring the 3-Way Dimmer
Now, take a look at your new 3-way dimmer. It’s built for this exact job and will have clearly marked spots for each wire.
- Connect the Ground: First things first, safety. Connect the bare copper or green ground wire from the box to the green screw or wire on your new dimmer.
- Connect the Common: Find that wire you so smartly labeled with tape. Connect it to the screw terminal marked "common" on the dimmer (it’s often a black screw).
- Connect the Travelers: Take the last two wires—your travelers—and connect them to the remaining two terminals on the dimmer.
Now, carefully fold the wires back into the electrical box. Don't just cram them in; a neat fold prevents kinks and stress on the connections. Mount the dimmer to the box and install the faceplate.
One last critical point: in almost every 3-way setup, you only replace one of the two switches with a dimmer. The other location keeps its standard 3-way switch. The two work together to dim and switch the light. Flip the power back on and test it out from both switch locations.
Knowing When to Call a Professional
There's a fantastic sense of accomplishment in a successful DIY project. But wisdom, especially with electrical work, is knowing your limits. Learning how to install a dimmer switch is a great skill, but some situations absolutely demand a pro's touch to keep things safe and avoid a much bigger headache.
Sometimes, what looks like a simple swap on the surface reveals a complicated and potentially hazardous mess hiding behind the wall plate. Recognizing these red flags is the most important skill you can have.
Warning Signs Inside the Wall
Once you pull the old switch out of the box, take a hard look at what you see. These are immediate "stop the job" signs.
- Old or Brittle Wiring: If the plastic insulation on the wires is cracked, frayed, or feels stiff and crumbly when you touch it, that’s a fire hazard waiting to happen. Don't mess with it.
- Aluminum Wiring: Seen in homes built from the mid-1960s to the early-1970s, this wiring has a dull gray color. It requires special connectors and handling techniques to prevent connections from loosening and overheating.
- An Overcrowded Electrical Box: Is the box jammed with a tangled web of wires? Forcing a new, often bulkier dimmer into that tight space can damage insulation, pinch wires, and create a dangerous short circuit.
These issues go far beyond a simple switch installation. They require a licensed electrician to come in, assess the situation, and make it right.
The motivation for many homeowners to install dimmers is rooted in saving energy. Governments worldwide are encouraging the use of lighting controls through stricter building codes to reduce energy consumption in both homes and businesses. You can discover more insights about these energy efficiency standards and how they influence modern lighting.
When the Final Test Fails
You've followed the steps, you've buttoned everything up, and you flip the breaker back on… but something's wrong. Sound familiar? Don't try to play detective on a live circuit if you encounter any of these problems:
- The breaker trips immediately.
- You see or hear a spark when you restore power.
- The new dimmer is completely dead and doesn't work at all.
Your first move? Shut the power off at the circuit breaker immediately and leave it off.
For homeowners in Weber, Davis, and Salt Lake counties, this is the moment to step back. If your project feels over your head or you run into any of these issues, the job is best left to a pro.
Got a Few Questions? Most People Do.
Even when a DIY project goes off without a hitch, a few questions can pop up afterward. Now that you’ve handled how to install a dimmer switch, let’s tackle some of the common things we hear from homeowners. Getting these sorted out will help you enjoy your new setup without any second-guessing.
Ever install a dimmer, flip it on, and get that annoying, low-grade buzz? You're definitely not the first. Let's dig into why that happens and a few other common head-scratchers.
Why Is My LED Dimmer Switch Buzzing?
A humming or buzzing sound from a new dimmer almost always points to an incompatibility issue. It's frustrating, I know. In our experience, it’s usually one of two simple things:
- You're using the wrong type of dimmer: Standard, old-school dimmers just weren't built for the tech inside modern LED bulbs. You need a dimmer specifically marked as "CL" on the packaging or the device itself. That little "CL" means it's designed to work correctly with CFL and LED lights.
- The bulbs themselves aren't dimmable: This one trips up a lot of people. Not every LED bulb can be dimmed. You have to check the box or the base of the bulb to make sure it explicitly says "dimmable." A mismatch here is the number one cause of that buzzing noise.
Can I Install Two Dimmers on One 3-Way Circuit?
For a standard 3-way circuit, that’s a firm no. A typical setup for a hallway or a large room with two switches is designed for one dimmer switch and one regular 3-way switch. They're meant to work as a team.
If you try to wire in two standard dimmers, they’ll just fight each other, leading to flickering, poor performance, or them just not working at all. There are special "multi-location" dimmers out there, but they have a more complex wiring scheme and are honestly a job best left for a pro.
The rule of thumb for most DIY 3-way projects is simple: one dimmer, one standard switch. This ensures reliable operation from both locations.
My Dimmer Gets Warm to the Touch. Is This Normal?
Yes, it’s completely normal for a dimmer switch to feel slightly warm when it's on. The electronics inside have to dissipate a little bit of energy as heat—that's just part of how they function.
But there’s a big difference between warm and hot. If the switch is uncomfortably hot to the touch, or if you notice the faceplate is getting really warm, that's a red flag. It could be a sign that the dimmer is overloaded. If that happens, turn off the power at the breaker immediately. Then, double-check that the total wattage of all the bulbs on that circuit doesn't add up to more than the dimmer's maximum load rating.
When in doubt, always put electrical safety first. If you run into an issue that feels like more than a simple fix, don't take a chance. For safe, professional electrical service in Northern Utah, call the trusted team at Black Rhino Electric at 385-396-7048 or request a free quote online. We'll get it sorted out right.