Are you trying to figure out the real cost to rewire a house? You're in the right place, because understanding this crucial home investment is the first step toward ensuring your family's safety and boosting your property's value. Honestly, while the average cost can range from $7,500 to $15,000, the final number depends on your home's unique needs.
Contents
- 1 Your Quick Guide to House Rewiring Costs
- 2 Why Rewiring Is a Critical Home Investment
- 3 Breaking Down the Key Rewiring Cost Factors
- 4 Understanding What Drives Your Final Price Up or Down
- 5 Navigating the House Rewiring Process From Start to Finish
- 6 How to Hire the Right Electrician for the Job
- 6.1 Start with the Essentials: Licenses and Insurance
- 6.2 Get Multiple, Detailed Quotes
- 6.3 Questions to Ask Every Potential Electrician
- 6.4 How Do I Know if My Entire House Needs Rewiring?
- 6.5 Does a Rewire Always Include Replacing the Electrical Panel?
- 6.6 Can I Live in My House During the Rewiring Process?
- 6.7 Is It Worth Rewiring a House Before Selling?
Your Quick Guide to House Rewiring Costs
Nobody likes a surprise bill, right? Getting a clear, upfront idea of the potential cost is the first step toward a smooth project. Here’s the thing: the final price isn't just one big number; it's a mix of labor, materials, and permits, and all those pieces can vary.
Let me explain. For most homeowners, the single biggest factor driving the budget is the square footage. More space simply means more wire, more outlets, and more hours for the electricians. To make this easier to visualize, we've broken down some common cost estimates.
Estimated Rewiring Costs by House Size
Here's a straightforward look at what you can generally expect to budget for a complete rewire, broken down by common home sizes.
| House Size (Square Feet) | Average Low-End Cost | Average High-End Cost |
|---|---|---|
| 1,500 sq ft | $6,000 | $9,000 |
| 2,000 sq ft | $8,000 | $12,000 |
| 2,500 sq ft | $10,000 | $15,000 |
| 3,000+ sq ft | $12,000 | $18,000+ |
As you can see, the bigger the house, the more involved the job becomes, which is reflected in the cost.
This chart helps visualize how those numbers scale up with your home's footprint.
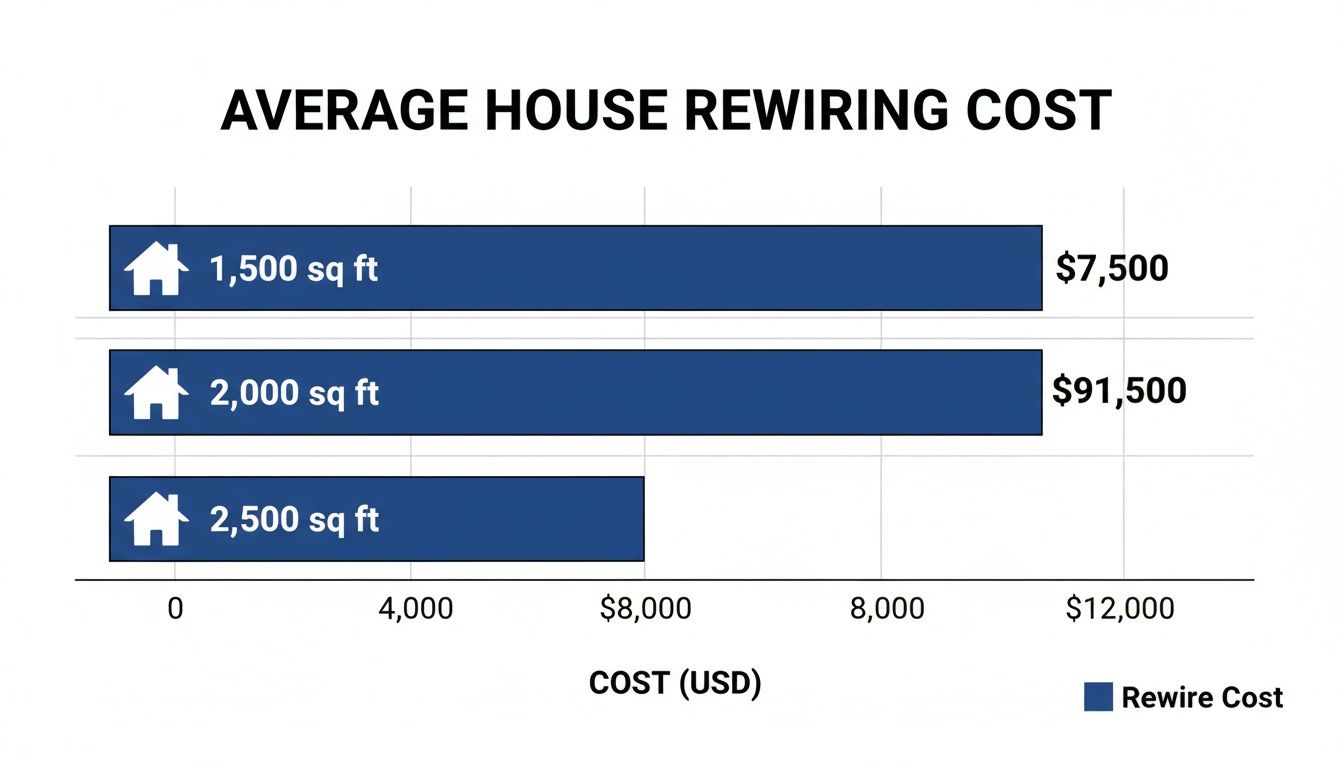
As the chart clearly shows, the cost scales directly with the size of your property, giving you a predictable baseline to start from.
According to detailed cost calculators, the national average often lands somewhere between $9,481 and $11,301 for a typical home, factoring in basic expenses. For a 2,000 sq ft house, costs can easily climb higher if your project also requires an electrical panel upgrade, which can add another $1,500 to $3,000 to the total.
These figures are a helpful reality check, but here’s the bottom line: the only way to get a precise number for your home is to request a quote from a licensed electrician.
Why Rewiring Is a Critical Home Investment
Thinking about the cost to rewire a house is one thing, but understanding why it’s such a crucial investment is where the real peace of mind comes from. It’s easy to ignore what you can’t see, but isn't the wiring behind your drywall your home’s central nervous system? It powers everything you rely on, day in and day out.
Honestly, ignoring the warning signs of an aging electrical system is a gamble you don't want to take.
Your home often sends signals—sometimes subtle, sometimes not—that it’s time for an upgrade. Do your lights dim when the AC kicks on? Does the breaker trip every time you run the microwave and the coffee maker together? These aren't just little quirks; they're symptoms of an electrical system struggling to keep up with modern life.
Unmistakable Signs Your Home Needs Rewiring
Let me explain. An overloaded or outdated system is more than an inconvenience; it’s a serious safety hazard. If you notice any of these issues, it’s time to call a professional electrician for an assessment.
- Persistent Burning Smells: A faint, sharp smell of burning plastic or ozone near an outlet or your breaker panel is a huge red flag. It means wires are overheating.
- Discolored or Warm Outlets: Switch plates and outlets should never feel warm to the touch or show any scorch marks. This is a clear sign of a dangerous wiring problem.
- Frequent Breaker Trips: Breakers are designed to trip to prevent overloads, but if it happens all the time, your circuits simply can't handle your electricity usage.
- Buzzing or Crackling Sounds: Any weird sounds coming from outlets, switches, or the electrical panel point to loose connections or faulty wiring.
- Outdated Two-Prong Outlets: If your home is full of ungrounded, two-prong outlets, it lacks a critical safety feature that protects against electrical shock and damage to your electronics.
These are your home’s warning lights. Ignoring them is like driving with the check engine light on—the problem will only get worse and potentially a lot more dangerous.
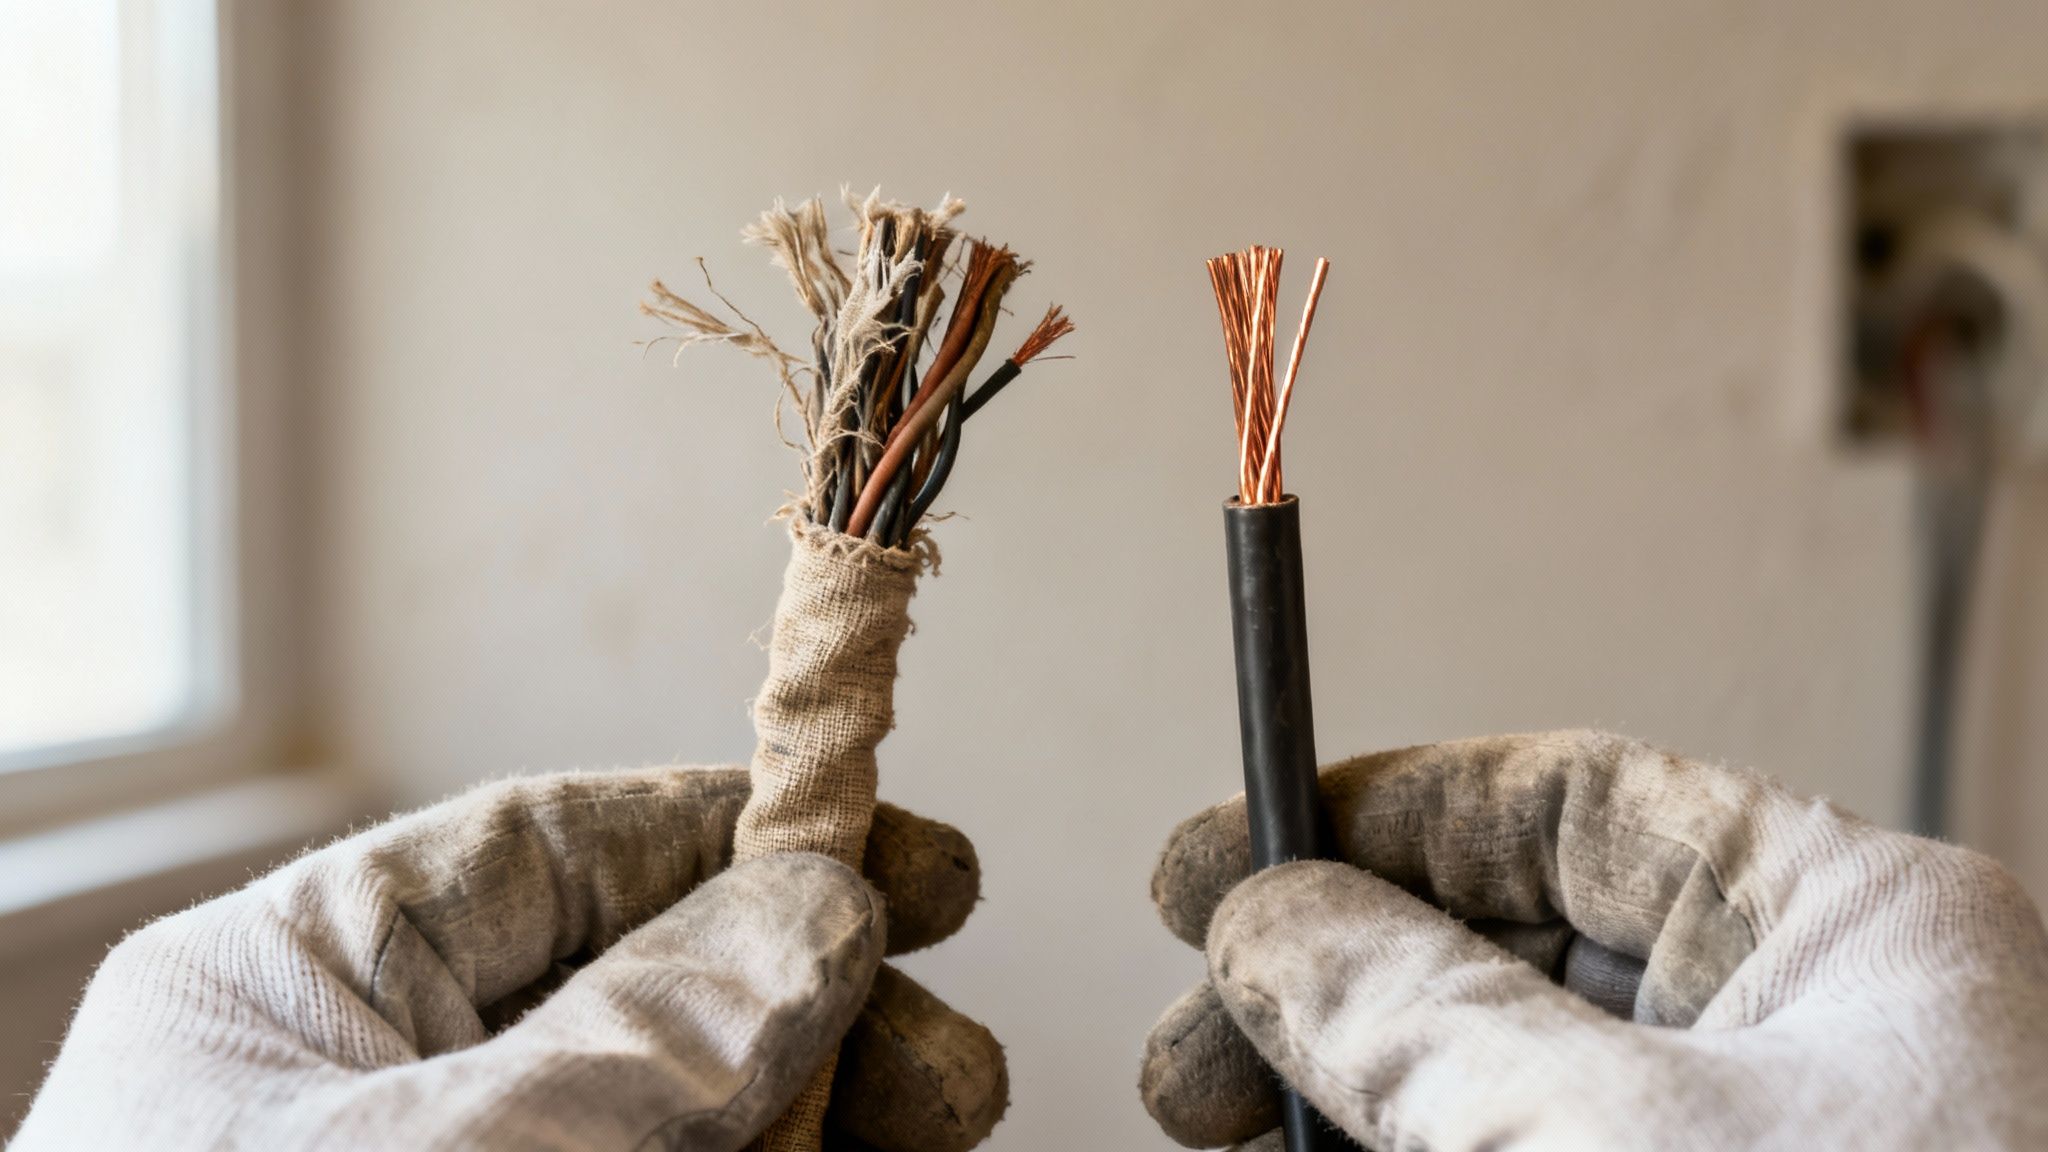
The Hidden Dangers of Old Wiring
You know what? The age of your home is a massive factor. Many older homes here in Northern Utah, especially those built before the 1970s, have wiring that just wasn't designed for our modern, power-hungry lives.
For instance, knob-and-tube wiring, common in homes built before the 1940s, lacks a ground wire, and its insulation becomes brittle and hazardous over the decades. Then there’s aluminum wiring, used from the mid-1960s to the early 1970s, which is notorious for expanding and contracting, leading to loose connections that create a serious fire hazard.
According to the Electrical Safety Foundation International, electrical failures are a leading cause of home fires, resulting in approximately 51,000 fires each year, nearly 500 deaths, and $1.3 billion in property damage. Outdated wiring is a primary contributor to these preventable tragedies.
More Than Just Safety: An Investment in Your Home
Rewiring your house isn’t just about dodging risks; it's about future-proofing your property. A modern electrical system brings real, tangible benefits that boost your home’s value and your quality of life. Think about it: a new system can handle today's powerful appliances, support smart home technology, and even accommodate an EV charger without breaking a sweat.
This kind of upgrade significantly increases your home’s resale value. An updated electrical system is a major selling point for buyers and knocks out a huge red flag during a home inspection. At the end of the day, viewing rewiring as a vital investment—rather than just another expense—is the key to protecting your family and securing your home’s long-term health.
Breaking Down the Key Rewiring Cost Factors
So, where does all that money actually go? Staring at a single, intimidating number for the cost to rewire a house isn't helpful. It's much better to see it as a sum of several distinct parts. Honestly, understanding what you’re paying for is the best way to feel in control of your budget.
Think of it this way: every quote you get is like a detailed recipe with specific ingredients. Let me walk you through the four main cost drivers, one by one, so you can see exactly how your final bill gets put together.
The Biggest Slice of the Pie: Labor Costs
Without a doubt, labor is almost always the single largest expense in a rewiring project. You're not just paying for a pair of hands; you're investing in years of training, specialized knowledge, and the expertise needed to navigate your home's unique quirks safely and efficiently. An experienced electrician knows how to fish wires through walls with minimal damage and ensure every connection is rock-solid.
Labor rates for licensed electricians in Northern Utah typically range from $50 to $120 per hour. That rate can shift based on a few key things:
- Your Location: Electricians in Salt Lake City might have higher hourly rates than those in more rural parts of the state. It's just a market reality.
- Experience and Specialization: A master electrician with decades of experience on historic homes will command a higher rate than a general journeyman, and for good reason.
- Project Complexity: If your home has tricky plaster walls instead of drywall, hard-to-reach attics, or requires meticulous work around existing structures, expect the labor hours to climb.
Raw Materials: The Wires, Panels, and Parts
The next major piece of the puzzle is the cost of the materials themselves. This is all the physical hardware that will become your new, reliable electrical system. Keep in mind that the price of some items, especially copper, can swing a bit based on market demand.
Here’s what’s usually included in that materials budget:
- Wiring: The bulk of this cost is copper wiring (usually Romex or a similar NM cable). A typical 2,000 sq. ft. home can eat up thousands of feet of the stuff.
- Electrical Panel: If your current panel is outdated or can't handle modern loads, a new 200-amp panel is a common and necessary upgrade.
- Outlets and Switches: This includes all the new standard outlets, GFCI outlets for kitchens and bathrooms, and fresh light switches.
- Junction Boxes and Fixtures: Every connection point and light fixture requires specific hardware to be installed safely and meet code.
A good rule of thumb is that materials will make up about 30-50% of your total project cost. While it might be tempting to find cheaper materials, quality is non-negotiable when it comes to electrical safety.
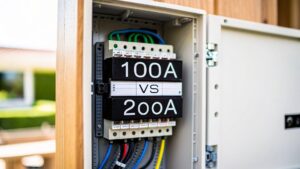
Electrical Panel Upgrades: The Brain of the Operation
Let’s be honest: is your current electrical panel up to the task? An old panel is like trying to run a new supercomputer with a flip phone's battery—it just can't keep up. Many older homes in Utah still have panels with only 60 or 100 amps, which is simply not enough for modern life.
Upgrading to a 200-amp service is often a must-do during a full rewire. This ensures your system can safely handle high-draw appliances like air conditioners, electric stoves, and EV chargers all at once without constantly tripping breakers. This upgrade alone can add $1,500 to $3,000 to your project, but it's a critical investment in your home's future functionality and safety.
Permits and Inspections: The Official Green Light
Finally, don't forget the administrative side of things. Proper electrical work isn't an unregulated, DIY-friendly task. To ensure everything is done safely and to the latest National Electrical Code (NEC) standards, your project will require official permits from your local city or county.
These permits and the inspections that follow are your assurance that the work was done right. In general, rewiring costs can land between $2-$4 per sq ft, meaning a 2,000 sq ft home might range from $4,000-$8,000. The final number is heavily influenced by the factors we've just discussed: materials typically make up 40% of the cost, labor accounts for 50%, and permits take up the last 10%, costing anywhere from $250-$900 depending on your municipality. You can read more about these cost breakdowns and see how they apply to various projects.
To put it all together, here’s a table that clearly shows how each component contributes to your overall budget.
Itemized Cost Component Breakdown
This table gives you a rough idea of where your money goes during a typical house rewire. The percentages can shift based on the project's complexity, but it’s a solid starting point for understanding your quote.
| Cost Component | Percentage of Total Cost (Approx.) | What It Covers |
|---|---|---|
| Labor | 50% – 70% | The electrician's time, expertise, and physical installation work. |
| Materials | 30% – 50% | All physical components like copper wire, outlets, switches, and junction boxes. |
| Electrical Panel | Varies (often separate) | The cost of a new panel and the labor to install it, if an upgrade is needed. |
| Permits & Inspections | 5% – 10% | Fees paid to your local city or county for project approval and final inspection. |
Seeing the costs broken down this way helps demystify the process. Instead of one big price tag, you can see the value in each part—from the skilled hands doing the work to the high-quality materials keeping your home safe.
Understanding What Drives Your Final Price Up or Down
Ever wonder why your neighbor’s rewiring quote was thousands different from yours, even though your houses look similar from the street? It's a common question, and the answer is simple: no two rewiring jobs are ever the same. The final cost to rewire a house isn't some fixed number on a price list; it’s a dynamic figure that shifts based on your home's unique character, age, and construction.
You know what? Many homeowners are surprised by how much these variables can swing the final bill. Let me break down what makes a project straightforward versus what can send the budget climbing.
Factors That Can Increase Your Costs
Honestly, some factors are just part of the deal, especially in older homes that come with their own set of quirks. An electrician has to account for these hurdles when building your quote because they translate directly into more labor, more materials, and more complex problem-solving.
Here are the main things that can push your project toward the higher end of the cost spectrum:
- Your Home's Age: This is the big one. If your house was built before the 1970s, it might have outdated systems like knob-and-tube or aluminum wiring. These aren't just unsafe by today's standards; they're also much more labor-intensive to remove and replace.
- Wall Material and Accessibility: Getting into your walls is the name of the game. Modern drywall is relatively easy to cut and patch. But older homes with thick plaster and lath walls? That requires more time, specialized tools, and a lot more cleanup, which can significantly increase labor costs.
- Unforeseen Structural Issues: Sometimes, we don't know what's hiding until we open up the walls. We might find rot, pest damage, or non-standard framing that turns running a simple wire into a complicated puzzle.
- Significant Electrical Panel Upgrades: If your current panel is a relic, a simple rewire won't cut it. Upgrading to a modern 200-amp service is often necessary to meet code and handle today's electrical demands. This is a substantial added cost, and you can learn more about modernizing your home's electrical panel here.
The whole-house rewiring market is now valued at a staggering $2.5 billion, largely because of our aging housing stock. Costs for older homes (built before 1970) often range from $4-$10 per square foot, compared to just $3-$5 for new construction. Why the big difference? Accessibility challenges, like carefully opening up old plaster walls, can easily add $2,000 or more to the project total.
Smart Ways to Keep Costs in Check
Here’s the thing: while some factors are out of your control, you can absolutely make strategic moves to manage your budget. It's all about planning ahead and working smart.
By thinking proactively about the project's scope and timing, you can avoid unnecessary expenses without ever compromising on the safety or quality of the work.
Being strategic can save you a surprising amount of money and stress. Here are a few proven ways to keep the final invoice as friendly as possible:
- Bundle with Other Renovations: Already planning a kitchen remodel or finishing the basement? Rewiring at the same time is a brilliant move. With the walls already open, your electrician gets easy access, which drastically cuts down their labor time and saves you the separate expense of drywall repair.
- Opt for a Partial Rewire (When Safe): Does your entire house truly need it? Sometimes, the problem is isolated to specific areas with outdated wiring, like the kitchen or an old addition. A licensed electrician can perform a thorough inspection to see if a targeted, partial rewire is a safe and code-compliant option for your home.
- Clear the Way for Your Electrician: This one is simple but so effective. Before the crew arrives, move furniture, boxes, and clutter away from the walls, attic, and crawl spaces. Every minute they spend moving your stuff is a minute you're paying for in labor.
- Keep Your Layout Simple: It’s tempting to add dozens of new outlets and complex lighting schemes, but every new addition adds to the cost. If you can stick to a layout that’s close to the original, you'll minimize the amount of new wiring runs and keep labor hours down.
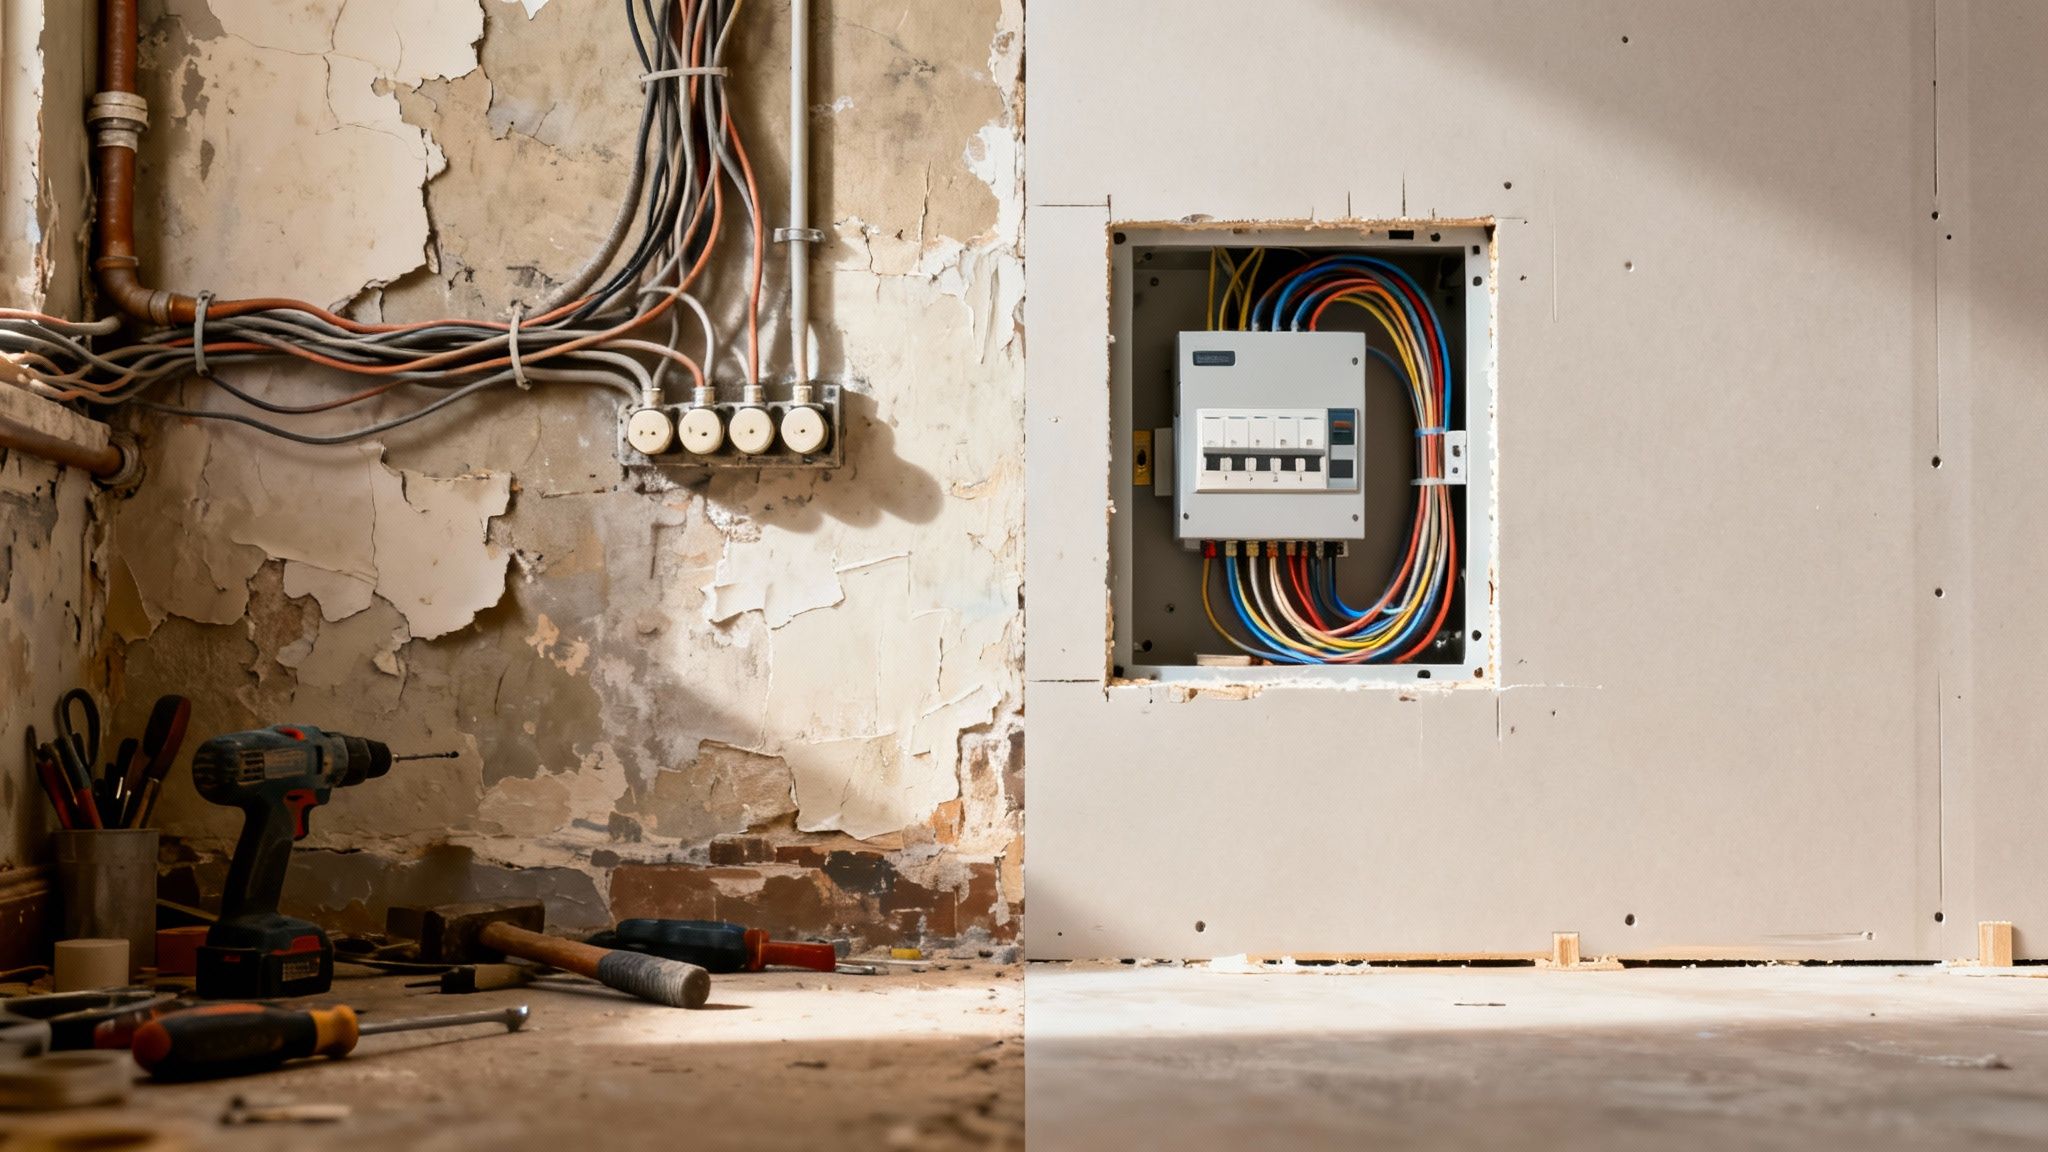
Thinking about having your walls opened up can be daunting, but understanding what to expect makes a world of difference. The cost to rewire a house is significant, and knowing the step-by-step process transforms a chaotic idea into a manageable project. Let me explain how a typical whole-house rewire unfolds.
This isn’t a chaotic free-for-all; professional electricians follow a clear, methodical plan to minimize disruption and maximize safety. From the first phone call to the final flick of a switch, each stage is designed to bring your home’s electrical system into the modern era efficiently.

Step 1: Initial Consultation and Detailed Quote
The journey begins with a thorough inspection. A licensed electrician will visit your home to assess your current system, identify outdated wiring like knob-and-tube, check your electrical panel's capacity, and talk through your needs.
Based on this assessment, they'll provide a detailed, itemized quote. This document should clearly outline the scope of work, material costs, labor estimates, permit fees, and any potential extras like drywall repair. This is your roadmap for the entire project.
Step 2: The Preparation Phase
Once you’ve hired an electrician, it’s time to prep. You know what? This part is a team effort. The contractor will protect your floors and large furniture with drop cloths and plastic sheeting.
Your role is to clear the way. You’ll need to move smaller furniture, clear out closets, and remove valuables from the work areas. The easier it is for the crew to access walls and ceilings, the more efficiently the job will go.
Step 3: Old Wire Removal and New Wire Installation
Here’s the thing: this is the most intensive part of the process. The crew will start by strategically cutting small access holes in your walls and ceilings to pull out the old, hazardous wiring.
Next, they’ll run new, high-quality copper wiring to every outlet, switch, and fixture location. This stage requires precision and expertise as they fish wires through tight spaces to minimize wall damage. It’s a bit messy and noisy, but it’s where the core safety upgrade happens.
A complete rewire for a standard 2,000 sq. ft. home is a significant undertaking, typically taking anywhere from five to ten business days to complete. This timeline allows for careful installation, thorough inspections, and proper finishing work.
Step 4: Panel Work and System Connection
With the new wires in place, the focus shifts to the heart of your system: the electrical panel. If an upgrade is part of your project, the old panel will be removed and a new, higher-capacity one will be installed.
The electrician then connects each new circuit to the appropriate breaker in the new panel. This is a critical step that ensures power is distributed safely and correctly throughout your home, preventing overloads and future problems.
Step 5: Final Inspection and Finishing Touches
Before the walls are closed up, a city or county inspector will visit to ensure all the new wiring meets local and national electrical codes. This is a non-negotiable safety step that protects you and your investment.
After the inspection passes, any holes in the drywall are patched and prepared for painting. Once the finishing touches are complete, your power is fully restored, and you can enjoy a safer, more reliable electrical system for decades to come.
How to Hire the Right Electrician for the Job
Honestly, the entire success of your rewiring project really hinges on one thing: hiring a qualified, trustworthy electrician. The final cost to rewire a house is a serious investment, and this is absolutely not the place to just grab the lowest bidder off the internet. Let me explain why picking the right professional is the most critical decision you'll make.
This isn't just about finding someone to pull wires. You're partnering with an expert who will make sure your home is safe, up-to-code, and ready for whatever you plug in next. You’re putting your family's well-being in their hands, so a little bit of homework upfront goes a very long way.
Start with the Essentials: Licenses and Insurance
Before you even get to pricing, your first move is to verify their credentials. Any legitimate electrician will be ready and willing to show you proof of their license and insurance. This is completely non-negotiable.
- State Licensing: In Utah, electricians must be licensed. This is your proof that they’ve met the state's standards for training, knowledge, and experience.
- Liability Insurance: This protects your home and property. What happens if a ladder goes through a window or a tool gets dropped through the ceiling? Their insurance should cover it, not yours.
- Workers' Compensation: This one is just as important. It protects you from being held liable if one of their crew members gets injured while working in your home.
Don't just take their word for it. You can and should look up their license with the Utah Division of Occupational and Professional Licensing (DOPL). It only takes a minute.
Get Multiple, Detailed Quotes
Never, ever accept the first quote you receive. You know what? It’s crucial to get at least three detailed, itemized bids from different licensed contractors. This lets you compare not just the bottom-line number, but the entire scope of the work they're proposing.
A vague, one-page quote is a major red flag. A professional bid should break everything down for you, including:
- Labor costs (their hourly rate and estimated hours)
- Material costs (wire, panel, outlets, switches, etc.)
- Permit fees
- Any extra costs they anticipate, like drywall repair
When you have this level of detail, you can make sure you’re comparing apples to apples and see exactly where your money is going.
A reputable electrician will never pressure you into signing on the spot. They understand this is a major project and will give you the time and information you need to feel confident.
Questions to Ask Every Potential Electrician
Once you have a few quotes in hand, it’s time to interview your top candidates. This is your chance to get a feel for their experience, professionalism, and how they communicate. A great electrician for a project this complex is more than just a technician; they often become a key part of your home remodeling team. For more on how an electrician fits into bigger renovations, you can learn about the role of a specialized remodeling electrician on our services page.
Here’s a simple checklist of questions to run through:
- How long have you been in business here in Northern Utah? Local experience is invaluable.
- Have you done rewiring projects on homes like mine? Ask about age, size, and construction type. Experience with older homes is a huge plus.
- Who will actually be doing the work? Will it be the master electrician you're talking to, or a team of journeymen and apprentices?
- How do you handle the permits and inspections? A pro contractor should manage all of this for you.
- What kind of warranty do you offer on your work and the materials?
- Can you give me a few local references I can call? Honestly, talking to past clients is one of the best ways to vet any contractor.
By following these steps, you build a foundation of trust and make sure you partner with a true professional who will get the job done safely, correctly, and to the highest standard.
Got more questions? You’re not alone. When it comes to a project as big as rewiring your house, it’s smart to get all the facts before you pull the trigger. Our goal is to clear up the common worries we hear from homeowners every day.
Honestly, we get asked these questions all the time. They cut right to the chase: safety, practicality, and the bottom line. Let's tackle them one by one.
How Do I Know if My Entire House Needs Rewiring?
The most obvious signs are the ones that make you nervous. Think frequently tripping breakers, lights that dim or flicker when the AC kicks on, or a faint, persistent burning smell coming from an outlet. You know what else is a major red flag? Any outlet or switch plate that feels warm to the touch or looks discolored.
If your home was built before the 1970s and still has its original knob-and-tube or old aluminum wiring, a full rewire is almost always the right call. It’s really the only way to make sure your home is safe and can actually handle the demands of modern life—from your coffee maker to a potential EV charger.
Does a Rewire Always Include Replacing the Electrical Panel?
Not always, but it’s extremely common and, frankly, often necessary. A full rewire is designed to increase your home’s electrical capacity, but older panels just weren’t built to handle that kind of load. Think of it like putting a powerful new engine in a classic car but keeping the original, tiny gas tank—it just won't work together.
Your electrician will take a hard look at your panel during the initial consultation. If it needs to be upgraded to meet current safety codes and support all that new copper, they’ll build it right into the quote.
Can I Live in My House During the Rewiring Process?
Yes, it’s usually possible to stay put, but you should definitely expect some disruption. Professional electricians work methodically, often tackling one section of the house at a time to keep power on elsewhere and minimize the inconvenience.
That said, there will be dust, noise, and contractors in your space for several days or even a couple of weeks. Some homeowners, especially those who work from home or have small kids, find it easier to stay with family or book a short-term rental.
Is It Worth Rewiring a House Before Selling?
It can be an incredibly smart investment. An up-to-date electrical system is a huge selling point that can boost your home's value and attract more serious, confident buyers.
A new electrical system eliminates a major red flag for home inspectors, which can lead to a much smoother and faster sale. Buyers see it as a sign of a well-maintained home, giving them confidence and peace of mind.
Ready to get a clear, no-obligation quote for your home rewiring project? The expert team at Black Rhino Electric is here to help. We provide safe, reliable, and code-compliant electrical solutions for homeowners across Northern Utah.
Contact us today to schedule your free estimate!